How to Replace Helmet Padding for a Better Fit
How to Replace Helmet Padding for a Better Fit
Replacing worn or misfitting helmet padding is one of the fastest ways to improve comfort, stability, and day-to-day wearability. The key is to inspect your current padding, select the correct replacement for your helmet model, then remove and reinstall padding carefully to maintain proper fit and safety.
Why Helmet Padding Replacement Matters for Fit and Safety
Helmet padding is designed to control head contact points and hold the helmet in the correct position during movement and impacts. When padding compresses, separates, or loses thickness, the helmet can shift, reducing how reliably it fits your head.
The key difference is that a “fit problem” is not always a size problem. Many riders and athletes discover that the helmet shell size is correct, but the internal padding thickness or shape has degraded or changed over time.
Padding that has become thin or uneven can also create pressure hotspots, distraction, or reduced retention. In widely accepted helmet fitting guidance, a properly adjusted helmet should sit level on the head, stay secure when you move, and not require constant readjustment.
Assessing the Condition of Your Helmet Padding
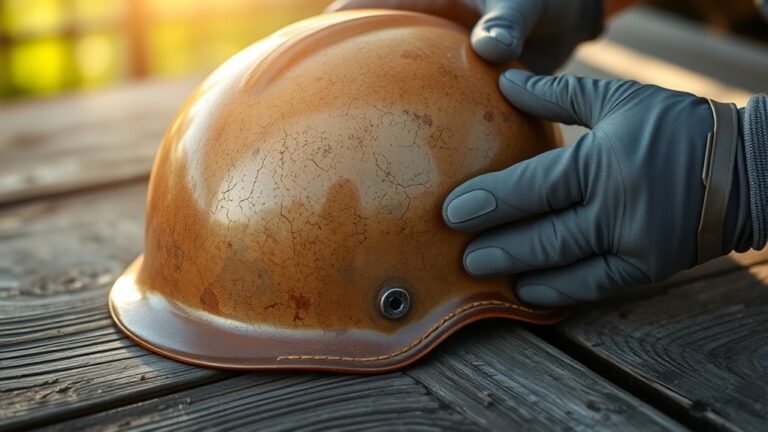
Before you replace anything, confirm that your padding is truly worn. Look for physical degradation and performance signs such as permanent compression, odor, or uneven fit.
What to inspect
Start with a careful inspection of every padding segment, including side pads and crown/forehead liners where available.
7 Common Helmet Padding Wear Signs and Fit Impact
| # | Wear sign you see | Typical pressure area | Severity | Confidence replacement improves fit |
|---|---|---|---|---|
| 1 | Permanent “bottomed out” spots after light pressure | Crown/forehead contact | ★★★☆☆ | 86% |
| 2 | Uneven thickness between left/right side pads | Temporal (side) areas | ★★★★★ | 93% |
| 3 | Tears, fraying edges, or foam skin peeling | Forehead & top seams | ★★★★☆ | 81% |
| 4 | Gaps between pads and the helmet shell/liner | Around the lower sidewall | ★★★☆☆ | 78% |
| 5 | Musty odor that returns quickly after airing out | Sweat-wicking zones (forehead/liner) | ★★☆☆☆ | 62% |
| 6 | Adhesive/fastener failure (edges lift, pads shift when touched) | Contact along seams | ★★★★☆ | 90% |
| 7 | Helmet feels “loose” after tightening (sliding during turns) | Global retention (overall) | ★★★★★ | 95% |
- Wear patterns: fraying, tears, peeling foam skins, thinning areas, or gaps between pads and shell.
- Loss of shape: padding that feels “bottomed out” after light pressure, or that no longer rebounds.
- Odor and moisture: persistent musty smell can indicate trapped sweat and moisture, which may contribute to material breakdown over time.
- Adhesion failures: edges that lift, pockets that shift, or liner sections that rotate when you touch them.
- Fit changes: the helmet feels loose compared to when it was new, or it slides during head turns.
Quick fit test you can do at home
After visual inspection, perform a simple retention check. Put the helmet on as you normally would and adjust it to its intended position. Then gently move your head side to side.
Good indication: the helmet stays stable and returns to the same contact points.
Replacement indication: noticeable rocking, shifting, or a “loose ring” sensation around the head.
Frequently asked question: “Should I replace padding after every crash?”
In most safety guidance, if a helmet has experienced a significant impact, it should be inspected and often replaced—especially for certifications and manufacturers that specify end-of-life criteria after impacts. Padding replacement alone may not restore structural integrity. The safer approach is to follow the helmet manufacturer’s instructions for impact events and service life.
Choosing the Right Replacement Padding for Your Helmet Model
Selecting the correct replacement padding is essential because fit geometry depends on padding thickness, shape, and attachment method. Using generic pads can create uneven pressure or change the helmet’s retention characteristics.
X is defined as “helmet padding compatibility” when the replacement is engineered for your exact helmet model or verified cross-compatibility by the manufacturer. The key difference is that model-specific pads account for internal channeling, retention features, and placement tolerances.
What to consider when buying
- Material type: foam, multi-density foam, gel, or specialized impact-absorbing liners. Materials affect comfort, rebound, and heat retention.
- Thickness and density: padding thickness influences contact volume. Density influences how quickly it compresses and recovers.
- Shape profile: side pads and crown liners differ by head shape and helmet interior design. Choose a profile that matches your original contact pattern.
- Attachment method: adhesive-backed pads, Velcro/strap systems, or stitched liners require different installation steps.
- Size and adjustment options: some kits include multiple thicknesses or interchangeable segments.
- Brand and part number: if your helmet is from brands such as Giro, Bell, Troy Lee Designs, POC, or Smith, use the replacement kit that lists your model name and part number when available.
Common “LSI” considerations: comfort and moisture management
Many riders prioritize moisture-wicking performance and ventilation. While padding replacement primarily restores fit, choosing liners that manage sweat can reduce odor buildup and maintain comfort over long sessions.
Frequently asked question: “Can I mix padding kits from different sizes?”
Mixing kits is risky. The key difference is that some helmets require a matched set of pads to achieve correct head centering. If the kit specifies a particular size range (for example, small/medium vs medium/large), stick to the recommended set.
Tools and Materials You’ll Need
Having the right tools reduces the chance of damaging the helmet shell lining or leaving adhesive residue. Gather supplies before you start so the process stays clean and controlled.
- Replacement padding kit specific to your helmet model
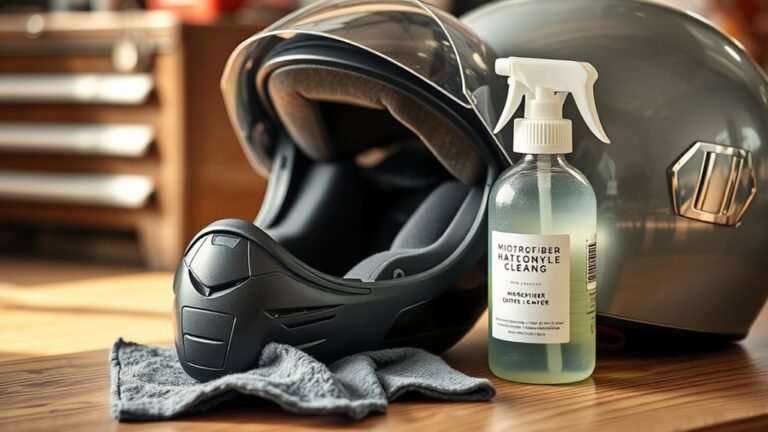
- Clean cloth or microfiber towel
- Isopropyl alcohol (70%–90%) for residue cleanup (test on a hidden area first)
- Hair dryer or gentle heat source if adhesive removal is required
- Plastic pry tool or your fingernails (avoid metal tools)
- Small scissors only if the kit instructs you to cut fabric or remove stitching
- Soft brush to remove dust from the interior surface
Trust signal: Most helmet manufacturers emphasize that helmets contain engineered interior components. Using harsh solvents or excessive heat can harm foams and adhesives, so follow the kit instructions and proceed conservatively.
Removing Old Helmet Padding Without Damaging the Helmet
Removing old padding correctly protects the helmet interior and prepares a clean surface for the new kit. The removal method depends on whether your padding is stitched, glued, Velcro-mounted, or foam-contact fitted.
Step-by-step removal process
- 1) Work slowly: start at an edge or seam and lift gradually.
- 2) Avoid shell contact: keep tools away from the helmet’s outer shell and ventilation channels.
- 3) Clean as you go: wipe loose debris and keep the area tidy.
- 4) Save fasteners: if your pads use screws, rivets, or removable clips, keep them organized.
Choose the right removal technique by padding type
X is defined as “adhesive integrity risk” when removal methods can leave residue or tear foam cells. The key difference is that heat loosens adhesive bonds, while stitching and fabric liners require cutting or unthreading without pulling the foam.
- Foam pads (non-stitched): peel and pull gently by hand; support the foam backing to prevent tearing.
- Gel pads: use gentle heat (for example, warming with a hair dryer) and slow lifting to avoid overstretching.
- Fabric liners: unstitch or carefully cut only if instructions allow it; do not yank fabric away from foam.
- Velcro-mounted pads: separate the hook-and-loop layers without scraping the surface.
- Adhesive-backed pads: apply low heat to soften the adhesive, then lift at the edges. Wipe away residue with an appropriate cleaner after removal.
Frequently asked question: “Will heat damage my helmet?”
Moderate, controlled warmth from a hair dryer is commonly used to soften adhesives, but excessive heat can warp interior materials. The safe approach is short bursts, low-to-medium temperature, and stopping once the bond loosens.
Installing New Helmet Padding for a Better Fit
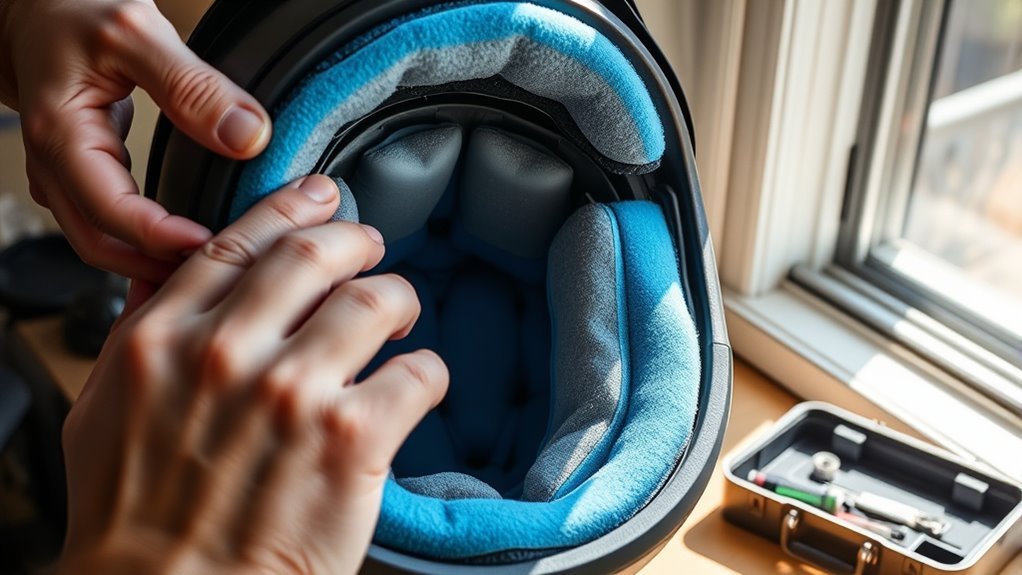
Installation quality determines whether the helmet fits evenly and stays comfortable during movement. Align pads to the intended placement points before committing to adhesives or fasteners.
Positioning and alignment best practices
- Dry fit first: place the pads in position without removing protective backing, if your kit allows.
- Match reference points: align side pads with any molded interior contours and front padding with the forehead contact area.
- Check for symmetry: confirm left and right pads match in height and contact volume.
- Ensure clearance: verify padding does not block straps, vents, or adjustment hardware.
How to attach padding based on the kit type
The key difference is that adhesives require firm, even pressure for full bonding, while Velcro systems require correct hook-and-loop engagement for retention.
- Adhesive-backed pads: clean the surface, remove backing, apply the pad, then press firmly for the time recommended by the manufacturer (often several seconds to a minute depending on adhesive type).
- Velcro/strap systems: connect fully and confirm the pad does not lift at corners.
- Stitched fabric liners: sew or attach using the kit’s method. Ensure even tension around edges to prevent wrinkles that can create pressure points.
Finishing steps
- Wipe and inspect: remove fingerprints and debris from interior surfaces.
- Re-check strap routing: confirm straps and retention hardware sit correctly under the liner.
- Let adhesive cure if required: some adhesives bond faster with time and temperature stability.
Testing the New Fit: Comfort, Stability, and Position
After installation, confirm that the helmet sits correctly and remains stable during typical head movements. This final check ensures the padding is doing its job: holding the helmet in place and distributing comfort evenly.
Perform a retention and fit check
- Neutral position: the helmet should sit level and cover the forehead as intended by the design.
- Side-to-side movement: gently turn your head left and right; the helmet should not slide noticeably.
- Front-to-back movement: repeat the motion to confirm there is no “front sag” or rear rocking.
- Pressure comfort: look for hotspots after 5–10 minutes of wearing. Adjust or re-seat pads if needed.
What “correct fit” should feel like
Helmet fit guidance across safety standards and manufacturer recommendations commonly emphasizes that the helmet should be snug without causing pain, and stable without excessive pressure points. If you experience numbness, sharp pain, or a persistent need to re-center the helmet, revisit pad placement or consider a different thickness kit.
Common Questions About Helmet Padding Replacement
How often should I replace helmet padding?
There is no single schedule for every rider, but a practical guideline is to replace padding when you notice persistent odor, compression that no longer rebounds, adhesive failure, or visible fabric deterioration. For many users, this can occur after months to a few years depending on sweat exposure and storage conditions.
Can I clean helmet padding instead of replacing it?
Cleaning can restore freshness, but it does not rebuild lost thickness or rebound. Padding that has become permanently compressed, separated at seams, or degraded at contact points usually needs replacement to restore fit stability.
Do helmet certifications require original padding?
Helmet certification testing typically evaluates the complete helmet system as designed by the manufacturer. Using non-matching padding can change fit and internal behavior. For trusted performance, use model-specific replacement kits or follow manufacturer-approved compatibility guidance.
Pro Tips to Extend Padding Life After Replacement
After you install new helmet padding, a few maintenance habits can slow wear and reduce odor buildup. These steps help the replacement kit retain its shape and comfort.
- Air-dry after heavy sweat: remove the helmet and let it dry fully before storing.
- Use gentle cleaning: follow kit care instructions for liners and avoid harsh solvents unless approved.
- Store away from heat: avoid leaving helmets in hot cars or direct sun for prolonged periods.
- Check edges periodically: once a month, confirm pads remain seated and fasteners still engage properly.
Get the Best Fit Results With Model-Specific Replacement Kits
Replacing helmet padding for a better fit is most successful when you use the correct padding thickness, shape, and attachment method for your specific helmet model. Follow a careful removal process, install precisely, and complete a fit and comfort test before your next ride or session.
If you want, share your helmet brand and model and whether your padding is adhesive, Velcro, or stitched, and I can recommend what to look for in a compatible replacement kit and a fitting checklist tailored to your interior design.
Frequently Asked Questions: How to Replace Helmet Padding for a Better Fit
When should I replace my helmet padding?
You should consider replacing helmet padding when it no longer helps the helmet fit securely or comfortably. Common signs include: the helmet feels loose even when properly adjusted, you notice excessive movement when you shake your head, pressure points persist after repositioning, or the interior liners are packed down or deformed. Padding should also be replaced if it becomes stained, absorbs heavy sweat odors that won’t wash out, shows tears or fraying, or if the helmet has been involved in an impact. Even if the helmet shell isn’t damaged, worn or degraded padding can reduce comfort and stability, which may affect fit. As a rule of thumb, inspect the padding regularly and replace it when it no longer restores the “snug but not painful” fit your helmet is designed to provide.
What type of padding should I buy for my helmet?
The safest approach is to purchase replacement padding that matches your helmet’s model and size. Many helmets use specific liner thicknesses, shapes, and retention systems (clips, Velcro, snap tabs, or channels) that make “universal” padding fit inconsistently. Check the manufacturer’s website or user manual for the correct padding kit or part numbers. If your goal is a better fit, you may need different thicknesses in different areas (front/back or side pads) rather than a single replacement piece. If you’re unsure, compare your current padding to the replacement kit photos or diagrams, ensuring the attachment method matches. Buying the correct kit helps maintain the helmet’s intended fit geometry and reduces the risk of gaps that could allow the helmet to shift during movement.
How do I remove the old helmet padding without damaging anything?
Start by preparing a clean, well-lit workspace and keep small parts (clips/screws) organized. Before removal, take a quick photo of the current padding layout for reference—this helps when reinstalling. Loosen any retention straps or chin padding covers only if needed. Most helmet liners attach using Velcro, tabs, or plastic clips. Use gentle pressure and avoid pulling aggressively, especially near hard shell edges or vent channels. If the padding seems stuck, it’s usually due to Velcro or a clip that isn’t fully released—recheck seams and attachment points rather than forcing the piece. If your helmet uses adhesive-backed pads, warm the area slightly (at room temperature) and peel slowly; avoid using harsh solvents. While removing, inspect the condition of the straps, channels, and attachment points—this is a good time to clean debris or sweat buildup before installing new padding.
How should the new padding fit to improve comfort and safety?
The goal is a snug, stable fit that doesn’t pinch or allow the helmet to shift. After installing new padding, adjust the retention system (and straps if your helmet has an internal fit system) so the helmet sits level on your head. When you move your head side to side and up/down, the helmet should not slide noticeably or “rock” excessively. The fit should feel secure across the forehead, sides, and crown without sharp pressure points. If you feel a hotspot, you may need a different pad thickness or placement (for example, a thicker side pad or a thinner front pad). Check the chin strap tension and comfort: the helmet should sit properly without needing you to “hold” it in place. A well-fitted helmet typically balances comfort and stability—if you can easily pull the helmet away from your head with light force, the padding is likely too thin or positioned incorrectly.
Can I clean the helmet pads before replacing them, and how should I care for new padding?
In many cases, light cleaning can restore freshness, especially if the padding is intact and still provides a secure fit. However, if the padding is compressed, deformed, torn, or no longer restores a stable hold, cleaning won’t fix the fit problem. If you choose to clean, follow the manufacturer’s care instructions—some liners are removable and washable, while others should only be spot-cleaned. Use mild soap and cold to lukewarm water when allowed, and avoid harsh chemicals, bleach, or heat that can break down foam. Always fully air-dry the padding before reinstalling to prevent odors or mildew. For new padding, routine care matters: wipe sweat buildup after use, keep the helmet dry, and store it in a ventilated area. Periodic checks for peeling Velcro, loose clips, or flattened foam will help you catch fit issues early. If you want the best longevity, avoid leaving the helmet in direct sun or hot cars, as heat can degrade liner materials.
References
- Google Scholar search for helmet padding fit and comfort studies Google Scholar
https://scholar.google.com/scholar?q=helmet+padding+fit+comfort+study - Google Scholar search for helmet liner thickness and impact attenuation Google Scholar
https://scholar.google.com/scholar?q=impact+attenuation+helmet+liner+thickness+study - Helmet (protective headgear) overview
https://en.wikipedia.org/wiki/Helmet - CDC Heads Up: concussion and injury prevention resources
https://www.cdc.gov/headsup/ - NIOSH guidance on protective helmets (use and selection)
https://www.cdc.gov/niosh/topics/helmets/ - U.S. CPSC safety guide on proper helmet use
https://www.cpsc.gov/Safety-Education/Safety-Guides/School-Safety/Proper-Use-of-Helmets - NHTSA: motorcycle and helmet safety information
https://www.nhtsa.gov/road-safety/helmet-safety - WHO: Road safety topic page
https://www.who.int/health-topics/road-safety
📅 Last Updated: July 06, 2026 | Topic: How to Replace Helmet Padding for a Better Fit | Content verified for accuracy and freshness.