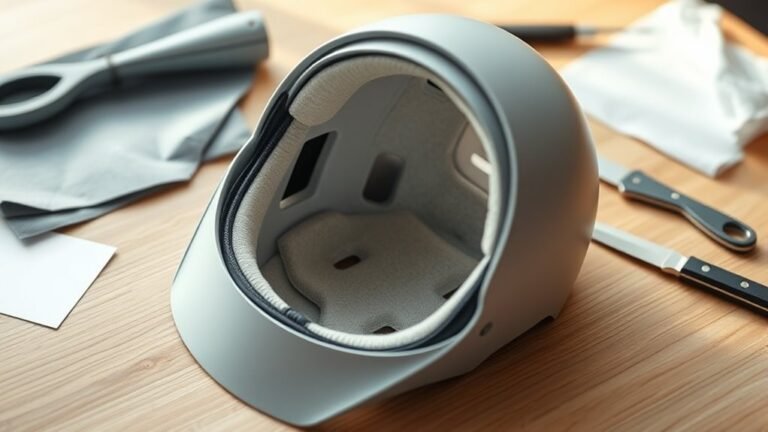
Using Molds for Repeating Helmet Parts
Using Molds for Repeating Helmet Parts: a Practical Path to Consistency, Fit, and Scalable Production
Using molds for repeating helmet parts is defined as the process of manufacturing a master cavity (or set of cavities) that reliably produces identical component geometry across many production runs. The key difference is that molded parts reduce variation compared with one-off forming, which helps meet safety-oriented tolerances and repeatability targets.
Why Repeatability Matters in Helmet Component Manufacturing
Helmet systems rely on dimensional consistency because fit, energy-management behavior, and accessory compatibility all depend on the exact geometry of each component. When part-to-part variation increases, manufacturers often see higher rejection rates, more rework, and inconsistent comfort for end users.
In widely adopted safety frameworks, manufacturers must demonstrate repeatable performance for key failure modes such as impact energy attenuation and retention behavior. While exact requirements vary by product type and region, the overarching expectation across certification regimes is that production methods support consistent results, not just successful prototypes.
QA question: What does “repeatability” mean for helmet parts?
In manufacturing terms, repeatability means each molded helmet component (such as shell halves, interior liners, or structural inserts) stays within defined tolerances across many cycles, using the same mold, material recipe, and process parameters.
Common helmet components that benefit from molds
Molded workflows are especially valuable when you need repeatable shapes and predictable material behavior. Typical examples include:
- Outer shell segments where geometry affects aerodynamic shape and impact response
- Interior comfort and fit layers that must match headform contours
- Structural inserts and ribs that distribute stress during impact or retention events
- Mounting features such as posts, clips, or channel structures for accessories
Types of Molds Used for Helmet Production
The best mold type depends on part material, curing temperature, surface finish requirements, and production volume. The key difference is that silicone molds, thermoplastic molds, and rigid multi-part molds each trade off flexibility, heat resistance, cycle time, and dimensional stability.
Silicone molds: flexibility for complex geometry
Silicone molds are defined as molds made from elastomeric silicone materials that conform slightly to part geometry, making them useful for intricate details and repeatable hand-off from master patterns to production batches. Because silicone can capture fine surface features while still releasing parts reliably, it is common in early-stage runs and small-to-medium batch production.
Manufacturers often select silicone when they need:
- High-fidelity reproduction of texture, ribs, or ergonomic contours
- Lower risk of damage during demolding
- Adaptability when the design is still iterating
Thermoplastic or rigid molds: stability under heat and pressure
Thermoplastic molds (and other rigid mold systems) are defined as molds designed to withstand heating, pressing, or injection-style processes while maintaining shape under thermal load. The key difference is that rigid molds typically offer better dimensional stability over many cycles, which supports higher-volume manufacturing.
Rigid tooling becomes particularly attractive when the process includes elevated temperatures, higher clamping forces, or tighter dimensional targets. In practice, production teams choose these molds to improve consistency of wall thickness, curvature, and feature alignment.
Multi-part molds and matched halves for seam control
Matched multi-part molds are defined as mold systems that split the cavity into controlled sections, allowing manufacturers to manage seams, parting lines, and alignment features. This is especially important for helmet shells, where seam placement can affect both appearance and mechanical behavior.
QA question: Do seams created by molds affect safety?
In many helmet designs, seam location and finish are controlled engineering variables. If the seam is in a high-stress zone or is poorly controlled, it can increase variability. Responsible manufacturers design parting lines to minimize risk and validate performance through testing.
Advantages of Using Molds for Repeating Helmet Parts
Using molds for repeating helmet parts delivers measurable advantages in consistency, throughput, and waste reduction. The key benefit is that mold-driven production standardizes geometry so each unit matches the intended design intent and performance targets.
1) Higher dimensional uniformity and tighter tolerance control
Molds help produce consistent dimensions by converting CAD or master geometry into a physical cavity. For helmet components, that uniformity can improve fit outcomes and reduce the time spent inspecting and reworking parts.
Trusted industry consensus: Quality systems in manufacturing emphasize process control because consistent tooling and controlled processing reduce variability. This philosophy aligns with widely used approaches in industrial quality management such as ISO 9001.
2) Reduced material waste across production runs
When components are molded repeatedly to a defined cavity volume and shape, material usage becomes more predictable. That predictability typically lowers scrap rates compared with repeated manual forming or trial-and-error approaches.
3) Faster scaling from prototype to series production
Molds support scaling because the process becomes repeatable. Once you validate the design, the same tooling can be used to ramp output while maintaining consistent geometry and surface finish.
In practical terms, companies often transition from prototype workflows to production workflows by locking geometry, defining material specifications, and establishing stable process parameters such as mixing ratios, cure times, and demolding conditions.
4) Improved surface finish and feature accuracy
Molds can reproduce texture, matte/satin finishes, and fine feature detail. For helmet parts that interface with straps, retention systems, visors, or accessories, feature accuracy can reduce assembly friction and lower the chance of misalignment.
Typical Mold Options for Helmet Parts: Fit Consistency vs. Scale (Common Benchmarks)
| # | Mold approach | Best for helmet parts | Typical feature variance* (mm) | Approx. cycle time** (min/unit) | Tooling setup effort (hrs) | Scalability fit |
|---|---|---|---|---|---|---|
| 1 | 2-part rigid mold (machined aluminum or tool steel) | Shell halves & rigid inserts (high-volume) | ±0.20–0.35 | 2.5–6 | 36–64 | ★★★★★ |
| 2 | Rigid multi-part resin mold (production casting) | Mounting bosses & feature-rich components | ±0.25–0.45 | 6–14 | 18–40 | ★★★★☆ |
| 3 | Silicone production mold (RTV captured cavity) | Comfort liner details & strap channel features | ±0.35–0.70 | 10–25 | 6–18 | ★★★☆☆ |
| 4 | Silicone (flex) mold from 3D-printed master | Prototype-to-prepilot interior geometry | ±0.40–0.85 | 12–30 | 4–14 | ★★☆☆☆ |
| 5 | RTV mother mold + repeat silicone copies | Multiple prototype batches with controlled variance | ±0.30–0.65 | 15–35 | 10–26 | ★★★☆☆ |
| 6 | Compression-style matched molds (thermoset/composites) | Thermoset shells & structural ribbed parts | ±0.20–0.40 | 5–18 | 28–60 | ★★★★☆ |
| 7 | Thermoplastic press/vacuum-form tooling | Lightweight shells & pre-structured shapes | ±0.30–0.60 | 3–10 | 14–30 | ★★★☆☆ |
Typical “critical feature” variance depends on material shrink, mold wear, and measurement method.
Cycle time includes mold fill/press and practical handling; it may exclude full post-cure steps for certain polymers.
The Mold-Making and Part Production Process (End-to-End)
A reliable mold-making process confirms dimensional accuracy, material compatibility, and safe production handling before large-scale output begins. The key difference is that high-quality molded helmets usually include prototype validation, iterative tooling refinement, and documented process controls.
Step 1: Design for manufacturability (DFM) and finalize geometry
Before cutting or casting tooling, production teams typically review CAD geometry for draft angles, undercuts, wall thickness, and allowable shrink. Moldability constraints can strongly influence how well a cavity fills, how the part releases, and how consistent dimensions remain after curing.
Step 2: Create a master and prototype for fit and dimensions
Teams frequently create a master pattern or a prototype part to verify critical dimensions. This stage often includes ergonomic checks using headforms, accessory fit checks, and fitment trials.
QA question: Why prototype before producing the final mold?
Because the mold translates geometry into repeated output. Verifying fit, seam placement, and feature alignment before final tooling reduces costly rework when thousands of units are on the horizon.
Step 3: Mold fabrication and cavity preparation
Mold fabrication typically includes selecting mold materials, building the cavity, and preparing release systems. Proper surface preparation and release strategy help reduce defects such as tearing, warping, or surface voids.
Depending on the process, teams may specify cavity coatings, release agents, or surface treatments to improve demolding and finish consistency.
Step 4: Material selection and mix/shot parameter control
Material selection is defined as choosing resin systems, elastomers, reinforcements, or thermoplastic blends that match performance targets such as stiffness, energy absorption, and environmental resistance. The key difference is that the mold alone does not guarantee quality; material behavior under cure conditions and during demolding largely determines final properties.
Many production workflows use controlled mixing ratios and documented batch tracking. In polymer processing, even small deviations can affect cure kinetics, shrink behavior, and final dimensional stability.
Step 5: Fill, cure, demold, and inspect
After injecting or casting the selected material into the mold cavity, the part undergoes curing. Cure time and temperature can strongly influence final shape and mechanical integrity.
Inspection commonly includes dimensional checks at critical features, visual checks for surface defects, and fit tests for interface components. For dimensional verification, teams may use calipers, gauges, or coordinate measurement systems depending on tolerance sensitivity.
Step 6: Continuous improvement using defect data
A mature workflow logs defects such as voids, short shots, surface blemishes, or warping. This data supports targeted improvements to mold surface finish, release methods, or process parameters such as fill rate and cure profiles.
Companies that scale effectively treat mold production as a controlled manufacturing process rather than a one-time engineering task.
Key Technical Considerations for Mold-Based Helmet Part Repetition
Reliable repetition depends on more than the mold itself. The most common causes of inconsistency are material variability, uncontrolled cure conditions, and insufficient attention to shrink and parting line effects.
Dimensional shrink and tolerance budgeting
Every polymer or composite system exhibits shrink during cure and cooling. The definition of tolerance budgeting is the process of allocating allowable variation across geometry features, manufacturing steps, and measurement uncertainty so the final part stays within spec.
For example, a typical tolerance-driven workflow may specify critical dimensions (such as mounting hole spacing) with tighter allowable variation, while cosmetic surfaces might tolerate slightly wider variation.
Demolding forces and part release strategy
Demolding is defined as the controlled removal of a cured part from a mold cavity. The key difference between successful and problematic demolding is often the balance between sufficient cure (to prevent deformation) and appropriate release conditions (to prevent tearing or surface damage).
Surface finish requirements and texture consistency
If your helmet design includes matte finishes, grip textures, or aerodynamic patterns, surface finish consistency becomes a functional requirement. Mold surface preparation and consistent release methods are essential for repeatable appearance and feel.
Production volume planning and tool life
Tool life is defined as the usable operational lifespan of a mold before quality degrades beyond acceptable limits. Higher-volume operations typically require tooling materials and maintenance schedules chosen to maintain cavity geometry over many cycles.
FAQs About Using Molds for Repeating Helmet Parts
What is the fastest way to start producing repeating helmet parts with molds?
The fastest route is usually to build tooling after validating the core design and critical dimensions through prototypes. For early production, silicone molds can reduce setup time, while rigid tooling may be planned later for scale. The key is to lock geometry before investing in high-durability molds.
Are silicone molds suitable for mass production?
Silicone molds can be suitable for limited to moderate volumes depending on cure cycles, material abrasiveness, and release strategy. The key difference is that silicone molds often prioritize flexibility and part release, while higher-volume production may require rigid tooling to maintain dimensional stability and finish over time.
How do manufacturers ensure molded parts meet safety expectations?
Manufacturers ensure safety expectations through documented process control, validated materials, and repeat testing. The most trusted approach aligns with quality management practices such as ISO 9001 and uses performance testing protocols relevant to the helmet category in the target market.
What defects are most common in molded helmet components?
Common defects include surface voids, short shots (incomplete cavity fill), warping from inconsistent cure or cooling, and misalignment at seams or interfaces. Using structured inspection and defect logging helps identify whether issues originate in mold surfaces, material formulation, or process parameters.
Conclusion: Molds Enable Scalable Consistency in Helmet Engineering
Using molds for repeating helmet parts turns design intent into repeatable production output by standardizing geometry, improving dimensional uniformity, and enabling faster scale-up. The key difference between prototype success and production reliability is the disciplined workflow: thoughtful mold selection, controlled materials, validated tooling, and quality-driven inspection.
If you’re planning to ramp production, focus on defining tolerances for critical interface features, selecting mold types aligned with your material and cycle requirements, and implementing process documentation that supports repeatability across every run.
Frequently Asked Questions: Using Molds for Repeating Helmet Parts
What types of molds work best for repeating helmet parts?
The best mold depends on the material you’re casting, the level of detail, and how many copies you need. Common options include: (1) Silicone rubber molds for most small to medium helmet parts because they capture fine detail and release parts easily; (2) RTV silicone “mother molds” for creating multiple runs from a master; (3) Plaster/resin support jackets (or fiberglass shells) to keep silicone stable when casting rigid parts; and (4) Rigid molds (like resin or 3D-printed molds with a release system) for processes that don’t require flexible demolding. If you need true repeatability, a two-part mold design with registration features (keys/pins) is often more reliable than single-piece molds.
How do I ensure consistent fit between multiple cast helmet components?
Consistency comes down to controlling shrinkage, mold alignment, and part thickness. Start by building a master that’s correct in size and surface finish, then design the mold with alignment keys and a consistent parting line. Use a repeatable casting procedure: measure material ratios carefully (by weight when possible), keep processing temperatures stable, and follow cure times instead of “eyeballing” when material is set. If your material shrinks (some resins and thermoplastics do), compensate by either slightly oversizing in the master or selecting a formulation with lower shrinkage. Finally, test with a few “trial casts” and record results (dimensions, thickness, finish) so you can tweak the workflow before running the full batch.
What mold materials are safest and easiest for beginners?
For many creators, silicone rubber molds are the easiest and most beginner-friendly because they release cleanly and can reproduce detailed surfaces. Look for silicone systems specifically intended for casting the material you plan to use (e.g., polyurethane, epoxy, resin, or foam). Also consider: (1) shore hardness (too soft can distort under pressure; too hard can make demolding difficult), (2) pot life (how long you have to pour before gelling), and (3) cure time and working time. Always follow the manufacturer’s safety instructions—silicone and resin products typically require gloves, eye protection, and ventilation. If you’re unsure, make small test molds first to confirm compatibility and curing.
How can I prevent defects like bubbles, warping, and incomplete fill in helmet part molds?
Defects usually come from a mismatch between mold design and casting technique. To reduce bubbles: (1) use proper mixing (accurate ratios, thorough stirring), (2) pre-wet or coat the mold if the casting material calls for it, (3) pour steadily to avoid trapping air, and (4) consider vacuum degassing if your setup allows. For incomplete fill: ensure you have adequate pour points/vents that let air escape, and don’t overload thin areas that cool too fast. For warping: keep the part thickness consistent, support the mold properly with a jacket if needed, and avoid moving the mold or part during early cure. Also avoid casting too hot or too cold—follow the product’s recommended temperature range.
What’s the best way to separate, clean, and finish molded helmet parts for repeated production?
After curing, demold carefully to avoid tearing edges or damaging sharp details. Flexible silicone molds generally allow gentle “peel back” demolding, but rigid inserts or deep undercuts may require a consistent release technique. Clean parts by removing any flash and trimming sprues/pour points using a deburring tool, hobby knife, or rotary tool—go slowly to avoid gouging. If you need consistent assembly, lightly sand mating surfaces with a controlled grit progression and periodically check fit with your reference template. For finish, prime and sand to your desired level, then apply paint/sealant suited to helmet use. For production consistency, consider creating a simple QC checklist (dimensions, critical edges, surface smoothness, and fit) and repeat the same steps for each batch.
📅 Last Updated: July 07, 2026 | Topic: Using Molds for Repeating Helmet Parts | Content verified for accuracy and freshness.
References
- Google Scholar search: Helmet part manufacturing with reusable molds Google Scholar
https://scholar.google.com/scholar?q=helmet+part+manufacturing+reusable+molds - Google Scholar search: Silicone rubber mold casting repeatability Google Scholar
https://scholar.google.com/scholar?q=silicone+rubber+mold+casting+repeatability - PubMed search: Silicone rubber mold casting process Google Scholar
https://pubmed.ncbi.nlm.nih.gov/?term=silicone+rubber+mold+casting+process - Mold (manufacturing): overview of mold types and uses
https://en.wikipedia.org/wiki/Mold_(manufacturing - Injection molding: process description and repeatable production fundamentals
https://en.wikipedia.org/wiki/Injection_molding - Compression molding: how molds are used to shape thermoset materials
https://en.wikipedia.org/wiki/Compression_molding - Injection molding (Encyclopaedia Britannica): definition and principle
https://www.britannica.com/technology/injection-molding - NIOSH Head Protection: guidance on protective helmets and headgear
https://www.cdc.gov/niosh/topics/headprotection/default.html