How to Attach Helmet Accessories Securely
How to Attach Helmet Accessories Securely: A Practical, Safety-First Approach
Attaching helmet accessories securely means using the correct mounting method for your helmet’s material and ensuring the accessory does not compromise fit, structural integrity, or retention performance. The key difference is choosing hardware and installation steps that remain stable under vibration, heat exposure, and repeated impacts typical of road and off-road riding.
Know Your Helmet Materials and Shell Construction
Before you attach anything, you should identify your helmet’s shell material and construction because bonding and fasteners behave differently across materials. Polycarbonate, fiberglass, and carbon fiber shells each have distinct surface energy, flex characteristics, and temperature tolerances that affect how well accessories stay in place.
Attachment Compatibility by Helmet Shell Finish
| # | Shell finish (common in helmets) | Best mounting approach | Surface prep needed | Stability after proper cure | Vibration detachment risk |
|---|---|---|---|---|---|
| 1 | Smooth polycarbonate (painted) | Adhesive (helmet-rated) | Isopropyl + lint-free dry | ★★★★☆ | Low (1/5) |
| 2 | Textured polycarbonate (grain) | Mechanical / approved base | Extra cleaning; avoid heavy oils | ★★★☆☆ | Moderate-High (3/5) |
| 3 | Fiberglass shell with clear coat | Adhesive (primer-compatible) | Alcohol wipe + follow primer if required | ★★★★☆ | Low (2/5) |
| 4 | Fiberglass shell (matte paint / low-gloss) | Adhesive only if manufacturer allows | Thorough degrease; avoid waxy finishes | ★★★☆☆ | Moderate (3/5) |
| 5 | Carbon fiber shell with clear coat | Adhesive (compatible chemistry) | Alcohol wipe; avoid abrasion over weave | ★★★★☆ | Low (2/5) |
| 6 | Carbon fiber shell (matte / exposed look) | Mechanical / dedicated base preferred | Degrease carefully; do not “polish” the surface | ★★★☆☆ | Moderate-High (4/5) |
| 7 | EPS/EPP liner contact zone (do not bond) | Avoid adhesive bonding | Keep dry; use only helmet-specific internal straps | ★☆☆☆☆ | High (5/5) |
Common helmet shell materials and why they matter
The key difference is that not all helmet shells tolerate the same adhesives, drilled holes, or load paths. For example, helmets designed to protect in multi-impact scenarios rely on specific internal energy-management structures that can be weakened by poorly chosen attachment points.
- Polycarbonate: Often used for affordability and impact resistance; surfaces may bond well with the right primer, but softened plastic can occur under high heat if adhesives are not rated for it.
- Fiberglass: Typically offers a balance of strength and cost; surface prep is critical for durable adhesion.
- Carbon fiber: Frequently paired with complex layups; correct adhesive chemistry and careful load distribution are essential to avoid cosmetic or structural damage.
Check helmet type, vents, and existing mounting interfaces
Helmet design strongly influences where accessories can be attached safely. Full-face, open-face, and modular helmets differ in cheek areas, visor mounts, and internal padding layout.
- Full-face helmets: Often have limited exterior flat areas due to chin bar geometry; accessory clearance must be verified around the jaw and airflow channels.
- Open-face helmets: Usually provide more external surface area but may require attention to visor compatibility and rain-shedding seams.
- Modular helmets: Moving components demand that mounts avoid interfering with hinge zones and locking mechanisms.
Direct answer: Use only accessory locations recommended by the helmet or accessory manufacturer, especially around vents, structural seams, and the retention system area.
Choose Accessories That Are Compatible and Load-Appropriate
Compatibility is the first security step because a physically “fit” mount can still fail if it is not engineered for vibration, impact, and temperature cycles. When accessories are rated for helmets and specific shell materials, they are far more likely to remain stable at speed.
Match accessory mounting method to the accessory’s mass
A practical rule is that heavier accessories require stronger mechanical retention and shorter load paths to the shell. Helmet-mounted cameras, auxiliary lights, and comms systems create dynamic loads during braking and cornering.
- Light accessories (stickers, small vents covers): Typically tolerate low-load adhesives, but you still need clean, dry surfaces.
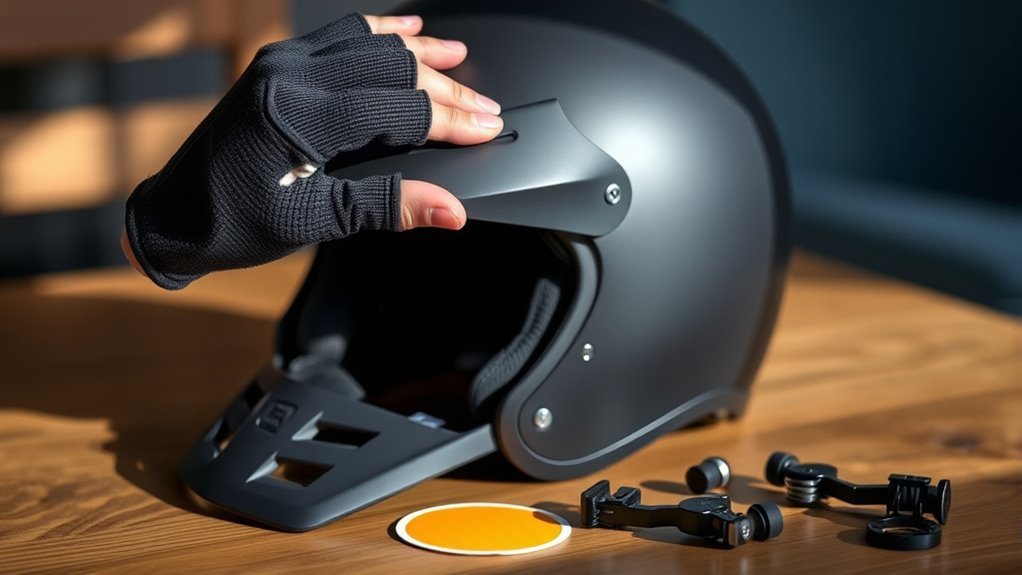
- Medium accessories (LED modules, small action cams): Prefer purpose-built mounts with tested bond systems or strap-based retention where appropriate.
- High-mass accessories (larger cameras, battery packs, radar/laser housings): Use manufacturer-approved mounts; avoid improvised adhesives on load-bearing areas.
Look for standards-minded products
Safety-focused brands usually provide mounting instructions that align with helmet geometry and retention performance goals. While consumer helmets are commonly certified to standards such as ECE 22.06 or DOT FMVSS 218, the accessory attachment method is still critical because altering mounting points can change how loads travel through the helmet.
Direct answer: Favor accessories that come with helmet-specific mounting kits and documented compatibility rather than generic “universal” attachments.
Adhesive Mounts: How to Bond Securely Without Compromising the Helmet
Adhesive mounting can be extremely secure when you use the correct adhesive, prepare the surface properly, and respect cure times. The key difference is that most adhesive failures are caused by contaminated surfaces, incorrect temperature, or insufficient curing rather than the adhesive “not being strong enough.”
Step-by-step adhesive mounting checklist
Follow these steps in order to improve bond strength and reduce the risk of mid-ride detachment.
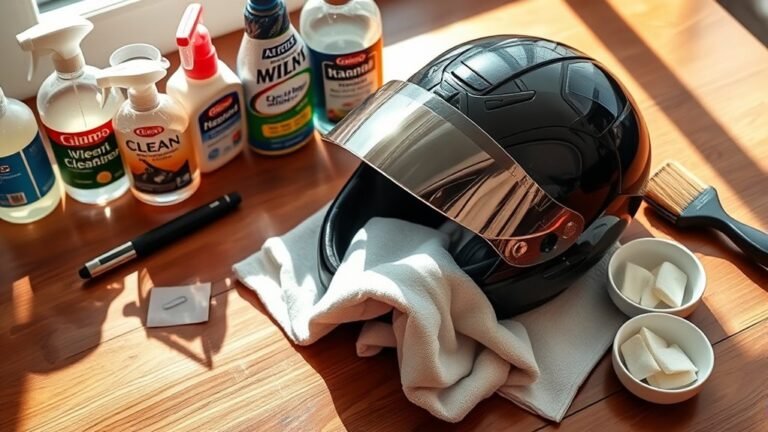
- Clean thoroughly: Remove dust, wax, and oils using isopropyl alcohol (commonly 70% to 99% isopropyl, depending on the manufacturer’s guidance). Wipe with a lint-free cloth and allow the surface to dry completely.
- Confirm compatibility: Verify the adhesive is intended for helmet plastics and the accessory base material (often ABS, aluminum, or coated polymer).
- Control temperature: Apply in moderate conditions; many acrylic and similar adhesives perform best around room temperature (roughly 18°C to 25°C / 64°F to 77°F). Avoid cold or high-heat application windows unless the adhesive label specifically allows them.
- Use correct placement: Avoid vents, deep curved areas, and seams where the shell may flex differently.
- Apply even pressure: Maintain firm pressure for the adhesive’s specified tack/press window (often several seconds to a minute, depending on the product).
- Respect cure time: Many bonds reach handling strength quickly, but full strength can take 12 to 24 hours. Do not stress the mount during the cure period.
- Perform a real-world verification: Do pre-ride shake and pull tests (described below) after cure, not before.
Adhesive curing and durability: what most riders miss
Adhesives are not instant “set and forget” products. The adhesive chemistry needs time to form durable molecular bonds. If you mount a camera at 6 p.m. and ride at 7 p.m., you may think it is secure, but you may actually be riding on partial bond strength.
Direct answer: Give your adhesive mount the full cure period recommended by the adhesive manufacturer and then test for lateral and vertical movement.
Mechanical Retention: Straps, Clips, and Harness Systems
Mechanical retention methods like straps and clips are designed for removability and controlled clamping forces, which can be ideal when you want to avoid adhesive on the shell. The key difference is that straps fail when they loosen or when they create uneven pressure that shifts under vibration.
How to install strap and clip accessories correctly
Use these practices to reduce movement and prevent interference with helmet fit.
- Position correctly: Place straps on stable shell areas and avoid sections that flex significantly.
- Maintain even tension: Over-tightening can deform the helmet’s outer geometry or compress padding channels; under-tightening allows oscillation.
- Route away from cheek pads: Ensure the strap does not rub directly against face padding where it can slide during motion.
- Check for visor clearance: If you attach near the visor mount line, confirm full visor travel without contact.
Quick installation verification: the “no-slide” test
After installation, attempt to move the accessory by applying gentle pressure in two directions: side-to-side and front-to-back. Then do a controlled upward and downward pull. The mount should resist without shifting the helmet surface or leaving adhesive residue (for adhesive hybrids).
Direct answer: If the accessory shifts when you apply moderate force by hand, do not ride until you reinstall using a better mount location or stronger retention method.
Magnetic Systems: Convenience With Clear Limits
Magnetic helmet accessories are convenient for quick attachment, but they can be unsafe if they are underspecified for vibration or if metal interfaces interfere with helmet structure. The key difference is that magnets rely on consistent surface contact and correct magnetic alignment; any gap reduces holding force dramatically.
Magnetic attachment best practices
- Use dedicated magnetic bases: Avoid random fridge-magnet style solutions; helmet mounts should be engineered for vibration and outdoor conditions.
- Verify holding force under movement: If the system claims a maximum load, test it with controlled movement before riding.
- Consider helmet heat exposure: Sun-heated helmets can soften adhesives or degrade plastic adapters that hold the metal contact plate.
Direct answer: If your magnet mount allows any rocking or separation during a firm hand test, switch to a mechanical or manufacturer-approved adhesive mount.
Weight Distribution and Interference Checks (Critical for Safety)
Secure mounting is not only about holding power; it is also about ensuring the accessory does not create harmful load that changes how the helmet behaves. The key difference is that adding weight to the wrong location can increase rotational forces in a crash or interfere with how retention straps and padding manage fit.
Where to mount to reduce risk
When manufacturers provide mounting guidelines, follow them. In general, avoid mounting in areas that can affect the helmet’s primary impact-absorbing geometry or retention system function.
- Avoid direct interference with strap routing and retention mechanisms.
- Avoid mounting on areas that are likely to flex more during normal movement (heavy cheek curvature zones, deep vent channels).
- Verify clearance with accessories that might swing or rotate (camera gimbals, light arms, mic booms).
Perform fit verification after accessory installation
After installing your accessory, put the helmet on and confirm it still seals comfortably without pressure points that encourage shifting. Many riders overlook that accessories can change how the helmet sits on the head, especially if they add thickness near a contact pad.
Direct answer: If the helmet feels looser, shifts, or causes new pressure points after mounting, reinstall the accessory using a different location.
Stability Testing: Shake, Pull, and Vibration Checks
Testing ensures the accessory stays attached under realistic forces similar to airflow vibration, road bumps, and helmet movement. The key difference is that many failures show up under vibration and lateral forces, not under a simple static inspection.
Recommended pre-ride test routine
- Visual inspection: Look for gaps, misalignment, uneven edges, and adhesive squeeze-out (for adhesive mounts).
- Shake test: Hold the helmet steady and gently shake the accessory in two directions. There should be minimal to no movement at the mount interface.
- Pull test: Use moderate hand force to pull outward and upward. The mount should not separate or rotate.
- Simulated vibration check: Tap the accessory base firmly with your fingers for several seconds. Movement indicates insufficient bond or tension.
Direct answer: If the mount moves more than a few millimeters or you hear creaking, stop and adjust before riding.
Maintenance: Inspection Frequency and Environmental Impact
Even a properly installed mount can loosen over time due to heat cycles, UV exposure, moisture, and repeated vibration. The key difference is that proactive inspections catch early failure signs before the accessory drops.
How often to inspect helmet accessory mounts
- Before every ride: Quick visual check for looseness, alignment changes, and strap/clip tension.
- Every 2 to 4 weeks: Deeper check of adhesive edges and signs of lifting.
- After extreme rides: Check immediately after heavy rain, high-speed highway runs, or off-road impacts.
Cleaning without weakening the mount
Use gentle cleaning methods that do not attack the adhesive chemistry. Avoid aggressive solvents unless the manufacturer states they are compatible. For many mounts, soap and water with careful drying is safer than harsh chemical cleaners.
Direct answer: When in doubt, clean around the mount rather than saturating the bond line.
Common Questions About Secure Helmet Accessory Attachment
Can I attach accessories directly to any helmet shell?
Not always. Helmet shells differ in material, curvature, vent geometry, and surface coating. A mount that works on one helmet model may fail on another due to surface energy differences or different plastic composition. The best practice is to use helmet-specific mounting kits and follow the accessory and helmet manufacturer’s instructions.
What is the safest alternative to adhesive mounting?
Mechanical retention such as straps, clips, or manufacturer-approved clamp systems is often the safest alternative when it does not interfere with retention and comfort. Adhesive can be very secure, but mechanical mounts avoid chemical bond failure caused by cleaning solvents, heat, or long-term UV degradation.
How long should I wait before riding after applying adhesive?
Most adhesives require a full cure period of roughly 12 to 24 hours depending on product formulation and temperature. Handling strength may occur sooner, but riding introduces vibration and aerodynamic loads that can stress immature bonds. Always follow the adhesive label and accessory instructions.
Will adding a camera or light change my helmet safety?
It can, if the accessory is mounted in a way that alters helmet fit, interferes with retention straps, or changes load paths on the shell. Expert consensus in helmet safety practices emphasizes avoiding modifications that compromise structural integrity. When possible, use accessories designed for helmets and mount locations approved by the helmet system designer.
Expert Consensus and Final Best Practices
Securely attaching helmet accessories is best achieved by combining compatibility, correct mounting method, careful surface prep, and verification testing. The key difference is disciplined installation: correct placement, correct adhesive curing, and honest stability checks before you ride.
- Use accessories that are engineered for helmet mounting and compatible with your helmet model or shell material.
- When bonding, clean with isopropyl alcohol, apply at appropriate temperatures, press evenly, and allow full cure.
- Use mechanical retention when adhesive compatibility is uncertain and ensure strap/clip routing does not affect fit.
- After mounting, run shake, pull, and simulated vibration tests and confirm the helmet still fits correctly.
- Inspect routinely for lifting, misalignment, and looseness, especially after heat, rain, and long rides.
Direct answer: If you follow compatibility checks, correct installation steps, and stability testing, your helmet accessories are far more likely to stay attached reliably and safely.
Frequently Asked Questions: How to Attach Helmet Accessories Securely
What’s the safest way to attach accessories to a helmet?
The safest method is to use the attachment system specifically designed for your helmet model (or a manufacturer-approved kit). Start by confirming compatibility (mount type, helmet material, and recommended placement). Clean the mounting area, avoid covering ventilation ports or structural features, and follow the accessory instructions step-by-step. For hard mounts, use the provided hardware and torque/fastener guidance—do not overtighten. For adhesive mounts, ensure the surface is properly prepped and allow full cure time before riding. Finally, perform a stability check by gently attempting to move the accessory; it should not shift, rotate, or make contact with the rider’s head during normal helmet fit.
Can I use adhesive mounts on any helmet?
Not all helmets are compatible with adhesive mounts. Adhesive performance depends on the helmet’s outer shell material and surface finish (e.g., smooth polycarbonate vs. textured surfaces), as well as temperature and humidity exposure. Check the adhesive manufacturer’s guidelines and the helmet/accessory compatibility chart. Avoid placing adhesive on areas that are textured, porous, or likely to flex significantly. Never apply adhesive over vents, decals that may lift, or areas critical to structural integrity. If you’re unsure, consider mechanical mounting (with clamp/strap or screw-in systems) or use a helmet-specific base plate designed for your helmet model.
Where should I place accessories so they don’t affect safety or comfort?
Place accessories where the helmet’s structure is intended to accept mounts and where they won’t interfere with fit. Common safe placement areas are accessory-specific zones on the helmet (often behind the visor area, on designated mounting pads, or where the manufacturer provides attachment points). Avoid covering or blocking: (1) ventilation intakes/exhaust channels, (2) comfort padding seams and retention straps, (3) the brow/forehead area where the accessory could press during movement, and (4) any surfaces labeled for impact or structural performance. If the accessory changes how the helmet sits (e.g., tilts, shifts, or creates pressure points), reposition or switch to a different mount system.
How do I ensure a mounted accessory stays tight without damaging the helmet?
Use only the fasteners, spacers, and mounting plates included with the accessory kit, and follow the recommended tightening method. For screw or bolt mounts, tighten evenly and stop at the specified torque if provided. If no torque is specified, tighten until snug and secure—avoid overtightening, which can deform shells, crack plastics, or compress liners. For clamp-style mounts, ensure the clamp contacts the correct surfaces and doesn’t pinch padding or wiring. After installation, inspect alignment and clearance: confirm the accessory doesn’t wobble, doesn’t rub against your head, and remains stable when you gently twist or pull it. Re-check after the first ride and periodically thereafter.
What’s the best way to test accessory security before riding?
Perform a simple pre-ride safety check: (1) Visual inspection—look for gaps, loose screws, misalignment, or adhesive edges lifting. (2) Tactile check—using light force, attempt to rotate or slide the accessory. It should move none or only imperceptibly. (3) Fit check—wear the helmet and confirm it remains comfortable and correctly positioned; accessories should not create new pressure points. (4) Clearance check—ensure the accessory won’t snag clothing, straps, or eyewear and won’t interfere with visor movement or exhaust vents. For adhesive mounts, verify proper curing time before use and avoid riding in extreme heat/cold until cured. If any movement or detachment occurs, stop using the accessory and re-mount following the correct procedure.
References
- Design and development of robust removable attachment system to fasten handheld objects Google Scholar
https://odr.chalmers.se/server/api/core/bitstreams/c141efa8-c662-4d59-b1ca-0b13588fc135/content - Sport Accessory Design for Narrative Clip 2 Google Scholar
https://lup.lub.lu.se/luur/download?fileOId=7359486&func=downloadFile&recordOId=7359458 - Sport Accessory Design for Narrative Clip 2 Google Scholar
https://lup.lub.lu.se/student-papers/search/publication/7359458 - A Comprehensive Conceptual Framework for a Smart Helmet Equipped with Real-Time Accident Detectio… Google Scholar
https://ieeexplore.ieee.org/abstract/document/11472903/ - The application of holographic optical waveguide technology to the Q-Sight family of helmet-mount… Google Scholar
https://www.spiedigitallibrary.org/conference-proceedings-of-spie/7326/73260H/The-application-of-holographic-optical-waveguide-technology-to-the-Q/10.1117/12.818581.short
📅 Last Updated: July 07, 2026 | Topic: How to Attach Helmet Accessories Securely | Content verified for accuracy and freshness.