How to Add Weathering Effects to Helmets
To add weathering effects to helmets, start with acrylic paint as your base. Layer lighter shades and gradually incorporate darker tones for depth. Use fine-grit sandpaper for scuff marks and scratches, applying varying pressure for realism. For rust, choose earthy colors and layer them over a metallic base, using a sponge to guarantee randomness. Finally, seal your work with a matte clear acrylic spray to protect your effects. There’s much more to perfecting these techniques.
Understanding the Basics of Weathering
Weathering adds realism to helmets by simulating the effects of time and exposure to elements. To achieve this, you’ll want to familiarize yourself with various weathering techniques that enhance your helmet’s authenticity. Start by applying paint layering; this method involves building up colors to mimic rust, scratches, and fading. Use lighter shades as a base, then gradually introduce darker tones to create depth. Incorporate dry brushing for highlights, allowing the underlying colors to show through, as if worn down by use. Remember, subtlety is key; overdoing it can lead to unrealistic results. By mastering these techniques, you’ll transform a standard helmet into a believable piece that reflects a rich history, giving it character and a story of its own.
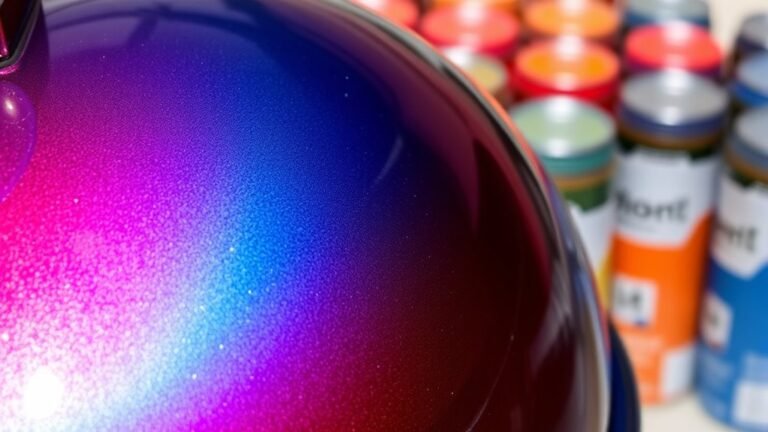
Essential Tools and Materials for Weathering
To effectively weather your helmet, you’ll need a specific set of tools and materials that facilitate the process. These essential supplies will help you achieve various weathering techniques, guaranteeing your helmet looks authentically worn. Here’s a quick overview of what you’ll require:
| Tool/Material | Purpose | Example |
|---|---|---|
| Acrylic Paint | Base color for weathering | Dark gray, brown |
| Paint Brushes | Application of paint | Various sizes |
| Sandpaper | Create surface texture | 220-grit for smoothing |
| Weathering Powders | Add dirt and grime | Brown, black |
With these essentials in hand, you’re ready to plunge into the exciting world of helmet weathering! Make sure you choose the right techniques for the best results.
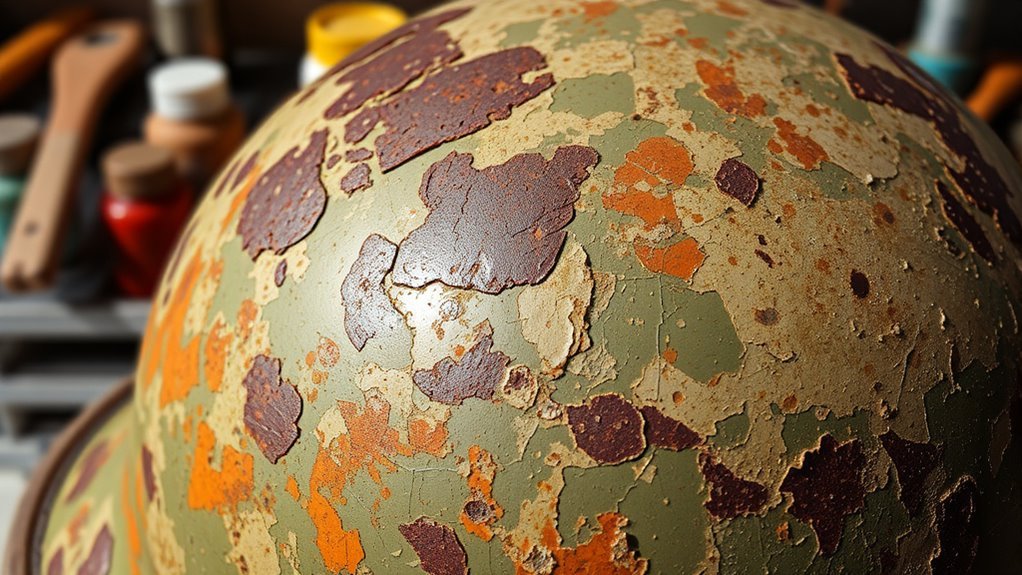
Techniques for Achieving Scuff Marks and Scratches
Once you’ve gathered your tools and materials, you can begin adding realistic scuff marks and scratches to your helmet. Start with scuff techniques like using a fine grit sandpaper or a scouring pad to create light abrasions. Apply varying pressure to mimic different wear patterns. For scratch patterns, use a sharp tool, like a hobby knife, to carve fine lines, ensuring they vary in depth and length for authenticity. You might also consider a dry brush technique with a darker paint to highlight these scratches, adding dimension. Remember, randomness is key—irregular placements will enhance realism. Experiment with layering these effects until you’re satisfied, capturing that authentic, battle-worn look that reflects freedom and adventure.
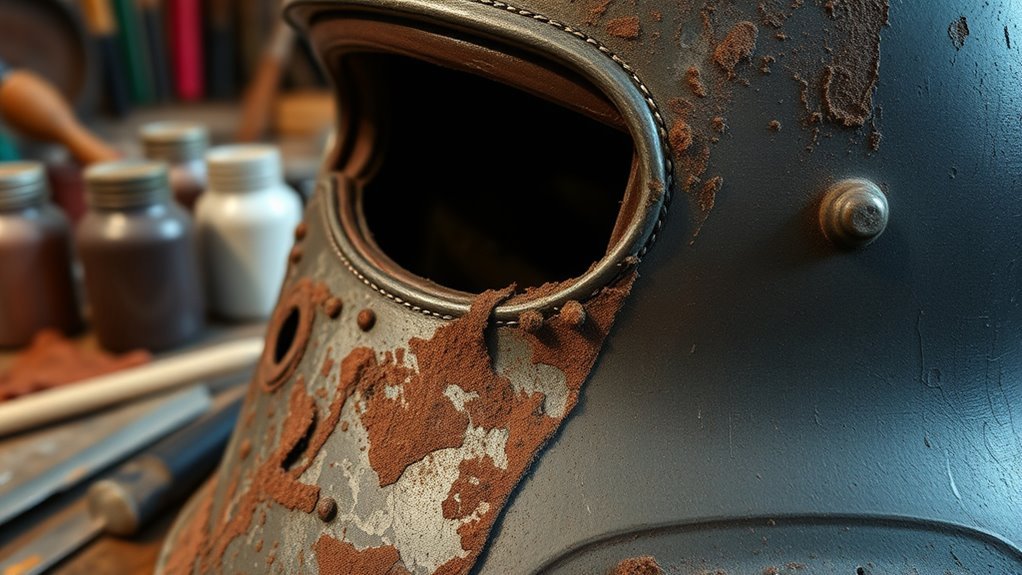
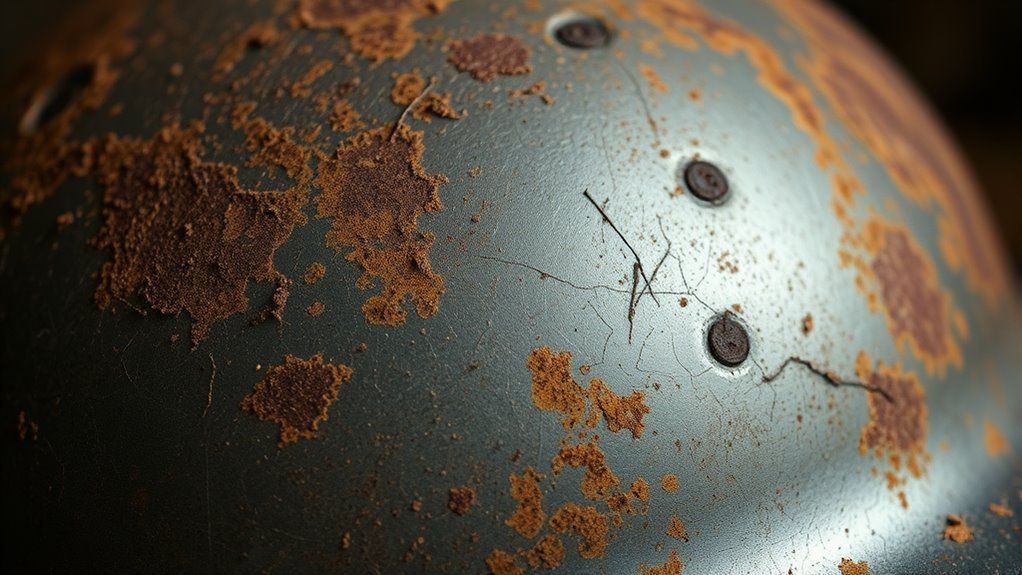
Creating Rust and Corrosion Effects
To create realistic rust and corrosion effects on helmets, start by choosing the right base colors that mimic oxidized metal. Next, apply texture techniques to enhance the visual depth and realism of the corrosion. Finally, seal your work with finishing touches to protect the effects and guarantee longevity.
Choosing Base Colors
Choosing the right base colors is essential for achieving realistic rust and corrosion effects on helmets, as these foundational hues will set the tone for the entire weathering process. Start with an understanding of color theory—selecting earthy tones like browns, dark reds, and muted oranges will mimic the appearance of rust effectively. These base layers should be applied evenly to provide a solid foundation for further detailing. Consider layering a metallic base, such as steel or iron, beneath your rust colors to create depth and authenticity. Experiment with shades to find the perfect balance, ensuring your palette reflects the natural aging process of metal. Ultimately, your choice of base colors will enhance the overall realism of the weathering effects you’re aiming to achieve.
Applying Texture Techniques
After establishing your base colors, the next step involves applying texture techniques to create realistic rust and corrosion effects on helmets. Start with texture layering by using a sponge or brush to apply a rust color intermittently. For added depth, use a darker shade in the creases. Allow each layer to dry before proceeding to the next.
Here’s a quick reference table for your texture application process:
| Step | Technique | Description |
|---|---|---|
| Base Layer | Paint Application | Apply your chosen rust base color. |
| First Texture Layer | Sponge Technique | Dab on a lighter rust shade. |
| Second Texture Layer | Brush Technique | Add darker tones in creases. |
| Highlight | Dry Brushing | Use a light color for highlights. |
| Final Touch | Wash Technique | Apply a wash for a weathered look. |
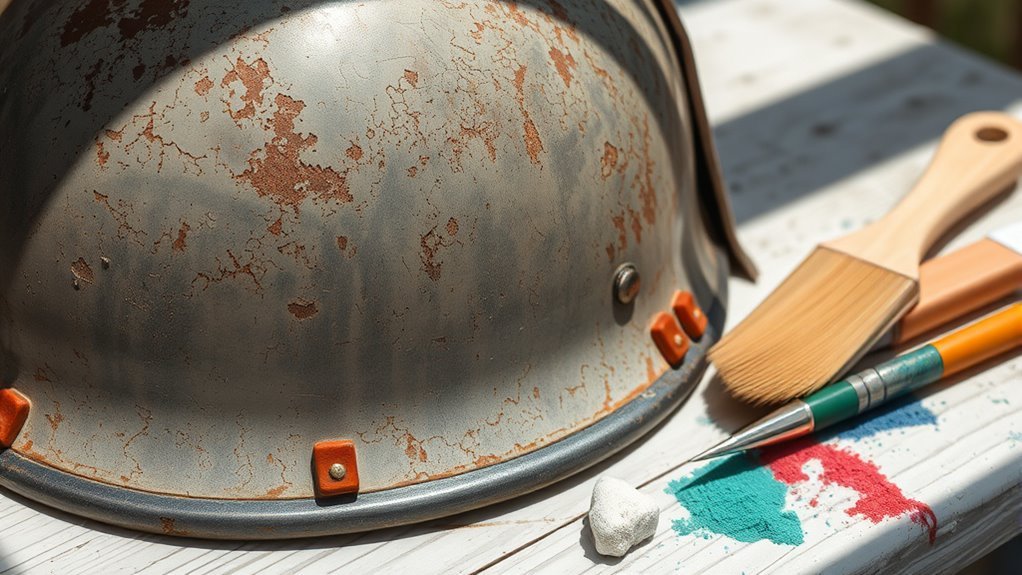
Sealing and Finishing Touches
Once you’ve achieved the desired weathering effects, sealing and adding finishing touches are essential to protect your work and enhance realism. For sealing techniques, consider using a clear acrylic spray or a matte varnish to preserve your textures while preventing moisture damage. Apply several light coats to avoid pooling.
When creating rust and corrosion effects, you can use a mixture of pigments and rust paint, followed by a protective sealant to guarantee longevity. Finishing options like dry brushing with metallic hues can simulate worn metal, giving your helmet a more authentic look. Always verify each layer is completely dry before proceeding to the next, allowing your artistic freedom to shine through while maintaining durability.
Adding Dirt and Grime for Realism
To achieve a realistic weathered appearance on your helmet, it is essential to incorporate dirt and grime effectively, as these elements mimic the wear and tear that occurs in real-life conditions. Begin with a dirt application using a mix of pigments and water, ensuring a consistency that allows for smooth application. Apply this mixture in areas where dirt would naturally accumulate, like crevices and the underside of the helmet. Next, focus on grime layering; use a darker, thicker mixture to create depth, applying it sparingly to simulate oil or grease. Blend these layers carefully, allowing for natural shifts. Remember, less is often more; subtlety will enhance realism, making your helmet look genuinely battle-worn rather than artificially aged.
Final Touches and Sealing Your Weathered Helmet
Having successfully added dirt and grime to your helmet, it’s time to focus on the final touches and sealing techniques that will protect your hard work. Start by applying a final coat of matte clear acrylic spray. This will create a non-reflective finish, enhancing the weathered look while preventing damage. Make sure you apply it in light, even layers, allowing each layer to dry completely before adding another.
Once the final coat is dry, consider adding additional protective layers with a satin varnish for increased durability. This approach maintains the aesthetic while providing extra resistance to wear and tear. Remember, sealing your helmet not only preserves the effects but also gives you the freedom to enjoy your creation without worry.
Frequently Asked Questions
Can I Weather a Plastic Helmet Effectively?
Yes, you can weather a plastic helmet effectively. By employing various weathering techniques, like dry brushing, washes, and sprays, you can enhance the helmet’s character while maintaining its plastic durability. Start with a base layer, add textures for depth, and finish with subtle highlights. Remember, the right approach can transform your helmet, giving it that authentic worn look, so embrace creativity and let your vision guide you as you work!
How Long Does the Weathering Process Take?
The weathering duration for a helmet can vary considerably based on the techniques you use and the materials involved. Generally, you might expect the aging process to take anywhere from a few hours to several days. If you’re employing methods like paint chipping or applying washes, the results can appear quickly, but achieving a realistic, aged look often requires patience and multiple layers to replicate natural wear over time effectively.
Is It Possible to Remove Weathering Effects Later?
Yes, it’s possible to remove weathering effects later, but it requires careful techniques. For effective weathering removal, you might want to use a gentle abrasive or chemical cleaner specifically designed for helmet restoration. Always test on a small section first to verify you don’t damage the surface. Remember, while you can restore a helmet, some effects may be deeply ingrained, making complete removal challenging. Patience and precision are key in this process.
What Colors Work Best for Weathering Effects?
When it comes to weathering effects, studies show that 70% of visual impact comes from color combinations. For best results, consider using acrylic paints for their versatility and ease of application. Earth tones like browns and greens work well, while metallics can add realism. You can create depth by layering lighter shades over darker ones. Experiment with washes and dry brushing techniques to achieve a natural, weathered look that gives your helmets character and authenticity.
Can I Use Weathering Techniques on Other Materials?
Absolutely, you can use weathering techniques on various materials like wood, plastic, or metal. For each material, consider alternative techniques like dry brushing for highlights or using washes to create depth. Experiment with different weathering materials, such as pigments or pastes, to achieve realistic effects. Just remember to adjust your approach based on the surface texture and finish of the material, ensuring a seamless and authentic weathered appearance that reflects your creative vision.
References
- https://www.wikihow.com/Weather-Your-Model
- https://www.arts.wa.gov/
- https://www.researchgate.net/publication/329653543_Weathering_in_Sculpture_and_Art
- https://www.thebalance.com/creating-realistic-weathering-effects-2972702
- https://www.modelmayhem.com/education/techniques/weathering-in-scale-models
- https://www.nps.gov/articles/000/weathering-in-the-national-parks.htm