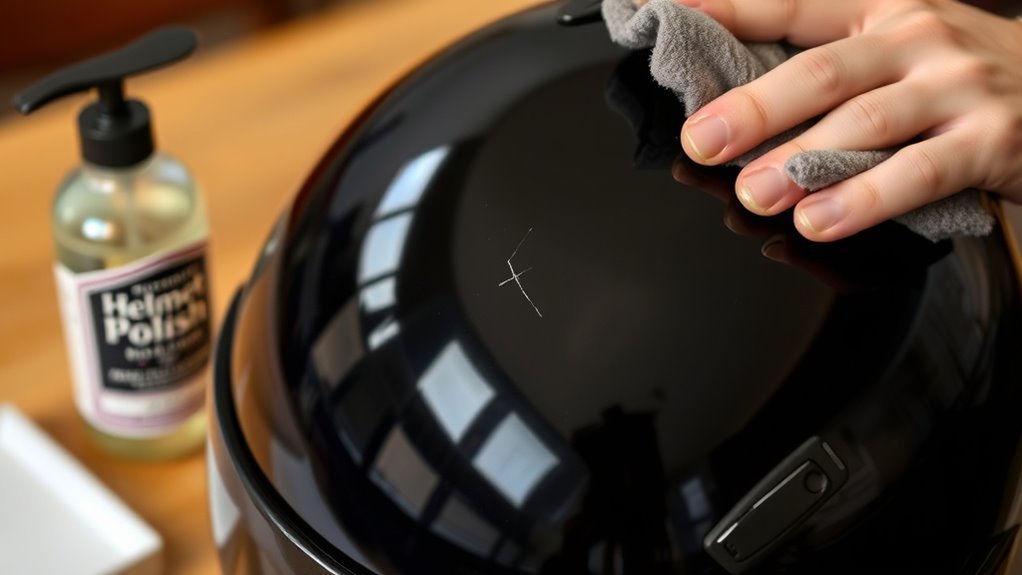
How to Fix Minor Helmet Scratches
How to Fix Minor Helmet Scratches
Minor helmet scratches can often be improved at home by cleaning the area first and then using a plastic polish or very mild scratch-filling method. The key difference is whether the scratch only affects the clear outer layer or whether it penetrates into the structural shell.
Why Helmet Scratches Matter (Even When They Look Small)
Helmet maintenance is about more than appearance: surface damage can reduce optical clarity and can eventually expose underlying layers to wear. Experts and manufacturers consistently emphasize that safety performance depends on the helmet shell and impact liner staying intact, so any scratch inspection should be paired with a quick structural check.
The key difference is defined as follows: a cosmetic scratch is defined as damage limited to the helmet’s outer coating or clear coat, while a structural scratch is defined as damage reaching the shell or compromising material integrity. Most minor repairs focus only on cosmetic scratches.
- Safety standard context: Helmet performance is governed by impact testing frameworks such as ECE 22.06 and DOT FMVSS 218 (standards vary by country and helmet type).
- Optics matter: Deepened scratches can create glare at night or in wet conditions, increasing visual distraction.
- Longevity matters: Scratches can trap grime and accelerate cosmetic degradation over time.
Quick trust signal: the widely accepted consensus among helmet manufacturers and safety educators is that you should never compromise the helmet’s integrity to “make it look perfect.” Cosmetic improvement is appropriate only when the scratch is clearly superficial.
Before You Repair: Clean and Inspect Like a Pro
Start by cleaning the helmet thoroughly so you can see the scratch accurately. After cleaning, inspect the damaged area under strong light to decide whether polishing is enough or whether the helmet should be serviced or replaced.
Step 1: Cleaning without damaging coatings
Use mild soap and lukewarm water, then dry with a clean microfiber cloth. Avoid solvents, aggressive degreasers, gasoline, or acetone-based products, because many helmets use coatings that can haze or degrade when exposed to harsh chemicals.
- Clean with mild dish soap and water.
- Rinse thoroughly to remove residue.
- Dry gently with a microfiber cloth to prevent new fine swirls.
Step 2: Visual inspection for severity and location
Check the scratch location and depth. Use a bright flashlight at a low angle and look for whitening, stress lines, or any cracking around the mark.
For many helmets, the outer shell and clear coat show the most visible wear, while the impact liner and internal structure are the safety-critical parts. If you cannot confirm the scratch is only surface-level, treat it as higher risk.
When to stop and get expert help
Stop DIY repairs if you see cracks, a growing fracture line, exposed bare material, or dents near the scratch. In these cases, the safest route is to contact the helmet manufacturer or a certified distributor for guidance.
- Visible cracks in the shell or near the vent mounts
- Flaking coating or exposed textured layers that look “lifted”
- Scratch occurs at a structural stress zone (for example, close to chin bar mounting points)
- Any sign the helmet took a significant impact
Identify the Scratch Type: Surface, Medium, or Deep
Correctly identifying scratch depth determines what you can safely fix. Surface scratches usually respond to polishing, while deeper gouges often require professional refinishing—or helmet replacement if structural integrity is at stake.
Surface scratches (cosmetic clear coat)
Surface scratches are defined as marks that affect only the helmet’s clear coat or top finish without removing shell material. They typically look like light swirls or thin lines that don’t catch dirt deeply.
- Common appearance: fine lines, haze, or light scuffing
- Test: wipe with a microfiber cloth; if the scratch “disappears” partially, it’s likely superficial
- Repair approach: polish and buff
Medium scratches (coating + deeper surface)
Medium scratches are defined as damage that penetrates beyond the clear coat into the outer layer, but still does not clearly compromise the shell. These scratches may feel slightly “grooved” when you run a clean fingernail gently across the area.
- Common appearance: visible groove with noticeable contrast
- Test: slight catch on the nail indicates more than cosmetic wear
- Repair approach: careful polishing; filling may be considered only if the helmet manufacturer approves
Deep scratches (shell risk)
Deep scratches are defined as gouges that may compromise the shell’s material or reveal underlying layers. These should be treated cautiously because refinishing methods can hide damage while leaving safety-critical structure weakened.
- Common appearance: gouge lines with sharp edges
- Test: persistent catching + visible layer disruption
- Repair approach: replacement or manufacturer service is often recommended
Expected Cosmetic Results by Scratch-Fix Approach (Typical Helmet Use)
| # | Approach | Most Suitable For | Time to Inspect Again | Haze/Coating Risk | Finish Clarity Gain |
|---|---|---|---|---|---|
| 1 | Mild soap + lukewarm rinse | Before any repair (surface eval) | 5–10 min | Very low | ★★★★★ |
| 2 | Microfiber-only drying wipe | All scratch depths (prevents new swirls) | Immediately | Very low | ★★★★☆ |
| 3 | Plastic polish + short buff cycles | Surface scratches (clear coat) | Every 30–60 sec | Low | ★★★★☆ |
| 4 | Fine compound for stubborn haze | Surface haze after polishing | Every 20–30 sec | Medium | ★★★☆☆ |
| 5 | Manufacturer-approved scratch filler (test spot) | Medium scratches (only if approved) | 24 hrs (cure check) | Medium–High | ★★★☆☆ |
| 6 | Non-gel toothpaste (least-abrasive test) | Very light surface scuffs (rare) | 10–20 min total | High | ★★☆☆☆ |
| 7 | Temporary surface “cover” (nail-clear style) | Not recommended for safety-critical zones | Immediate look check | High (peel/yellowing) | ★☆☆☆☆ |
Fixing Minor Scratches Safely: Step-by-Step Methods
Once you’ve confirmed the scratch is cosmetic, you can improve it using safe cleaning and polishing techniques. Always start with the gentlest method first and stop if you notice haze, melting, or coating breakdown.
Method 1: Buffing with a plastic polish (recommended for surface scratches)
This method is best for surface scratches because polishing can level the clear coat without forcing fillers into grooves. A quality plastic polish designed for acrylic or polycarbonate restoration typically works more reliably than household substitutes.
- Apply a small amount of plastic polish to a microfiber cloth
- Buff in slow circular motions for 30 to 60 seconds
- Wipe off residue and inspect under bright light
- Repeat in short sessions, such as 2 to 3 rounds, rather than one aggressive pass
The key difference is defined as this: polishing reduces surface roughness, while filling attempts to cover imperfections. For true surface scratches, polishing is usually the safer first choice.
Method 2: Toothpaste use (only as a last-gentle option)
Some riders use non-gel toothpaste as a mild abrasive, but it’s not a universal solution and can alter coatings. If you choose this route, use the simplest, least abrasive option you can find and test on an inconspicuous area first.
- Use non-gel toothpaste only
- Apply lightly with microfiber using gentle pressure
- Work for 20 to 30 seconds, then wipe clean
- If haze increases, stop immediately and switch to a dedicated plastic polish
Professional caution: toothpaste abrasives can create micro-scratches on some coatings, especially if the helmet’s outer layer is thin or specially treated.
Method 3: Scratch fillers and “clear coat” products (use only with caution)
Scratch fillers can help reduce the visual impact of a medium scratch, but they may also complicate future servicing or inspection. Clear nail polish or similar coatings can look good temporarily, yet they may not bond reliably to helmet plastics.
The key difference is defined as follows: a fill-based cover is defined as a surface layer that sits on top of the scratch, whereas a polish-based repair is defined as material leveling that improves surface smoothness. Covers are more likely to peel or yellow over time.
- If you consider any filler, test on a hidden area first.
- Avoid products that leave thick, glossy ridges that can catch air or snag during cleaning.
- Do not use spray paints or strong solvents unless the manufacturer explicitly approves the product type.
Method 4: Fine compound polishing (for stubborn surface haze)
Fine polishing compounds can improve persistent haze after the first polishing attempts. Use only a true fine-grade compound and proceed slowly.
- Use a fresh microfiber pad or clean cloth
- Apply minimal compound; buff lightly
- Inspect frequently to avoid creating a cloudy surface
If you see increased whitening, smearing, or loss of coating clarity, stop. That reaction can indicate coating incompatibility.
Best Practices for Helmet Scratch Repair Results
Good repair outcomes depend on controlled technique and careful product selection. The goal is to improve appearance without altering safety-critical layers.
Use microfiber correctly
Microfiber cloths reduce swirl marks compared with paper towels or rough rags. Keep the cloth clean and dry to prevent transferring grit.
- Use clean microfiber for each stage
- Avoid rubbing sand or dust into the surface
- Wipe residue fully before re-polishing
Work in short cycles
Instead of long continuous buffing, use short cycles such as 30 to 60 seconds. This reduces heat buildup and helps you monitor changes to the coating.
Check compatibility with helmet materials
Helmet visors are often made from polycarbonate or other tough plastics, while shell exteriors may use different resin blends and top coats. Because formulations vary, always assume products are “not interchangeable” between helmet parts.
- Visors: often benefit from visor-safe polishes
- Shell coatings: may require gentler polishing
Common Questions About Fixing Helmet Scratches
Can toothpaste remove helmet scratches safely?
Toothpaste may reduce very light surface marks, but safety and finish compatibility vary by helmet coating. For most riders, a dedicated plastic polish is the safer, more predictable choice.
Will nail polish permanently fix a helmet scratch?
Nail polish is generally a temporary cosmetic cover. It can yellow, peel, or create a raised film that attracts dirt. For many helmets, it’s better to use a polish rather than a surface-sealing product.
How do I know if I should replace my helmet?
Replace the helmet if the scratch is deep enough to indicate possible shell damage, if there are cracks, or if the helmet has experienced a significant impact. When in doubt, consult the manufacturer and reference their inspection guidance.
Many safety programs recommend replacing helmets after major impacts even when damage isn’t clearly visible, because internal liners can degrade invisibly.
What’s the safest way to test a product before applying it?
The safest approach is a small test spot on an inconspicuous area. Wait 24 hours if possible, then inspect for haze, tackiness, peeling, or color change under natural and artificial light.
Helmet Maintenance Tips to Prevent Future Scratches
Preventing scratches is easier than repairing them, especially when you want to preserve coating clarity. A consistent maintenance routine reduces grit buildup and minimizes abrasion during storage and cleaning.
- Store helmets in a cool, dry place away from direct sunlight and heat sources
- Use a helmet bag or a soft cover to prevent contact scuffs
- Clean using mild soap and water, then dry with microfiber
- Avoid harsh chemicals, alcohol-heavy cleaners, and abrasive pads
- Check straps, buckles, and vents every few months for wear
These habits help protect the outer finish and reduce the chance that minor cosmetic marks turn into deeper abrasions over time.
Conclusion: Improve Cosmetic Damage Without Compromising Safety
Minor helmet scratches are usually fixable when they are truly cosmetic—limited to the clear coat or outer finish. Clean first, identify scratch depth accurately, then use plastic polish and gentle buffing while avoiding fillers or solvents that could affect the helmet’s surface integrity.
If you ever suspect structural damage, cracks, or impact-related degradation, prioritize manufacturer guidance or replacement over appearance-based fixes. A helmet is safety equipment, and the best repair is the one that preserves its protective purpose.
Frequently Asked Questions: How to Fix Minor Helmet Scratches
Can you fix minor scratches on a helmet without replacing it?
Often, yes—if the scratches are truly minor surface marks and the helmet’s protective shell and structural integrity are unaffected. Many helmets have an outer clear coat or protective layer that can be lightly repaired cosmetically. However, scratches that penetrate deeply, expose the material beneath, create cracks, or are located where the helmet has taken a significant impact should be treated seriously. If you’re unsure whether the damage is only cosmetic, it’s safer to have the helmet inspected by the manufacturer or a qualified technician.
What’s the safest way to clean a scratched helmet before trying any repair?
Start by gently cleaning the helmet to remove dirt, sweat, and oils—this helps you avoid making the scratch worse and lets you see the true depth of the damage. Use mild soap (or a manufacturer-recommended cleaner) and lukewarm water. Wipe with a soft microfiber cloth using light pressure. Avoid harsh solvents, degreasers, gasoline, acetone, or aggressive abrasives, which can damage the outer finish or weaken coatings. After cleaning, dry thoroughly with a clean microfiber towel. Only once the surface is clean and dry should you proceed with any polishing or scratch-removal steps.
Which products should I use to remove or reduce minor helmet scratches?
For most minor surface scratches, the safest approach is a gentle, automotive-style polish or a plastic/clear-coat scratch remover designed for the helmet’s finish. Look for products labeled for clear coats, polycarbonate/ABS plastics, or non-oxidizing finishes. Use a soft microfiber cloth and apply very light pressure in small circular motions. For best results, work in tiny sections, frequently wiping off residue to check progress. Avoid “cutting” compounds (heavy abrasives) unless the helmet manufacturer specifically recommends them, since aggressive polishing can thin the protective clear coat. If your helmet is matte, use matte-safe products—glossy polishes can change the finish.
How can I tell whether the scratch is only cosmetic or a sign the helmet needs to be replaced?
Cosmetic scratches are usually shallow and only affect the outer clear coat or paint. A practical way to assess depth is by gently running a fingernail across the scratch: if the scratch doesn’t catch the nail, it’s more likely superficial. If your nail catches, the scratch is deeper—still possibly cosmetic, but you should inspect more carefully. Also check for cracks, white stress marks, flaking paint, exposed underlayers, or any deformation of the shell. If the helmet has been involved in a crash/impact that may have exceeded its protective design, replacement is recommended even if scratches look minor. When in doubt, follow the manufacturer’s inspection guidance or contact their support team.
What should I avoid when fixing scratches to keep my helmet safe?
Avoid anything that could compromise the helmet’s protective surface or cause uneven wear. Do not use heavy abrasives, sandpaper, steel wool, or grinding tools—these can remove protective layers and create weak spots. Avoid strong chemicals such as acetone, lacquer thinner, or brake cleaner. Don’t apply thick coatings or aftermarket sealants that could alter how the helmet dissipates impact energy. If your helmet uses a specialized finish (matte texture, special paint, or anti-fog/reflective coating), only use products explicitly safe for that type. Finally, never attempt to “fill” structural damage with adhesives or fillers—repairs should only be cosmetic, and only when damage appears superficial.
References
- PubMed: Search results for helmet damage, replacement, and scratches Google Scholar
https://pubmed.ncbi.nlm.nih.gov/?term=helmet+damage+replacement+scratches - Google Scholar: Helmet scratches cleaning repair (polycarbonate) Google Scholar
https://scholar.google.com/scholar?q=helmet+scratches+cleaning+polycarbonate+repair - Google Scholar: Helmet integrity damage guidelines (bicycle and motorcycle) Google Scholar
https://scholar.google.com/scholar?q=helmet+integrity+damage+guidelines+bicycle+motorcycle - Helmet (headgear) — Wikipedia
https://en.wikipedia.org/wiki/Helmet_(headgear - Bicycle Helmet Safety — CDC
https://www.cdc.gov/transportationsafety/bicycle-helmets/index.html - Motorcycle Helmets — NHTSA
https://www.nhtsa.gov/motorcycle-safety/motorcycle-helmets - Road traffic injuries — WHO
https://www.who.int/news-room/fact-sheets/detail/road-traffic-injuries - Helmet — Britannica
https://www.britannica.com/technology/helmet
📅 Last Updated: July 07, 2026 | Topic: How to Fix Minor Helmet Scratches | Content verified for accuracy and freshness.