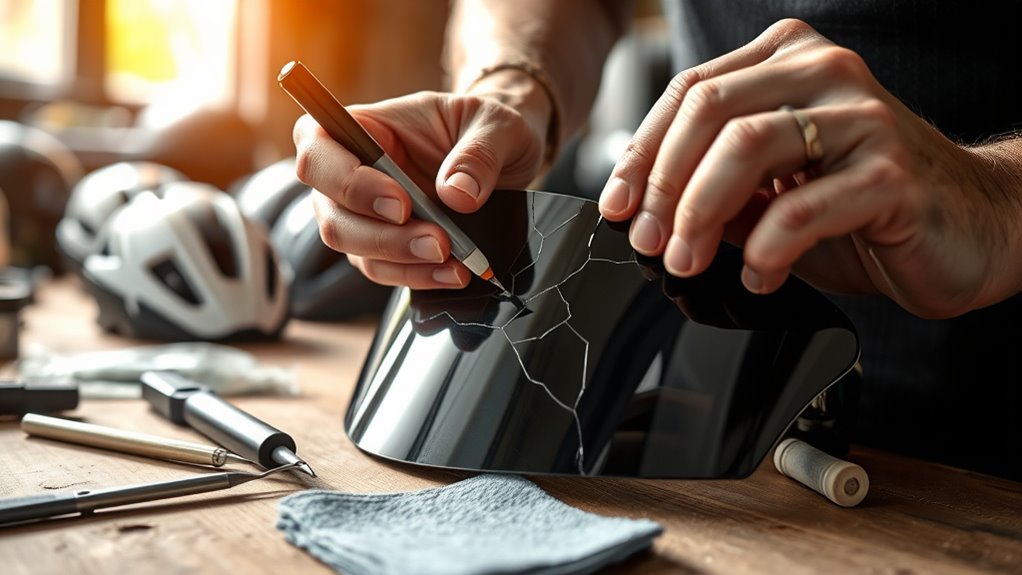
Repairing Cracked Helmet Visors: A Step-by-Step Guide
Repairing Cracked Helmet Visors: A Step-by-Step Guide
Repairing a cracked helmet visor can restore visibility, but only if the damage is minor and the visor material is compatible with the repair method. If the crack threatens structural integrity, visor replacement is the safest option and the only approach aligned with most helmet-safety guidance.
How to Decide Whether a Cracked Visor Should Be Repaired or Replaced
Start with a safety-first decision: many cracked motorcycle, bicycle, and work-helmet visors should not be repaired because adhesion may not restore impact resistance. The key difference is whether the visor’s cracking affects the visor’s strength and optical clarity, which directly impacts protection and ride safety.
Inspect the crack location, depth, and severity
A visor crack is defined as a fracture line that compromises either the optical surface, the load-bearing layer, or both. Begin inspection in bright, indirect lighting and check from multiple angles.
- Size: Note the longest dimension of the crack (for example, under 10 mm versus longer than 25 mm).
- Location: Cracks near the mounting points, hinges, or near the field of view are higher risk.
- Depth: Surface scoring is less severe than fractures that show a visible step or gap.
- Optical distortion: Look for waviness or refraction effects when holding the visor against a light source.
Use practical safety thresholds
General industry consensus favors replacement when the visor is significantly compromised because adhesives typically restore cosmetic appearance more reliably than impact performance. Many helmet standards and manufacturer manuals emphasize that protective elements must be maintained to preserve rated performance.
- If the visor is deeply fractured, has multiple crack lines, or shows distortion, replace it rather than repair.
- If the crack is small, superficial, and does not distort the viewing area, repair may be reasonable as a temporary-to-moderate fix.
- If the visor is part of an approved face shield system (common in industrial head protection), follow the manufacturer’s replacement guidance.
Quick QA: Is a repaired visor “as safe as new”?
No. A repaired visor is not defined as equivalent to an OEM (Original Equipment Manufacturer) visor in terms of impact resistance. Even high-quality adhesives and careful curing rarely replicate factory lamination, heat-treatment, or certification testing.
Identify Your Visor Material Before You Choose Any Product
Visor repair depends on material compatibility, because polycarbonate, acrylic (PMMA), and coated visor surfaces respond differently to cleaning agents, solvents, and adhesives. The key difference is that some adhesives bond strongly to polycarbonate while acrylic can craze or crack if you use the wrong chemistry.
Common visor materials and what they mean for repair
Material identification is defined as determining the visor polymer type (for example, polycarbonate or acrylic) from markings, packaging, or manufacturer documentation. If you cannot confirm the material, assume the risk is too high and replace the visor.
- Polycarbonate: Often used for high-impact head protection; generally repairable with compatible clear epoxies, but coatings must be protected.
- Acrylic (PMMA): Can be clearer and more rigid, but is more prone to surface cracking and solvent-related damage.
- Coated or treated visors: Anti-scratch and anti-fog coatings may be sensitive; avoid harsh cleaners and solvents.
Quick QA: How can I confirm polycarbonate vs acrylic?
Check the visor edge for molded markings, read the helmet manufacturer’s manual, and look for labels on the visor assembly. When documentation is missing, contact the manufacturer or use a replacement—guessing is not worth risking visibility and safety.
Step 1: Clean the Visor So the Adhesive Can Bond
Before repairing, clean the visor thoroughly to remove oils, road grime, and microscopic contamination that prevent strong bonding. Adhesion is defined as the chemical and mechanical attraction between the adhesive and the substrate surface.
What to use and what to avoid
Use mild, non-abrasive cleaning methods and avoid products that can attack polymer surfaces or strip coatings.
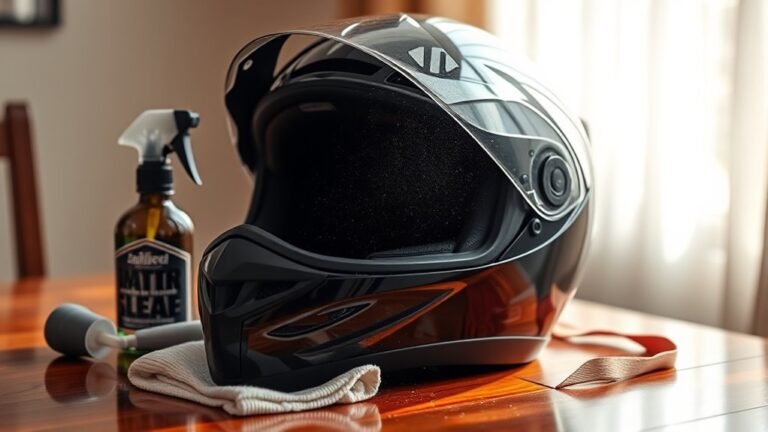
- Use: Mild soap diluted in water, or a manufacturer-recommended visor cleaner.
- Use a microfiber cloth: A lint-free microfiber reduces the chance of micro-scratches.
- Avoid: Acetone, strong alcohol blends, aggressive solvents, and abrasive pads.
Cleaning method that reduces haze and scratches
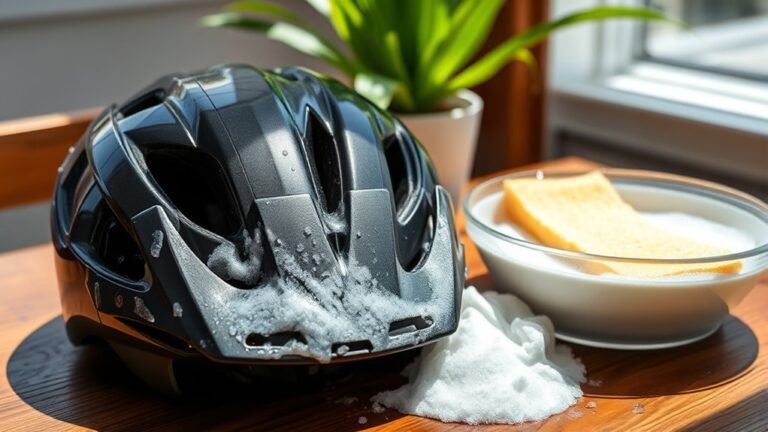
- Rinse the visor with clean water to remove grit.
- Wash with mild soap using gentle, circular motions.
- Rinse until no residue remains.
- Dry with clean microfiber and allow full air-drying for several minutes.
Quick QA: Can I clean with alcohol to speed things up?
Not recommended unless the product is explicitly approved for your visor material and coatings. Alcohol can soften or haze some polymers and coatings, reducing clarity and potentially weakening the bond.
Step 2: Prepare the Crack Area for a Reliable Repair
Preparation is where most DIY repairs succeed or fail, because the adhesive needs a clean, well-prepared crack line to fill and stabilize. The key difference is that smoothing the crack edges improves surface contact and reduces visible “voids.”
Lightly smooth rough edges (only if appropriate)
For minor surface cracks, you may gently deburr or feather the edges using fine-grit sandpaper. For deep cracks, visible gaps, or distortion, replacement is usually the safer path.
- Fine grit: Use around 800 to 1500 grit for controlled smoothing.
- Gentle pressure: Avoid pressing hard, which can worsen cracks.
- Clean after sanding: Remove dust with a microfiber and a final rinse if needed.
Optional reinforcement for larger gaps
If the crack is wide enough to leave a noticeable gap, some repair approaches incorporate a fiberglass mesh or reinforcement strip. Reinforcement is defined as a material layer added to improve stability across a fracture line, but it cannot restore factory-rated impact performance.
Step 3: Choose the Right Adhesive and Cure System
The right adhesive is critical because the wrong chemistry can cause whitening, crazing, or long-term bond failure. Adhesive selection is defined as matching the adhesive’s viscosity, curing method, and chemical compatibility to the visor polymer and coating.
Recommended types for clear visor repairs
Look for clear, optical-grade epoxies or visor-specific adhesives that cure into a transparent solid. For best results, select products designed for clear plastics and specify compatibility for polycarbonate or acrylic.
- Clear epoxy: Common choice for stable, transparent repairs when fully cured.
- Visor-specific adhesive: Often formulated for a particular helmet/visor system.
Typical Clarity & Working Time by Adhesive Chemistry (for Clear Visor Repairs)
| # | Adhesive chemistry | Best for visor | Functional hardness* | Cure control | Clarity after cure |
|---|---|---|---|---|---|
| 1 | Two-part clear epoxy (transparent) | Polycarbonate & PMMA (when labeled compatible) | 4–24 hours | Room-temp staged cure | ★★★★☆ |
| 2 | Visor-specific UV-curing adhesive (clear) | Polycarbonate systems with UV guidance | Minutes to 2 hours | Controlled UV exposure | ★★★★☆ |
| 3 | Two-part optical-grade epoxy putty | Polycarbonate (small gap bridging) | 6–24 hours | Mix ratio + time at room temp | ★★★☆☆ |
| 4 | Cyanoacrylate (CA) gel (clear) | Small chips on PMMA (only if compatible) | 1–2 hours | Risk of brittle bond & fogging if excess | ★★☆☆☆ |
| 5 | Acrylic cement (solvent-based) | PMMA only (very chemistry-specific) | Minutes to 2 hours | Solvent can craze acrylic if misused | ★★★☆☆ |
| 6 | Hot-melt / thermoplastic patch | Only when visor manufacturer approves | Immediate set; 1–24 hours to stabilize | Heat can warp thin visor sections | ★★☆☆☆ |
| 7 | Two-part polyester resin (clear or semi-clear) | Generally not recommended for visor optics | 4–16 hours | Higher risk of yellowing/optical haze | ★☆☆☆☆ |
*“Functional hardness” is a practical guideline for when the repair is typically rigid enough to handle carefully; full strength still depends on the adhesive’s label cure schedule and ambient conditions.
Curing time matters more than “feel”
Most epoxies require a staged cure. For example, many clear epoxies cure to functional hardness in 4 to 24 hours, then continue to strengthen for several more hours or days depending on temperature. Follow the manufacturer’s curing specifications exactly.
Quick QA: Do I need heat to cure epoxy faster?
Only if the product explicitly states safe temperature limits for your visor material. Heat can warp thin visor sections, degrade coatings, or create uneven curing that distorts optics.
Step 4: Apply the Repair Adhesive Correctly
Apply the adhesive with precision so it fills the crack without creating thick ridges that distort vision. The key difference is avoiding bubbles and excess adhesive, because bubbles and ridges create optical distortions and light scattering.
Best practices for application
- Use a fine applicator: A small brush, syringe tip, or precision applicator helps control flow.
- Fill, don’t mound: Apply enough to bridge and fill the crack line, but avoid overflow.
- Remove excess immediately: Wipe any squeeze-out carefully with a clean microfiber before it cures.
- Protect the surrounding surface: If needed, use a removable barrier around the crack area to keep adhesive off the optical surface.
Alignment and clamping strategy
If the crack has opened slightly, gentle alignment prevents a “step” that will distort the view. Use temporary clamps or a strap with padding, applying only light pressure.
- Prevent flexing: do not clamp so hard that you bend the visor.
- Minimize stress: excessive force can widen the crack or create new fractures.
Step 5: Cure, Finish, and Restore Optical Clarity
Curing is defined as the chemical process where the adhesive hardens into a stable, transparent solid. Full cure and careful finishing determine whether the repair remains clear and durable.
Cure checklist
- Keep the visor flat on a clean surface.
- Maintain recommended temperature and humidity from the adhesive label.
- Do not disturb the repair during the first curing phase.
After-cure finishing (only if needed)
If the repair leaves a slight ridge, you may carefully polish or lightly sand using fine grades, then polish to clarity. Start only after full cure.
- Use very fine sandpaper: Commonly 2000 to 3000 grit for controlled leveling.
- Final polish: Use a plastic polish safe for your visor material and coatings.
Quick QA: Will sanding remove the anti-scratch coating?
Often yes. Many visors have anti-scratch layers; sanding can thin or remove them, increasing future scuffing. If your visor has a visible coating, consider replacing instead of sanding, or choose a polish method that minimizes coating removal.
Testing Your Repaired Visor Before Use
After the repair is cured, test for optical distortion and adhesion integrity before riding or operating equipment. The key difference is that surface appearance alone is not a safe indicator; you must verify clarity and check for movement along the crack.
Optical and mechanical checks
- Visual clarity test: View high-contrast text or lights through the visor at riding distance.
- Light refraction check: Hold against a bright background to see whether the repair area “warps” light.
- Gentle pressure test: Apply light hand pressure around the crack line. No cracking sounds, no lifting, and no spreading should occur.
Decide on immediate replacement if you see any issues
If you notice haze, a visible ridge, spreading cracks, or any loss of structural stability, stop using the visor. Protective headgear is judged by performance under impact, and a compromised visor is a risk factor.
Common Mistakes to Avoid When Repairing Helmet Visors
Most failures come from contaminated surfaces, incompatible adhesives, and rushed curing. The key difference is that high-quality preparation and curing consistency are what keep the repair transparent and stable.
- Skipping cleaning: Oils and dust prevent strong bonding.
- Using the wrong chemical: Solvents can damage polymer clarity and coatings.
- Over-clamping: Too much pressure can warp the visor.
- Ignoring full cure: Flexing too soon can break the bond.
- Repairing safety-critical cracks: Structural cracks near mount points or major fracture networks should be replaced.
FAQ: Helmet Visor Repair Questions People Ask Most
Can I repair a cracked visor that has already started spidering?
If the crack pattern is spreading, that is defined as ongoing fracture propagation. Replacement is strongly recommended because adhesives rarely halt stress fractures safely.
What about scratches around the crack?
Scratches are defined as surface abrasions, not structural fractures, but they can still reduce visibility. Light polishing may help after full cure, but sanding may damage coatings.
How long should I wait before putting the visor back on?
Plan around the adhesive’s labeled cure schedule. As a general rule, many clear epoxies reach functional hardness in 4 to 24 hours, but full strength can take longer; do not reinstall until the product is fully cured.
Is a repair kit worth it?
A visor repair kit can be worth it when it includes material-compatible adhesive and clear application instructions. If the kit does not specify compatibility with polycarbonate or acrylic and your visor’s coating, replacement may be the safer approach.
When to Replace Instead of Repair
Replace the visor when crack severity, distortion, or safety critical placement cannot be confidently resolved with adhesive repair. The key difference is that replacement preserves manufacturer-rated construction and optical performance, which repair processes cannot reliably replicate.
- Multiple cracks or a long fracture line beyond minor surface damage.
- Visible distortion that changes how lights or text appear.
- Cracks near mounting hardware or structural connection points.
- Any uncertainty about material compatibility or coating integrity.
Professional Recommendation and Safety Notes
For helmets and face shields used in high-risk environments, consult the helmet manufacturer and follow the manual for approved visor parts and maintenance procedures. Expert consensus is that protective gear should be maintained to preserve rated performance; when that is doubtful, replacement is the responsible choice.
If you tell me your helmet brand and visor material (polycarbonate vs acrylic), along with where the crack is located and its approximate length in millimeters, I can recommend whether repair is likely feasible and what adhesive type to look for.
Frequently Asked Questions: Repairing Cracked Helmet Visors
Can a cracked helmet visor be repaired, or should I replace it?
It depends on the visor’s location, the size of the crack, and the visor material. Small surface scratches can sometimes be polished (for certain visor coatings), but a visible crack usually indicates compromised strength and may spread under impact, heat, or vibration.
In most safety-critical cases, replacement is the safest and most reliable option—especially if the crack affects the viewing area, appears to run across structural zones, or you’ve had an impact. If the visor includes an anti-scratch or anti-fog coating, DIY repair can also leave weak spots or optical distortions.
As a rule of thumb: if the crack penetrates through the visor, grows when flexed, or reduces clarity—replace. Only consider repair steps as a short-term measure when the manufacturer allows it and the damage is minor and non-structural.
What tools and materials do I need to repair a cracked helmet visor?
For a careful, step-by-step repair, you’ll typically need:
- Cleaning supplies: mild soap, clean microfiber cloths, and isopropyl alcohol (for residue removal—only if compatible with your visor coating).
- Removal/handling tools: gloves, non-marring tools for removing the visor (as appropriate), and small containers to organize screws or clips.
- Inspection tools: good lighting and a magnifier or phone camera for close inspection.
- Filling/repair supplies (if appropriate): visor-safe clear adhesive or epoxy designed for polycarbonate/acrylic (match the visor material), and small applicators (like micro spatulas) or syringe tips.
- Clamping/support: painter’s tape and gentle supports to keep the crack aligned while curing (avoid excessive pressure).
- Optional finishing: a visor-safe polish/finish only if the manufacturer recommends it—do not polish blindly if you have an anti-scratch coating.
- Curing time tools: a stable, dust-free environment and a timer to ensure full cure.
The most important “tool” is choosing the correct repair material for your visor type (many are polycarbonate, some are acrylic). If you’re unsure, check your helmet/visor manual or manufacturer guidance before starting.
How do I tell whether my visor is polycarbonate or acrylic before repair?
Identifying visor material helps you select an adhesive that bonds correctly without damaging the optics or weakening the visor. The most reliable methods are:
- Check the helmet/visor markings: look for labels near the mounting area, packaging, or on the inside edge of the visor.
- Consult the manufacturer’s documentation: your helmet model’s manual or visor product page often lists compatible materials.
- Ask for model-specific guidance: customer support can confirm the visor type and whether repairs are approved.
Avoid “at-home” tests (like bending, burning, or harsh chemical tests). They can worsen the crack, damage coatings (anti-fog/anti-scratch), or create additional stress lines.
If you can’t confirm the material with reasonable certainty, replacement is strongly recommended over improvised adhesives.
What’s the correct step-by-step process for repairing a crack in a helmet visor?
Below is a careful, general process. Follow your visor manufacturer’s instructions if they differ, and stop if you notice spreading cracks, significant distortion, or worsening clarity.
- Safety first: remove the visor if your helmet system allows it. Wear gloves and avoid applying pressure directly over the crack.
- Inspect the damage: in bright light, determine the crack length, whether it crosses structural/viewing zones, and if there are any chips or missing pieces.
- Clean thoroughly: wash with mild soap and water, then dry with a microfiber cloth. Remove residue using isopropyl alcohol only if it’s compatible with your visor coatings; let it fully evaporate.
- Dry completely: humidity can prevent proper curing. Ensure the visor is at room temperature and fully dry before any adhesive.
- Align the crack: gently bring the crack edges into their original position (often using careful tape placement). Do not force the visor flat if it fights the alignment.
- Apply the repair material: use a visor-safe clear adhesive designed for the visor material. Apply sparingly along the crack line so it can wick into the damage without flooding the surface.
- Control the surface: wipe away excess immediately with a clean applicator. Keep adhesive away from areas where it will interfere with the optical surface or ventilation channels.
- Clamp/support lightly: use tape or gentle supports to hold alignment while curing. Avoid heavy pressure that can create new stress.
- Cure fully: allow the adhesive to cure for the full recommended time in a dust-free, temperature-stable environment. Don’t rush “tack time” expectations.
- Inspect optics after curing: check clarity under different angles and lighting. Look for haze, bubbles, or sharp edges. If the view is distorted or the crack is still growing, replace the visor.
- Reinstall and test safely: reinstall carefully, then test fit and function. Avoid riding until you’re confident the repair is stable and optically acceptable.
If the visor is part of a structural safety system (or the crack is in a critical area), replacement is typically the correct long-term fix.
How long will a repaired visor last, and how can I test if it’s safe?
A properly executed repair can restore clarity and help prevent the crack from spreading, but it cannot fully replicate the original visor’s manufacturing strength and impact performance—especially on a surface that must withstand high-energy forces.
How long it lasts: varies widely based on crack size, location, visor material, adhesive quality, curing conditions, and exposure to heat and UV. Many repairs are best treated as a temporary solution until a replacement is obtained.
Safety checks you can do:
- Visual stability: verify the crack does not re-open or “grow” around the repair over time.
- Optical inspection: look for distortion, haze, bubbles, or scratching over the repaired region. If visibility is compromised, replace.
- Temperature/handling sensitivity: after curing, gently check for looseness or movement along the repair area. Avoid flexing or pressing—visors should not flex aggressively at the crack line.
- Coating compatibility: if the visor has anti-scratch/anti-fog coatings, confirm the repair didn’t damage the coating (which may worsen haze later).
- Real-world caution: if you’ve had a crash/impact or the visor is compromised, don’t rely on a repair—replace the visor.
If you’re uncertain about safety, replacement is the recommended option. Helmet components are designed to protect you under extreme conditions, and a visor’s performance matters.
References
- [B] The bicycling guide to complete bicycle maintenance & repair: for road & mountain bikes Google Scholar
https://books.google.com/books?hl=en&lr=&id=bxxZDwAAQBAJ&oi=fnd&pg=PA55&dq=Repairing+Cracked+Helmet+Visors:+A+Step-by-Step+Guide&ots=10qKqnRMsF&sig=R6-XpMQdsl7iz9Mo4VIi8Yg5PCc - [B] FLORIDA Motorcycle DMV EXAM PREP 2026/2027: A Complete Rider’s Guide to Mastering the Road wi… Google Scholar
https://books.google.com/books?hl=en&lr=&id=tCnbEQAAQBAJ&oi=fnd&pg=PT9&dq=Repairing+Cracked+Helmet+Visors:+A+Step-by-Step+Guide&ots=iGjZix2gAY&sig=Lw2VO_CDt_uZ43v5unz5L_C4Bmg - Adaptive Equipment to Enhance Older Driver Performance: A Guidebook Google Scholar
https://rosap.ntl.bts.gov/view/dot/60432 - [B] The screenwriter’s workbook: Exercises and step-by-step instructions for creating a successfu… Google Scholar
https://books.google.com/books?hl=en&lr=&id=JMjS7p1eVjAC&oi=fnd&pg=PA1&dq=Repairing+Cracked+Helmet+Visors:+A+Step-by-Step+Guide&ots=1V8ilcTR4v&sig=fz47IWxhYrDZt6nmg6ws06nsa6Q - [B] Turnaround, shutdown and outage management: Effective planning and step-by-step execution of … Google Scholar
https://books.google.com/books?hl=en&lr=&id=MBaDccULdk4C&oi=fnd&pg=PP1&dq=Repairing+Cracked+Helmet+Visors:+A+Step-by-Step+Guide&ots=nvXIOdLzVy&sig=G3BYTmWtiE54ba3ecWPMWr7uEtk
📅 Last Updated: July 06, 2026 | Topic: Repairing Cracked Helmet Visors: A Step-by-Step Guide | Content verified for accuracy and freshness.