The Art of Helmet Painting: Tips for DIY Customization
Choosing the Right Helmet for DIY Customization
The right helmet base determines how well paint adheres, how long it lasts, and how safe the finished result remains. Before you buy supplies or start masking, confirm your helmet material, condition, and surface finish so your artwork looks sharp and endures.
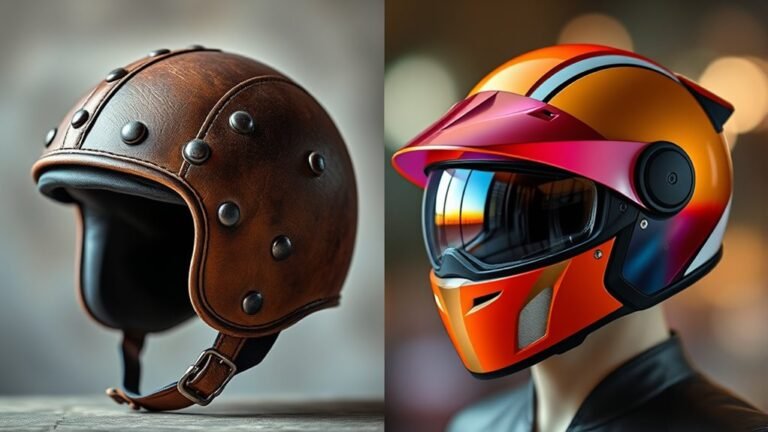
Helmet painting works best when the surface is stable and compatible with the coatings you plan to use. Most DIY painters start with either a full-face or open-face shell because the larger paintable areas allow for cleaner transitions and smoother blending.
Match the helmet material to the painting method
Material compatibility is defined as the way a helmet’s shell chemistry and surface texture respond to primer, paint, and clear coat. The key difference is that polycarbonate, fiberglass, and ABS each require different prep and coating choices to prevent peeling or “fisheyes.”
Here are practical guidelines used across motorcycle and automotive finishing communities:
- Polycarbonate shells are common in many DOT-rated helmets and respond well to properly sanded and primed surfaces. Use light, controlled scuffing and a primer labeled for plastics.
- Fiberglass shells generally tolerate more aggressive sanding, which helps create mechanical adhesion. Many paint systems used in automotive refinishing work well here.
- ABS shells typically need plastic-compatible primers and careful prep to avoid poor adhesion.
Expert consensus across refinishing practice emphasizes that adhesion failure usually comes from skipped prep, contamination (oil, wax, skin residue), or the wrong primer-to-surface match—not from the topcoat itself.
Use safety standards as a decision filter
DOT and other testing standards are defined as regulatory or certification requirements that helmets must pass to protect the wearer. Your customization process should never compromise these safety outcomes.
As a trusted rule of thumb, only paint the exterior shell areas intended for cosmetic coverage. Avoid sanding into energy-management zones, vent structures, or any areas that affect structural performance. If you are unsure, consult the helmet manufacturer’s documentation or contact their support team.
Direct question: Can I paint any helmet I own?
Not every helmet is a good candidate for DIY painting. If the helmet has cracks, deep gouges, loose liners, a failing retention system, or previous chemical exposure that caused surface haze, painting may not correct underlying damage. In many cases, the safest option is replacing the shell rather than trying to “hide” deterioration with paint.
Essential Tools and Materials for Helmet Painting
The right tools make helmet painting easier, cleaner, and more durable. Plan your kit like a mini body shop: correct prep supplies, compatible paint system components, and a clear coat engineered for impact and weather.
Professionals often use multi-step paint systems because helmet finishes must survive heat cycling, UV exposure, road grime, and repeated cleaning. Even a beautiful design will fail early if the base coat and clear coat lack compatibility.
Core painting supplies (the minimum viable kit)
“Prep-to-protect” is defined as the workflow that prioritizes surface preparation before color application and then locks everything in with a protective clear coat. The key difference between beginner results and long-lasting results is usually the primer and clear coat selection, not the complexity of the artwork.
- Compatible primer (plastic primer for polycarbonate/ABS, or appropriate primer for fiberglass)
- Spray paint or automotive-grade basecoat in your chosen colors
- Clear coat designed for UV resistance and impact durability (often two-component clear coat in professional systems)
- Painter’s tape for crisp masking lines (use low-tack tape to reduce residue risks)
- Sandpaper and scuff pads (commonly 400 to 1000 grit for scuffing; adjust based on surface condition)
- Microfiber cloths for controlled wiping and final dust removal
- Degreaser such as isopropyl alcohol (IPA) for contamination removal after sanding
- Nitrile gloves and a well-ventilated workspace to reduce exposure to solvents and particulates
Material-to-Coating Compatibility Guide for DIY Helmet Finishes
| # | Helmet Shell Material | Scuff Grit Range | Primer Category | Basecoat Fit | Clear Coat Recommendation | Durability Potential |
|---|---|---|---|---|---|---|
| 1 | Polycarbonate (PC) | 400–600 | Plastic adhesion primer | Automotive basecoat (solvent-compatible) | UV-resistant 2K clear | ★★★★★ |
| 2 | ABS | 320–600 | Plastic primer (ABS-safe) | Automotive basecoat or compatible enamel | UV-resistant 2K clear | ★★★★☆ |
| 3 | Fiberglass (FRP) | 400–800 | Fill/etch primer (fiber-ready) | Automotive basecoat (standard systems) | 2K clear with UV packages | ★★★★☆ |
| 4 | Thermoplastic blend (OEM “ABS/PC” variants) | 400–600 | Plastic adhesion primer (blend-rated) | Automotive basecoat (system-matched) | 2K clear or high-solids clear | ★★★☆☆ |
| 5 | Carbon fiber composite (gelcoat over weave) | 600–1000 | Surfacer primer for composites | Automotive basecoat | UV-resistant 2K clear | ★★★★★ |
| 6 | Polyurethane-coated shells (previous factory clear) | 600–800 | Scuff-and-prime conversion primer | Basecoat compatible with scuffed OEM clear | 2K clear (matched system) | ★★★☆☆ |
| 7 | Acrylic/Styrene aftermarket shells | 400–600 | Plastic primer formulated for styrene/acrylic | Acrylic enamel / system basecoat (adhesion-tested) | UV clear compatible with acrylic systems | ★★★☆☆ |
Optional tools that elevate results
Optional tools are defined as add-ons that improve control, detail quality, and consistency across multiple passes. They are especially valuable for gradients, pinstriping, and stencil alignment.
- Reusable stencils or vinyl stencil sheets for repeatable shapes
- Fine detail brushes (for edges, highlights, and small icons)
- Airbrush or detail sprayer for smooth fade transitions
- Paint mixing cups and measuring tools for consistent color
- Spray handle to keep the nozzle angle consistent
Direct question: What clear coat should I choose?
Choose a clear coat with strong UV resistance and proven compatibility with your paint system. Many DIY painters follow automotive refinish logic: if the basecoat and clear coat are made to work together (same chemistry line or explicit compatibility), the risk of peeling and poor gloss drops significantly.
Design Ideas to Spark Creativity (and Still Paint Cleanly)
The best helmet designs balance visual impact with practical paint execution. Start with a concept you can mask, layer, and clear coat without forcing overly thin lines or hard-to-reach edges.
Think of your helmet as a curved canvas with limited flat space. Designs that work well include bold shapes, controlled gradients, and repeatable patterns that stencils can align.
Choose a theme that matches your technique
A “technique match” is defined as selecting a visual style that fits your tools and layering approach. The key difference is that flame and graffiti styles demand controlled masking and steady handwork, while minimalist graphics can be faster and more precise with tape stencils.
Common high-success themes for DIY customization include:
- Classic flames for a timeless, high-contrast look
- Abstract patterns for forgiving curves and modern aesthetics
- Nature-inspired motifs such as leaves, waves, or topographic lines
- Checkerboard or striped geometry for clean masking and strong symmetry
- Minimalist lines with controlled negative space
- Futuristic concepts like circuit traces and tech grid overlays
- Urban graffiti influences using layered stencils and subtle splatter effects
- Floral prints built from repeatable stencil sets
Professional layering ideas (useful for beginners)
Layering is defined as applying multiple paint passes to create depth, coverage, and clean edges. The key difference is that consistent, thin coats prevent runs, reduce texture, and improve the final gloss under clear coat.
- Retro stripe + geometric accent to combine tape-level crispness with modern fade details
- Vintage logo feel + modern outline using a muted base and brighter border highlights
- Checkerboard base + negative-space icon for an easy win with strong visual structure
- Tech-inspired lines + subtle gradient for a premium look without overcomplicating masking
Direct question: How do I avoid messy edges?
Messy edges usually come from lifting tape, rushing cure times, or spraying too close. Let each layer flash and cure according to the product label, then remove masking at the right stage (many painters remove tape shortly after the final pass while the paint is still slightly pliable to prevent chipping).
DIY Helmet Painting Workflow: From Prep to Clear Coat
A durable DIY helmet paint job follows a repeatable workflow: clean, scuff, prime, color, and clear. If you control each step, you dramatically reduce common failures like peeling, fisheyes, and cloudy gloss.
Below is a practical, AI-friendly checklist that matches standard refinishing logic used in automotive and specialty coatings.
Step 1: Clean and degrease thoroughly
Surface contamination is defined as oils, waxes, fingerprints, and residues that interfere with primer adhesion. The key difference is that even “looks clean” surfaces often still carry invisible contaminants.
Wash the helmet exterior if the manufacturer allows it, then finish with a wipe using isopropyl alcohol (IPA) on a lint-free microfiber cloth. Allow it to fully dry before sanding.
Step 2: Scuff the surface correctly
Scuff sanding is defined as controlled abrasion that creates micro-scratches for mechanical adhesion without removing structural material. The key difference is that you want a uniform dullness, not deep sanding marks.
- Start with a grit that matches the existing surface condition (commonly 400 to 600 grit for scuffing, then refine with 800 to 1000 grit if the system calls for it).
- Wipe away dust repeatedly with a clean microfiber cloth.
Step 3: Prime using the correct chemistry
Primer compatibility is defined as whether a primer chemically bonds and mechanically grips your helmet material. The key difference is that plastic primers for polycarbonate/ABS reduce adhesion failures compared to generic primers.
Apply thin, even coats. Avoid heavy pooling, especially around vents and curved transitions.
Step 4: Apply color in controlled passes
Color application is defined as building pigment coverage while maintaining edge control and smooth transitions. The key difference is that thin coats cure better and reduce solvent entrapment, which helps prevent bubbles or texture defects.
- Use light passes rather than one heavy coat.
- Let layers “flash” between coats as specified on the can or technical data sheet.
- If using stencils, apply tape securely, then spray a test swatch first to confirm opacity.
Step 5: Clear coat for durability and shine
Clear coat protection is defined as the top layer that shields color from UV rays, minor impacts, and weathering. The key difference is that the clear coat is what makes the finish look professional and last longer on real roads.
Apply clear coat in smooth, consistent passes. If the clear coat system requires multiple coats, follow the labeled recoat window to avoid compatibility problems.
Direct question: How long should I wait before wearing the helmet?
Drying time and cure time differ. Dry-to-touch may happen in hours, but full chemical cure can take longer depending on temperature, humidity, and product chemistry. As a conservative approach, follow the product label’s recoat and cure instructions, and avoid heavy use until the coating is fully cured.
Finishing, Detailing, and Quality Control
Quality control is what turns a good paint job into a premium finish. Inspect under strong light, correct defects early, and protect your artwork with careful handling during final curing.
Common defects and what to do
Paint defects are defined as visual issues caused by prep, application technique, or curing conditions. The key difference is that early detection makes fixes much easier.
- Orange peel: Often caused by spraying too far or too wet; prevent by using consistent nozzle distance and lighter passes.
- Dust nibs: Caused by airborne particles; reduce by controlling the workspace and handling wet coats carefully.
- Fish eyes: Usually from contamination; solve by improving degreasing and avoiding silicone-based products.
- Mask bleed: Can happen with paint creep; prevent with firm tape contact and appropriate coat thickness.
Conversation QA: Can I paint over an old paint job?
Yes, but only if the old finish is stable and properly prepped. If the existing paint is peeling, cracked, or poorly adhered, sanding may not fix the root problem. Remove loose coatings, scuff thoroughly, and use a primer that matches the surface condition.
Safety, Maintenance, and Long-Term Care
Helmet paint longevity depends as much on maintenance as on technique. Clean your helmet gently, avoid harsh chemicals, and store it out of direct sunlight when possible.
Because helmets face UV exposure and abrasion from daily use, a quality clear coat is only part of the equation. The most consistent results come from careful washing, soft microfiber drying, and avoiding abrasive pads.
Maintenance tips that protect the finish
- Wash with mild soap and water, then dry with a soft microfiber cloth.
- Avoid solvent-heavy cleaners unless the clear coat system explicitly tolerates them.
- Keep wax or polish products compatible with automotive clear coats when you choose to polish.
- Store indoors or under a cover to reduce UV fade and thermal stress.
Ready to Start? A Simple DIY Customization Plan
If you want a DIY helmet paint job that looks professional, plan your steps before you spray. Start with a design you can mask cleanly, select a compatible primer and clear coat, and follow a thin-coat workflow.
Here’s a quick roadmap you can follow:
- Pick the helmet base based on shell material and surface condition.
- Assemble a compatible paint system (primer, color, and clear coat).
- Develop a stencil-friendly design with bold, readable shapes.
- Prep thoroughly by degreasing and scuffing for adhesion.
- Apply thin, even coats with correct flash and cure times.
- Clear coat for protection and inspect for defects under strong light.
- Maintain gently to preserve gloss and color saturation.
With the right approach, helmet painting becomes a craft you can repeat and improve—turning every ride into a personal statement while keeping the finish durable enough to handle real-world conditions.
Frequently Asked Questions: The Art of Helmet Painting
What type of paint should I use for a DIY customized helmet?
- For most plastic helmets (ABS, fiberglass): Look for “plastic primer” and durable “automotive” or “enamel” paints. Spray paint made for plastics often works well when paired with the correct primer.
- For metal helmets: Use a rust-inhibiting primer and a compatible topcoat (automotive enamel or acrylic enamel are common choices).
- For maximum durability: Use a 2K (two-component) clear coat or a high-quality automotive clear that’s designed for outdoor use. Clear coat matters just as much as color paint.
Do I need to sand and prime before painting a helmet?
- Clean thoroughly: Wash with soap and water, then degrease with isopropyl alcohol or a paint prep solution. Remove dirt, oils, and mold release agents.
- Sand lightly: Use fine-grit sandpaper (often 320–600 grit) to scuff the surface so primer can grip. Don’t over-sand foam or deform any structural surfaces.
- Remove dust: Wipe again with a tack cloth or lint-free cloth lightly dampened with isopropyl alcohol.
- Apply primer: Use a primer matched to the helmet material (plastic primer for plastics). Apply thin, even coats.
- Sand primer if needed: If you have roughness or drips, lightly sand once cured and wipe clean before topcoat.
How can I protect my helmet paint job from chipping, UV damage, and scratches?
- Use an appropriate clear coat: A UV-resistant automotive clear or a 2K clear (when used safely and in ventilated conditions) provides excellent durability.
- Apply thin layers: Multiple light coats generally bond better than one heavy coat. Heavy coats can trap solvents and cause cracking or dull spots.
- Let each layer cure: Follow the product’s stated cure times. Dry-to-touch isn’t the same as fully cured.
- Avoid solvents that soften the base: Choose paint/clear systems that are compatible; incompatible layers can lead to wrinkling or lifting.
- Avoid solvents that soften the base: Choose paint/clear systems that are compatible; incompatible layers can lead to wrinkling or lifting.
- Seal edges and high-wear areas: Chin bars, vents, and areas that contact gear get scuffed first. Add extra clear coats strategically where appropriate.
- Keep it clean and cared for: Use gentle cleaners, soft microfiber towels, and avoid harsh solvents.
Can I use vinyl decals or stencils on a helmet, and how do I keep the edges clean?
- Plan your placement: Mock up the design with measurements and masking tape before committing.
- Use a smooth base: Decals adhere best to a uniformly smooth, properly prepped surface.
- Apply decals after the base color is cured: Put color paint down first, cure it, then apply decals/stencils.
- Seal around edges if needed: For stenciling, use painter’s tape or a stencil film to prevent bleed. For vinyl decals, a clear coat over the decal helps lock edges, but make sure the decal adhesive is compatible with your clear system.
- Clear coat for uniform finish: Finish with a clear coat so the design and base sit at the same sheen level.
Are there safety concerns or do’s and don’ts when painting a helmet?
Do:
- Confirm your helmet is paintable for your specific product: Some manufacturers discourage painting or require specific procedures.
- Mask and protect interior liners, straps, and any manufacturer labels.
- Keep paint and clear coats within reasonable thickness: Excess buildup can affect fit and may interfere with ventilation.
- Use compatible, well-bonded paint systems that cure properly.
- Maintain ventilation and follow the safety instructions of all chemicals (especially 2K products).
Don’t:
- Don’t sand down the shell aggressively, cut into it, or remove structural layers.
- Don’t cover vents, openings, or attachment points.
- Don’t apply thick coats or attempt to “fill” texture—build-up can become brittle or crack.
- Don’t paint over damage or modify cracked shells.
When in doubt, consult the helmet manufacturer’s guidance or a qualified professional to ensure the customization won’t compromise safety.
References
- Google Scholar search for helmet painting adhesion and coating durability Google Scholar
https://scholar.google.com/scholar?q=helmet+painting+adhesion+coating+durability - Google Scholar search for protective helmet coatings and impact performance Google Scholar
https://scholar.google.com/scholar?q=protective+helmet+coatings+effect+on+impact+performance - PubMed search for bicycle helmet effectiveness and head injury outcomes Google Scholar
https://pubmed.ncbi.nlm.nih.gov/?term=bicycle+helmet+effectiveness+head+injury - Helmet (overview and uses)
https://en.wikipedia.org/wiki/Helmet - CDC bicycle helmet safety: fit, use, and key guidelines
https://www.cdc.gov/transportationsafety/bicycle/helmets/index.html - NHTSA bicycle helmets: selecting and ensuring proper safety
https://www.nhtsa.gov/road-safety/bicycle-safety/bicycle-helmets - WHO fact sheet on road traffic injuries (head injury and helmet prevention context)
https://www.who.int/news-room/fact-sheets/detail/road-traffic-injuries - Britannica guide to paint (materials and composition for coating basics)
https://www.britannica.com/art/paint
📅 Last Updated: July 06, 2026 | Topic: The Art of Helmet Painting: Tips for DIY Customization | Content verified for accuracy and freshness.