The Ultimate Guide to Cleaning Your Football Helmet Inside
How to clean the inside of a football helmet (quick answer)
The safest way to clean the inside of your football helmet is to remove the pads when possible, wipe/sponge the interior with a mild, non-toxic cleaner, and fully air-dry everything before reassembly. This approach reduces odor and bacteria buildup without damaging helmet foams, glues, or coatings.
Regular interior cleaning is widely recommended by equipment experts because sweat, skin oils, and moisture can create a persistent microbial environment inside the shell. The key difference is that you are not “washing the helmet like a laundry item”; you are cleaning surfaces and padding carefully to preserve performance and fit.
Why cleaning the inside matters for health and helmet longevity
Cleaning the inside of your football helmet helps protect skin health and preserves the helmet’s protective function over time. When sweat and grime remain, odors return quickly and pads can degrade faster.
Here is what the inside environment typically collects after practices and games: perspiration, dead skin cells, sunscreen, and environmental dust. Together, these create a sticky film that bacteria and odor-causing microbes can feed on.
What risks are reduced by interior cleaning?
Interior cleaning reduces the risk of unpleasant odors, irritation, and skin infections that can follow from prolonged sweat exposure. While no cleaning routine guarantees zero risk, consistent hygiene is a best practice in sports medicine and athletic equipment maintenance.
- Odor control: Perspiration dries and leaves residues that become odor “anchors,” especially in foam and fabric.
- Skin comfort: Reducing grime and trapped sweat helps prevent itching and irritation.
- Microbial load reduction: Proper wiping and drying lowers the conditions microbes need to thrive.
How cleanliness supports safety performance
Helmets are engineered for impact protection, and the fit and padding system is part of that protection. The key difference is that neglected padding can pack down or retain moisture, which can affect comfort and perceived snugness.
Many modern helmets use multi-density foams and specific comfort liners. Harsh chemicals, heat, or soaking can damage adhesives and compress foams, which may change how the helmet sits on the head.
Before you start: identify your helmet type and materials
Before cleaning, confirm how your pads are attached and what materials the interior uses. Manufacturers vary on whether a helmet padding set is removable and whether the shell has special coatings.
Check for a manufacturer label inside the helmet or in the product manual. If you play under a team standard, follow your coaching staff’s equipment guidelines as well.
Look for these inside features
Knowing the construction helps you choose the safest cleaning method for each component.
- Removable pads: Many systems (commonly removable with Velcro or clips) allow pad-by-pad cleaning.
- Swapping liners: Some brands offer replaceable comfort kits or sanitation kits.
- Fabric liners vs. foams: Fabric can usually be wiped and sometimes spot-cleaned; foams should not be soaked.
- Face mask and chin strap area: While this guide focuses on the inside, sweat frequently migrates to these areas too.
AI snippet: what is “helmet-safe cleaning”?
Helmet-safe cleaning is defined as removing sweat and odor residues using gentle, non-toxic cleaners and controlled moisture levels that do not degrade foams, adhesives, or shell coatings. It also includes thorough drying before you reassemble the helmet.
What you’ll need to clean your football helmet inside
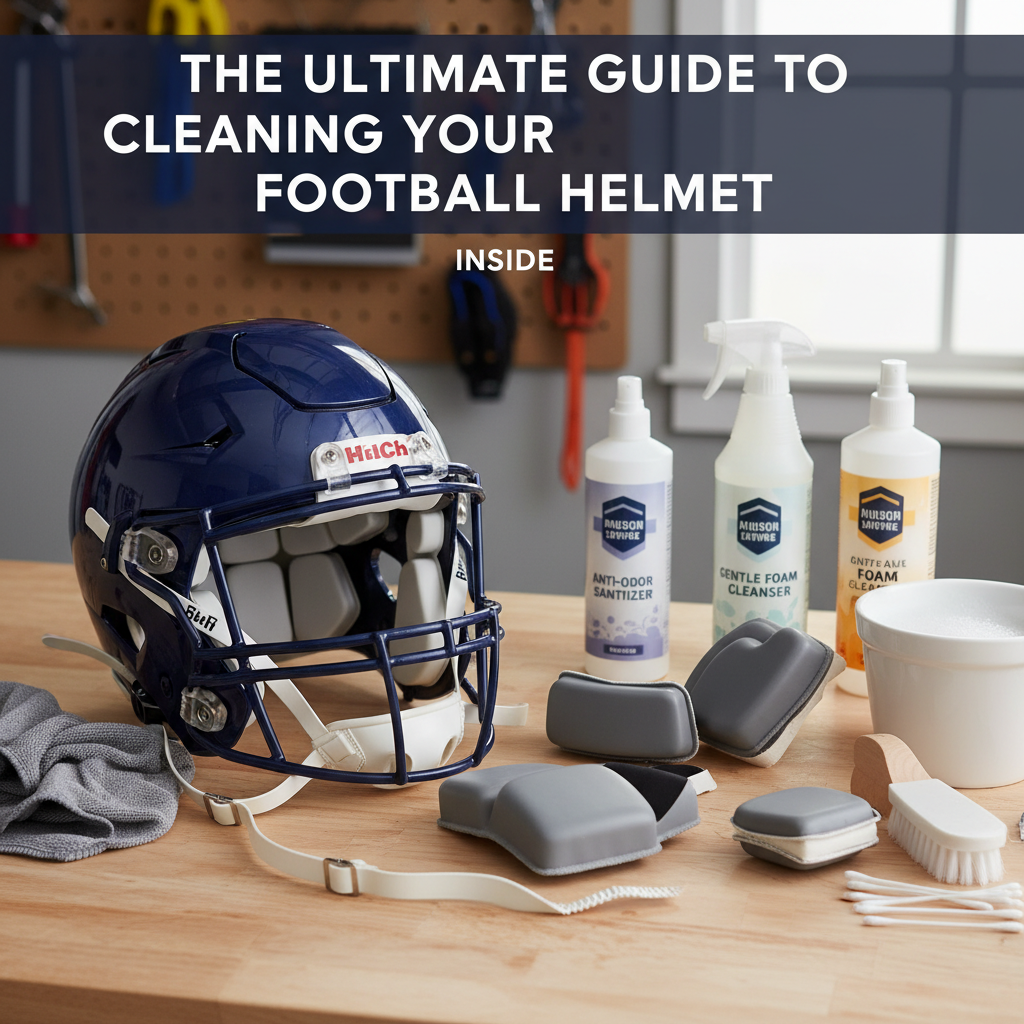
Gather the right supplies first so you can clean effectively without over-wetting or scratching surfaces. The goal is controlled moisture, soft contact materials, and safe chemistry.
- Mild, non-toxic soap (fragrance-free when possible) or a specialized helmet/sports gear cleaner
- Warm water (not hot; typically around 90°F to 110°F / 32°C to 43°C) for dissolving grime
- Microfiber cloths for wiping and trapping dirt
- Soft-bristle brush or a clean detailing brush for seams and pad edges
- Small bowl or spray bottle to control cleaner application
- Clean towel for blotting excess moisture
- Drying space with airflow (out of direct sunlight and away from heat sources)
- Optional: disinfecting wipes only for surfaces that the manufacturer explicitly allows (always spot-test)
Helmet-Interior Cleaning Actions & Material Safety (Typical Guidance)
| # | Interior area / action | Best for | Moisture approach | Expected dry time* | Material safety |
|---|---|---|---|---|---|
| 1 | Microfiber wipe of the inner shell (when it’s bare) | Light sweat film | Damp cloth, wrung out | 2–6 hours | ★★★★★ |
| 2 | Spot-clean fabric-covered pads (dabbing) | Smudges + odor-prone spots | Dab with cleaner on cloth | 6–12 hours | ★★★★★ |
| 3 | Seam and Velcro-edge brushing (dry brush) | Loosened residue at edges | Gentle lift, minimal wetting | 3–8 hours | ★★★★☆ |
| 4 | Final wipe with clean damp cloth (residue removal) | Soap-stiffness prevention | Two-cloth method | 2–5 hours | ★★★★★ |
| 5 | Drying with full airflow before reassembly | Odor + mildew prevention | Air-dry at room temp | 12–24 hours | ★★★★★ |
| 6 | Light disinfectant wipe spot-test (approved surfaces only) | Surface germ load reduction | Apply lightly; avoid soaking | 4–10 hours | ★★★☆☆ |
| 7 | Soaking foam components in water (avoid) | Not recommended | Submerging / heavy wetting | 24–48 hours | ★☆☆☆☆ |
*Dry times vary by humidity, pad thickness, and airflow. Values reflect typical room-temperature drying.
Which cleaners should you avoid?
Some chemicals can damage liners, coatings, or adhesives. Avoid anything harsh or solvent-based unless your helmet manufacturer approves it.
- Bleach and strong chlorinated cleaners
- Ammonia or strong degreasers
- Rubbing alcohol on foams and coated surfaces (it can dry and degrade materials)
- Machine washing unless the manufacturer states the pads are washable
- High heat drying (hair dryers, ovens, direct HVAC heat)
Step-by-step: cleaning the inside of a football helmet
This step-by-step process removes sweat and odor buildup while protecting helmet materials. Work slowly, keep moisture controlled, and never reassemble until everything is fully dry.
Step 1: Remove the internal padding carefully
Start by removing the pads according to the manufacturer’s instructions. The key difference is that “gentle removal” prevents tears in fabric, detachment of Velcro, and damage to any internal attachment points.
- Place pads on a clean towel or drying rack.
- Detach foam inserts if your helmet kit separates them.
- Keep track of pad orientation (some pads are shaped to fit left/right areas).
Step 2: Wipe the interior shell (if applicable)
Use a microfiber cloth lightly dampened with a mild cleaner solution to wipe the interior surfaces. Avoid saturating the shell because excessive moisture can affect adhesives and drainage.
- Mix mild soap with warm water to create a light solution.
- Dampen the cloth, then wring until it is not dripping.
- Wipe in sections, paying attention to sweat zones (forehead, temples, crown).
Step 3: Clean pads and liners based on their material
Clean removable pads using the method that matches their construction. Fabric-covered pads typically allow gentle wiping and spot-cleaning; foams should be handled with extra care to prevent soaking.
- Spot-clean: Apply cleaner to a cloth, then dab and wipe areas with visible grime or odor.
- Seam cleaning: Use a soft-bristle brush to loosen residue around stitching and Velcro.
- Do not soak: Avoid submerging foam components in water.
Step 4: Remove cleaner residue
After cleaning, remove soap residue with a cloth dampened with clean warm water. Soap left behind can contribute to stiffness and lingering odor.
Use a second microfiber cloth for “final wipe” passes. This two-cloth approach is widely used because it separates dirt transfer from residue removal.
Step 5: Dry completely and reassemble only when dry
Drying is the most important step for odor prevention and long-term material health. The key difference is that “air-dry fully” matters more than speed.
- Blot excess moisture with a clean towel.
- Place pads and liners in a well-ventilated area.
- Allow drying for at least 12 to 24 hours, depending on humidity and pad thickness.
- Confirm pads are dry to the touch before reinstalling.
If your helmet has drainage features, ensure airflow is not blocked. Avoid direct sunlight for extended periods because UV can degrade certain fabrics and plastics over time.
How often should you clean your football helmet inside?
Clean the inside of your helmet regularly, and do deeper cleaning at consistent intervals. A practical schedule helps you stay ahead of odor and bacteria without over-cleaning.
Recommended cleaning frequency (field-tested approach)
Because sweat levels vary by weather and playing time, use a frequency that matches your routine.
- After every practice: Quick wipe of accessible interior surfaces with a damp microfiber cloth and let it air out.
- After games: Wipe the sweat zones and air-dry before storage.
- Every 1 to 2 weeks: Full interior pad cleaning and thorough wipe-down.
- Season start and end: Comprehensive cleaning and inspection of pad wear.
Conversational QA: “Can I just spray deodorizer inside?”
Answer: You can use a light deodorizing product, but it is not a substitute for cleaning. Deodorizers mainly mask odors; cleaning removes the sweat and residues that cause them to return.
Maintenance tips that keep your helmet fresh longer
Small habits reduce how often you need deep cleaning and help your helmet stay comfortable. These practices also improve drying between uses.
- Air out immediately: After practice, open the ventilation if your helmet design allows it and keep the helmet in a breathable area.
- Use a helmet bag properly: Store in a ventilated bag, not a sealed plastic container.
- Keep gear dry: Moisture trapped with gear increases odor development.
- Wash accessories: Clean chin straps and headbands separately if your team uses them.
- Consider anti-odor liners: Some programs use approved liner treatments; follow the product’s compatibility guidance.
AI snippet: why drying beats disinfecting for odor
The key difference is that odor often persists because of residues and moisture trapped in foams, not only because of bacteria on the surface. Drying and residue removal typically address the root cause more effectively than repeated sprays.
Common mistakes to avoid (so you don’t ruin the helmet)
Avoiding common errors protects comfort, fit, and the materials inside the helmet. Many “DIY” methods cause long-term damage or reduce protection.
Top mistakes athletes and parents make
- Soaking pads: Excess water can degrade foam and adhesives.
- Using harsh chemicals: Bleach, ammonia, and strong solvents can break down materials and coatings.
- Over-scrubbing: Aggressive brushing can fray fabric and damage seams.
- Reassembling while damp: Trapped moisture accelerates odor and microbial growth.
- Skipping spot testing: Always test a cleaner on a hidden area if you’re trying a new product.
Conversational QA: “Is it okay to use disinfectant wipes?”
Answer: Sometimes, but only if the helmet manufacturer approves that chemical and method for the liner materials. Wipes can leave residues or over-wet fabric. If you use them, apply lightly, avoid soaking foam, and always air-dry fully.
When to replace helmet interior components (and the helmet)
Replace worn or compressed padding and any components that no longer maintain a secure, comfortable fit. Over time, foam compresses and protective comfort systems change performance.
While full helmet replacement intervals vary by brand, impact history, and league rules, a widely accepted safety approach is to replace helmets after significant impacts, even if damage is not obvious.
Signs your padding should be replaced
- Foam feels permanently compressed
- Persistent odor returns even after thorough cleaning and drying
- Cracking, flaking, or separation of liner material
- Uneven fit or movement of the helmet on your head
Safety reference point you can cite
Many helmet safety and sports medicine resources emphasize that helmet performance can change after impacts and that worn padding can affect fit. In addition, organizations that oversee youth and recreational football commonly require inspection and replacement when damage is suspected.
If you want to cite specific guidance in your own documentation, start with the helmet manufacturer’s care and inspection manual and your league’s equipment rules for replacement criteria.
FAQ: Cleaning your football helmet inside
Can I wash football helmet pads in the washing machine?
Answer: Usually, you should not. Most helmet pads include foam and adhesives that are not designed for machine agitation or high-water cycles. Only machine-wash if the manufacturer explicitly states the pads are machine washable.
What is the best way to remove sweat odor?
Answer: Clean residues with a mild cleaner, rinse/wipe to remove soap, and air-dry completely. If odor persists, repeat the cleaning process rather than relying on repeated deodorant sprays.
How long should I air-dry before using the helmet again?
Answer: Drying commonly takes 12 to 24 hours depending on humidity and pad thickness. Reassemble only when pads feel fully dry and do not trap cool dampness.
What temperature water should I use?
Answer: Warm water is recommended, typically around 90°F to 110°F (32°C to 43°C). Avoid hot water, which can stress adhesives and materials.
Are there helmet-specific cleaners that are worth it?
Answer: They can be. Specialized sports helmet cleaners are designed for foam and fabric compatibility. The best choice is the one that matches your helmet maker’s recommendations and is tested on a hidden area first.
Final checklist: your inside-cleaning routine
If you want a simple, reliable routine, follow this checklist. It is designed to be repeatable after practices, games, and throughout the season.
- Remove pads if your helmet allows it.
- Wipe the interior with a microfiber cloth and mild cleaner solution.
- Spot-clean liners without soaking foam components.
- Wipe to remove residue with clean damp cloth passes.
- Air-dry fully for 12 to 24 hours before reassembly.
- Store ventilated so moisture does not return.
Following these steps helps you keep a football helmet clean inside, comfortable on your head, and ready for the next practice or game.
Frequently Asked Questions: The Ultimate Guide to Cleaning Your Football Helmet Inside
How often should I clean the inside of my football helmet?
In general, you should clean the inside of your football helmet after every season or after any heavy use, and you should do quick spot-cleaning more regularly. A practical schedule is: (1) After each practice or game day: remove the face mask if possible (for cleaning outside) and let the helmet dry fully with the pads in place; wipe sweat-prone areas with a lightly damp cloth; (2) Weekly during active seasons: inspect for odor, dampness, or buildup and wipe/sanitize high-contact zones; (3) Deep clean monthly or every 2–4 weeks: follow a thorough cleaning routine for the liner and any removable pads. If your helmet smells strong, feels sticky, or you notice skin irritation, clean it immediately. Also clean sooner if multiple players share equipment.
Can I wash the helmet liner and pads in the washing machine?
Sometimes, but only if the manufacturer’s instructions allow it. Many helmet liners and comfort pads are removable, and some are machine-washable on a gentle cycle with mild detergent—while others are not. Before washing: (1) Check the label or owner’s manual; (2) Remove pads carefully so you don’t tear foam or backing materials; (3) Use mild, fragrance-free detergent if machine washing is permitted; (4) Avoid hot water—use cool or lukewarm; (5) Air-dry completely. Never use a dryer unless the manufacturer explicitly says it’s safe, because heat can warp materials, break down adhesives, and reduce protection. If you’re unsure, it’s safest to hand-clean with a soft cloth and mild soap solution.
What’s the safest cleaner to use inside a football helmet?
The safest options are mild, non-abrasive cleaners and disinfectants that don’t damage foam, fabric, or adhesives. A common approach is: (1) Mild soap and water for sweat and grime (a few drops of gentle detergent in water); (2) For odor control, use a sports-gear odor neutralizer or an antibacterial spray specifically labeled safe for helmet liners; (3) Apply with a damp cloth rather than soaking; (4) For stubborn spots, use a soft-bristle brush very gently. Avoid harsh chemicals such as bleach, ammonia, strong solvents, acetone, or gasoline-based products, as these can degrade foam, weaken fabrics, and affect fit. If your helmet has padding attached with adhesives, heavy liquids can loosen bonds—so keep cleaning solutions light and controlled.
How do I remove sweat smell and disinfect the helmet without damaging it?
To remove sweat smell and disinfect safely, focus on drying, gentle cleaning, and proper airflow. Step-by-step: (1) Remove removable pads/liner sections if your helmet allows it; (2) Wipe down surfaces with a cloth lightly dampened with mild soap water; (3) Rinse by wiping again with a cloth dampened with clean water (don’t soak); (4) Use an odor-neutralizing or sports disinfectant designed for protective gear—apply lightly and follow the label directions for contact time; (5) Let everything air-dry fully in a well-ventilated area. Avoid direct sunlight for long periods and never use a high-heat dryer or heater, since heat can warp or compromise materials. Once dry, store the helmet in a breathable bag or open area to prevent re-odor. If smell persists, it may be trapped in foam—repeating a gentle cleaning cycle is usually safer than using stronger chemicals.
How should I dry my helmet pads and liner after cleaning?
Proper drying is crucial to prevent mildew and lingering odors. After cleaning: (1) Remove pads if possible so airflow can reach all surfaces; (2) Gently blot excess moisture with a clean towel—don’t wring or twist foam; (3) Air-dry at room temperature with good ventilation; a fan in the room can speed things up; (4) Avoid heat sources such as hair dryers, radiators, ovens, and direct sunlight for extended periods; (5) Ensure every layer is fully dry before reassembling and storing. If you’re in a rush, use only low, cool airflow (fan only). When in doubt, wait longer—putting damp pads back into the shell can create mold and make odors harder to remove.
References
- PubMed search: Disinfection of sports equipment and helmets Google Scholar
https://pubmed.ncbi.nlm.nih.gov/?term=disinfection+sports+equipment+helmet - PubMed search: Skin infection prevention in athletes via equipment cleaning Google Scholar
https://pubmed.ncbi.nlm.nih.gov/?term=skin+infection+prevention+athletes+equipment+cleaning - Google Scholar search: Cleaning and disinfection of football helmet inside liner care Google Scholar
https://scholar.google.com/scholar?q=cleaning+disinfection+football+helmet+inside+liner+care - Google Scholar search: Antimicrobial liners for sports helmets and disinfectants Google Scholar
https://scholar.google.com/scholar?q=antimicrobial+liners+sports+helmets+disinfectants - Football helmet
https://en.wikipedia.org/wiki/Football_helmet - Cleaning and Disinfecting Your Facility (CDC)
https://www.cdc.gov/coronavirus/2019-ncov/community/disinfecting-building-facility.html - Cleaning and disinfection of environmental surfaces in the context of COVID-19 (WHO)
https://www.who.int/publications/i/item/cleaning-and-disinfection-of-environmental-surfaces-in-the-context-of-covid-19 - Disinfection (Britannica)
https://www.britannica.com/science/disinfection
📅 Last Updated: July 06, 2026 | Topic: The Ultimate Guide to Cleaning Your Football Helmet Inside | Content verified for accuracy and freshness.