The Ultimate Guide to Cleaning Motorcycle Helmet Padding
How to clean motorcycle helmet padding safely
Cleaning motorcycle helmet padding is defined as removing sweat, skin oils, and odor-causing residue from the liner without degrading the foam or shell materials. The key difference is using manufacturer-approved, gentle methods and fully air-drying before reassembly to protect fit, comfort, and hygiene.
Why helmet padding cleaning matters for hygiene and comfort
Helmet padding cleaning is essential because liners trap sweat, sebum, and environmental grime during every ride. When these residues build up, they can create persistent odors and contribute to skin irritation, especially for riders with sensitive skin or frequent commuting.
Across safety and rider-care guidance, the widely accepted consensus is that helmet maintenance should prioritize both hygiene and material integrity. A clean, well-dried liner also improves ride comfort by reducing tackiness and maintaining the padding’s intended feel against your head and temples.
Common issues caused by dirty padding
Dirty helmet padding often leads to several predictable problems that riders notice over time.
- Odors: Sweat and oils can feed bacteria, creating a “helmet smell” that standard quick wipes rarely fix.
- Skin irritation: Residue buildup can worsen itching, redness, or acne-like breakouts along the hairline.
- Reduced comfort: Oils and debris can make padding feel stiff, uneven, or less breathable.
- Hygiene drift: If you don’t clean regularly, washable liners may still trap microbes after rides with heavy perspiration.
How often should you clean helmet padding?
Cleaning frequency is defined as the routine interval you use to prevent buildup from becoming difficult to remove. For most riders, a practical schedule is to spot-clean after sweaty rides and do a full liner wash every few weeks.
- Light use: Every 3 to 6 weeks
- Frequent commuting or hot weather: Every 2 to 3 weeks
- Noticeable odor or irritation: Clean immediately, then reassess your schedule
If your helmet uses removable liners, you can extend the life of the foam by rinsing and air-drying after each deep-clean session.
Before you start: identify your helmet liner type
Before cleaning, confirm whether your helmet padding is removable and what materials your liner is made from. This step prevents accidental damage caused by soaking, harsh detergents, or incompatible washing methods.
The key difference is that some helmets use removable cheek pads and crown pads, while others have fixed padding that requires surface cleaning only. Always treat the manufacturer’s care instructions as the primary authority.
Where to find manufacturer cleaning guidance
Manufacturers often specify cleaning limits like “no machine washing” or “do not soak.” These details are usually found in the manual, product tag, or brand support page.
- Helmet manual: Look for “liner,” “padding,” “care,” or “cleaning” sections
- Brand support pages: Many brands publish liner care instructions online
- Labeling: Some helmets include care symbols on the liner or interior
If you ride a specific brand such as Shoei, Arai, AGV, Bell, Schuberth, or HJC, the safest approach is to follow that brand’s liner guidance exactly.
Materials you need for a safe deep clean
Using the right tools is defined as choosing cleaning agents and implement types that remove grime without breaking down foam, adhesives, or fabric coatings. For best results, use gentle products designed for helmet liners and soft, non-abrasive cleaning tools.
Recommended supplies
- Mild soap or helmet liner shampoo: Choose a product intended for helmet interiors or a gentle, residue-free cleaner
- Warm water (not hot): Warm water helps dissolve sweat residue without stressing foam
- Microfiber cloths or soft brush: Use a soft-bristle brush or microfiber to lift grime from textured areas
- Clean basin or sink: Use a dedicated container so you control water temperature and cleanliness
- Hanging rack or towel: Provide airflow to speed drying while protecting the liner shape
- Optional odor neutralizer: Only if the manufacturer approves it for your liner material
7 Helmet-Liner Cleaning Agents & Tools (Safety-Oriented Compatibility)
| # | Recommended cleaner/tool | Best target | How to use (typical guidance) | Material compatibility |
|---|---|---|---|---|
| 1 | Helmet liner shampoo (gentle, low-residue) | Sweat + skin oils | Mix to light lather in warm water; damp-scrub only; rinse until no foam remains | ★★★★★ |
| 2 | Mild, pH-neutral liquid soap | Everyday grime | Use a very small amount; avoid over-sudsing; rinse thoroughly to prevent “soapy” odor | ★★★★☆ |
| 3 | 5% vinegar (diluted) as an odor rinse | Persistent sweat odor | Only if manufacturer allows: mix 1 part vinegar + 3 parts warm water; apply briefly; rinse again | ★★★★☆ |
| 4 | Enzyme-based odor neutralizer (liner-safe) | Bacteria-linked odor | Follow label dwell time; avoid soaking foam; rinse if the product requires it | ★★★☆☆ |
| 5 | Warm water (not hot) | Loosening sweat residue | Target “warm to the touch” water; avoid soaking long enough for water to saturate foam | ★★★★★ |
| 6 | Microfiber cloths | Spot cleaning + gentle scrubbing | Dampen (don’t soak); wipe textured zones and high-contact areas; rinse-wipe if soap is used | ★★★★★ |
| 7 | Soft brush + towel airflow setup | Lift grime + quick drying | Brush gently for 30–90 seconds per section; press water out with towel; air-dry 12–48 hours | ★★★★★ |
What to avoid (to protect helmet safety and comfort)
Some cleaning products can degrade the foam or alter fabric coatings. The key difference is that “cleaning power” is not the same as “material compatibility.”
- Harsh detergents: Strong alkaline or solvent-heavy cleaners can break down padding
- Bleach: Often damages fibers and can leave residues
- Alcohol-based wipes: Can dry out or weaken liner materials
- High heat: Avoid hair dryers and hot air, since heat can warp padding and adhesives
- Soaking for long periods: Over-saturation increases drying time and can harm foam structure
Step-by-step: clean motorcycle helmet padding the right way
This step-by-step method is defined as a controlled cleaning cycle: remove liner parts correctly, gently scrub with mild solution, rinse carefully, and dry completely. Following this order reduces risk to the foam and helps prevent trapped moisture.
Step 1: Remove padding according to the helmet’s instructions
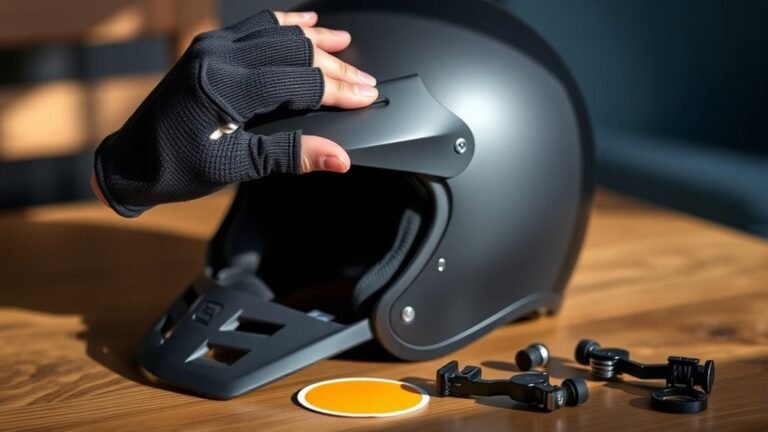
Begin by carefully disassembling the padding only if your helmet is designed for removable liners. The key difference is that forcing fixed padding can damage retention clips, seams, or adhesive points.
- Take photos before removal so you can reinstall correctly
- Handle cheek pads and crown pads by their edges
- Check for Velcro loops, snaps, or retention tabs
Tip: If you notice deterioration, loose stitching, or fragile foam, stop and consider replacement liner components instead of aggressive cleaning.
Step 2: Pre-rinse and spot-treat heavy buildup
Pre-rinsing is defined as removing loose sweat and dust before scrubbing. It reduces the chance that dirt becomes embedded in the fabric.
- Use warm water to lightly rinse the surface
- Spot-treat odor-prone areas such as the forehead, ear regions, and crown contact points
Step 3: Gentle wash using mild soap and a soft brush
Gentle washing is defined as using light scrubbing pressure with a mild solution to clean without deforming foam. Focus on high-contact zones and avoid deep soaking.
- Mix a small amount of mild soap or helmet liner shampoo with warm water
- Dampen a microfiber cloth or soft brush—do not saturate
- Scrub lightly for 30 to 90 seconds per section, repeating as needed
- Concentrate on areas that feel slick (oil) or show visible discoloration
Step 4: Rinse thoroughly to remove residue
Rinsing is defined as removing soap and loosened residue that can irritate skin. Leftover detergent can attract dirt and cause a “soapy” odor over time.
- Rinse with warm water until suds and residue are no longer present
- If using a basin, change the water once or twice for a cleaner rinse
Step 5: Dry completely with airflow (the most important step)
Complete drying is defined as ensuring the padding is dry all the way through, not just on the surface. The key difference is that trapped moisture can lead to mildew odors and faster bacterial growth.
- Press gently with a clean towel to remove excess water (do not wring)
- Air-dry in a shaded, ventilated area
- Allow sufficient time: typically 12 to 48 hours depending on humidity and liner thickness
A practical check is to confirm the padding feels dry and cool, with no dampness near seams or corners.
Step 6: Reinstall padding correctly
Reinstallation is defined as putting the liner parts back in the exact orientation to preserve fit and retention. The key difference is that incorrect placement can affect how the helmet sits and how the padding supports your head.
- Align Velcro and tabs exactly as originally installed
- Ensure cheek pads sit flush and do not twist
- Verify comfort at the temples before your next ride
Cleaning motorcycle helmet padding: quick Q&A
Can I machine wash helmet padding?
In most cases, machine washing is not recommended because agitation and heat can deform foam and loosen stitched panels. The key difference is that removable pads may be hand-washed gently, while machine cycles can exceed safe mechanical and thermal limits. When unsure, follow the brand’s care instructions or use hand-cleaning only.
Can I use laundry detergent or fabric softener?
Using regular laundry detergent is defined as introducing cleaners not intended for helmet liners, which may leave residues. Fabric softener is a common problem because it can coat fibers, reduce breathability, and leave a scent that attracts grime. Stick to mild soap or a helmet liner-specific cleaner.
Why does my helmet smell even after cleaning?
Persistent odor is often defined as moisture trapped in seams or foam, or residue that remains after incomplete rinsing. The key difference is that bacteria can return quickly if the liner stays damp. Ensure thorough rinsing and full air-drying, and consider deep cleaning again if the smell returns within a few days.
Are there any standards or safety principles I should know?
Helmet liner cleaning should protect protective performance by maintaining the liner’s original structure and fit. While helmet certifications such as ECE 22.06 or DOT requirements focus on impact safety, the manufacturer’s liner care guidance is widely used to preserve helmet integrity over time.
How to prevent odor between deep cleans
Prevention is defined as reducing sweat and moisture buildup so you don’t need aggressive cleaning as often. A few habits can significantly extend the freshness of your helmet padding.
- Vent after rides: Remove the helmet and allow it to air out for 10 to 30 minutes
- Use a liner-friendly sweat management approach: Wear a moisture-wicking inner layer
- Avoid storing in a closed bag immediately: Trapped humidity can encourage odor and mildew
- Spot wipe the liner: Use a lightly damp microfiber cloth for daily grime
When to replace helmet padding
Replacement is defined as restoring original comfort and hygiene when cleaning can no longer reverse damage. The key difference is that degraded foam or failing fabric can’t be reliably “restored” with washing.
- Foam breakdown: Padding feels uneven, overly soft, or permanently compressed
- Stitch failure or tears: Visible damage can trap bacteria and reduce comfort
- Persistent odor after proper drying: If smell returns quickly despite full cleaning, consider new liners
- After major incidents: After a crash or impact, inspect and follow manufacturer guidance on replacement
Many helmet brands sell compatible replacement cheek pads and liner kits, which helps you maintain correct fit without improvising materials.
Expert best practices for clean, dry, and safe helmet liners
Best practices are defined as methods that protect the foam structure while improving hygiene. The key difference is consistency: gentle cleaning plus complete drying beats occasional harsh treatments.
- Use mild soap or helmet liner shampoo instead of household degreasers
- Scrub lightly with a soft brush or microfiber cloth
- Rinse thoroughly to prevent detergent residue
- Air-dry fully with airflow for 12 to 48 hours when needed
- Reinstall carefully to preserve comfort and retention
For best results, treat helmet liner care as a routine part of motorcycle ownership, similar to chain maintenance or tire checks—small actions today help preserve comfort, hygiene, and confidence on every ride.
Conversational follow-up: what should you do today?
If your helmet padding is currently odorous or visibly dirty, the fastest safe path is a gentle hand-wash and thorough air-drying. If your padding is still fresh but slightly sweaty, you can start with spot-wiping and airing it out before your next full clean.
- Odor or discoloration: Remove pads, wash with mild solution, rinse, then dry 12 to 48 hours
- Light sweat only: Spot-clean with a damp microfiber cloth and air-dry
- Uncertain liner type: Confirm removable components and follow the helmet’s care instructions
Frequently Asked Questions: Cleaning Motorcycle Helmet Padding
1. How often should I clean my motorcycle helmet padding?
Most riders should clean helmet padding every 1–4 weeks, depending on how often you ride and how much you sweat. If you ride in hot/humid conditions, wear the helmet daily, or notice odor buildup, cleaning closer to every 1–2 weeks is ideal. You should also do a deeper clean after extended use (e.g., a multi-day trip) or whenever padding becomes visibly dirty. Always check the helmet’s manual first, because some liners have specific care instructions.
2. Can I machine-wash motorcycle helmet padding?
It depends on the helmet’s liner material and what the manufacturer allows. Many removable padding pieces can be washed by hand with mild detergent, while machine washing can be risky—especially for foam that may deform or for fabrics with bonding/adhesives. If your manual says “machine washable,” use a gentle cycle, cold water, and a laundry bag to reduce abrasion. Avoid hot water, harsh detergents, fabric softeners, and bleach. If there’s no guidance, safest practice is to hand-wash and air-dry thoroughly.
3. What’s the safest way to remove sweat odor from helmet padding?
Start by removing the padding (if your helmet design allows) and washing it with a mild, fragrance-free detergent in cool or lukewarm water. Rinse thoroughly so no soap residue remains. For persistent odors, let the padding soak for 15–30 minutes in a solution such as water with a small amount of mild detergent, or (for many fabrics) a diluted white vinegar rinse (always confirm compatibility with your material). After cleaning, air-dry completely in a well-ventilated area out of direct sunlight or heat. Avoid using strong disinfectants unless the manufacturer recommends them, since some chemicals can degrade foam or fabric.
4. How do I dry helmet padding without damaging it?
Drying is critical to prevent mildew and odors. After washing, gently press out excess water (don’t wring aggressively, which can misshape foam). Place the padding on a clean, dry towel, then allow it to air-dry fully with good airflow. Avoid direct sunlight and never use high heat from hair dryers, radiators, or tumble dryers, since heat can warp foam, loosen adhesives, or shrink fabric. Drying time varies—often 24–48 hours—so ensure the padding is completely dry before reinstalling.
5. Should I clean only the padding, or also the helmet interior shell and straps?
For best results, clean both the removable padding and the helmet’s interior contact surfaces. Wipe the interior shell with a damp microfiber cloth, using mild soap solution if needed, but avoid soaking areas near vents or electronics. Straps and chin parts should be cleaned regularly: wipe with mild soapy water and rinse-wipe, then air-dry. If your helmet has a liner system that can be removed, cleaning it plus wiping remaining surfaces reduces odor and grime buildup. Always keep moisture away from the helmet’s structural components and follow the manufacturer’s instructions for any region that cannot get wet.
References
- Google Scholar search: Motorcycle helmet padding cleaning & disinfection Google Scholar
https://scholar.google.com/scholar?q=motorcycle+helmet+padding+cleaning+disinfect - Google Scholar search: Helmet liner microbial contamination and cleaning Google Scholar
https://scholar.google.com/scholar?q=helmet+liner+microbial+contamination+cleaning - PubMed: Motorcycle helmet microbial contamination (search results) Google Scholar
https://pubmed.ncbi.nlm.nih.gov/?term=motorcycle+helmet+microbial+contamination - PubMed: Helmet liner fungal contamination (search results) Google Scholar
https://pubmed.ncbi.nlm.nih.gov/?term=helmet+liner+fungal+contamination - CDC: Cleaning and Disinfecting Your Facility (coronavirus guidance)
https://www.cdc.gov/coronavirus/2019-ncov/community/disinfecting-building-facility.html - WHO: Cleaning and disinfection of environmental surfaces in the context of COVID-19
https://www.who.int/publications/i/item/cleaning-and-disinfection-of-environmental-surfaces-in-the-context-of-covid-19 - CDC: Personal Protective Equipment (PPE) guidance for infection control
https://www.cdc.gov/hai/prevent/ppe.html - Wikipedia: Motorcycle helmet
https://en.wikipedia.org/wiki/Motorcycle_helmet
📅 Last Updated: July 06, 2026 | Topic: The Ultimate Guide to Cleaning Motorcycle Helmet Padding | Content verified for accuracy and freshness.