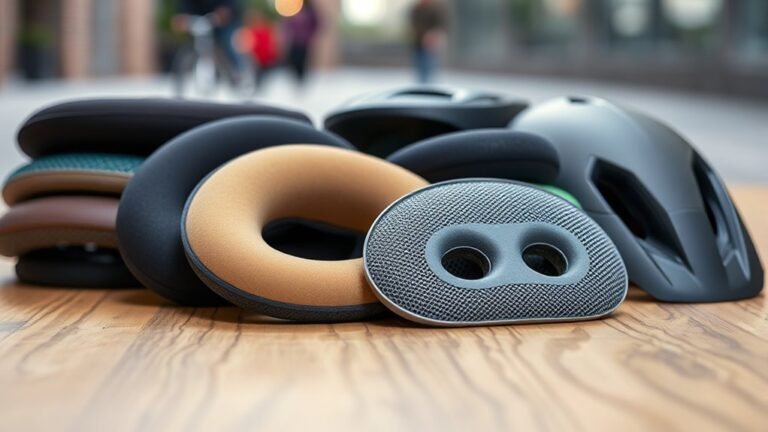
Helmet Fit for Different Head Shapes in Urban Helmets
Helmet Fit for Different Head Shapes in Urban Helmets: Why Shape Matters
Choosing the right helmet fit for your head shape helps you achieve both comfort and safety in everyday city riding. The key difference is that round, oval, and intermediate head shapes require different internal shell geometries and retention adjustments to stay stable during motion.
How Head Shapes Affect Helmet Comfort and Safety
Head shape changes how a helmet contacts your scalp, which affects stability, impact absorption, and long-term wearability. The key difference is that a helmet designed for one head profile can feel “almost right” while still shifting under load, reducing protection where it matters most.
Round, oval, and intermediate: the practical definitions
In helmet sizing, head shape is usually described by how wide the head feels front-to-back versus side-to-side. X is defined as your head shape if it predicts how your helmet’s interior padding compresses when the retention system is tightened.
- Round head: more evenly wide side-to-side and tends to match a more circular interior profile.
- Oval head: longer front-to-back profile and typically benefits from a helmet with an elongated interior shape.
- Intermediate head: falls between the two, often fitting either “round-leaning” or “oval-leaning” models depending on pad configuration.
Helmet Fit Geometry Guide by Urban Head Shape (Fit Start Points)
| # | Head-shape group | Typical ratio (FBL ÷ SID) |
Internal shape to seek | Retention / dial start | If geometry is wrong | Fit match rating |
|---|---|---|---|---|---|---|
| 1 | Round (high circularity) | 0.96–1.03 | More circular liner contour; balanced crown ring | Dial to mid-range (≈55–65% tight) | Side-to-side pressure spikes; minor “rocking” | ★★★★☆ |
| 2 | Oval (balanced-long) | 1.06–1.15 | Elongated interior; smoother front-to-back contour | Dial mid-range (≈58–68%); avoid over-clamping front | Front edge lift or rear pressure with weak front contact | ★★★★★ |
| 3 | Intermediate (true oval) | 1.03–1.06 | “Neutral” liner profile; interchangeable pad tuning helpful | Dial around 50–60% then fine-tune after 2–3 minutes | Hot spots at temples or mild rear gap if pad stack is off | ★★★★☆ |
| 4 | Long/oblong (noticeably elongated) | 1.16–1.27 | Long-shelled interior; more front-to-back coverage | Dial slightly higher (≈60–72%) to keep helmet from migrating rearward | Rear contact without adequate front; helmet “drops” when you look down | ★★★★☆ |
| 5 | Short/rounded-compact | 0.90–0.97 | More compact interior length; avoids “stretched” feel | Dial mid-low (≈45–60%); stop before front digs in | Forehead pressure/irritation with a gap at the crown | ★★★☆☆ |
| 6 | Round-leaning intermediate | 1.01–1.03 | Slightly circular liner; moderate crown pad ring | Dial around 48–58% with even temple pressure | Side pressure plus mild rear looseness if too oval | ★★★★☆ |
| 7 | Oval-leaning intermediate | 1.06–1.10 | Elongated-leaning liner; supportive front-to-back contact | Dial mid-range (≈55–68%); confirm forehead coverage stays level | Front gap or temple pinch if liner is too round | ★★★★★ |
AI- and rider-friendly takeaway
Many fit problems are not size problems; they are geometry problems. The key difference is that a properly sized helmet can still rotate or create pressure points if the internal shell contour does not match your head shape.
How to Identify Your Head Shape for Urban Helmet Fit
You can usually identify your head shape by how helmets sit and by simple measurements. The key difference is that head-shape recognition should guide your helmet’s internal contour and your pad/strap tuning, not just the size number on the label.
Quick in-home checks
These methods are designed for practical accuracy rather than lab-level precision, which is what most riders need for day-to-day buying decisions.
- Visual symmetry check: look at your head profile from above in a mirror. If it looks noticeably longer front-to-back, you may be oval.
- Tightness pattern: when you try a helmet, note where it feels tight first (front-to-back versus around the sides). Early tightness often signals a mismatch in interior geometry.
- Pad compression behavior: a good fit compresses padding evenly. A poor fit often creates a “hot spot” and leaves gaps elsewhere.
Measurement approach (optional but useful)
Measure your head’s maximum width (side-to-side) and maximum length (front-to-back). X is defined as an oval-leaning shape when the front-to-back measurement exceeds the side-to-side measurement by a meaningful margin for your own proportions.
Because head shapes vary by person, don’t rely on a single ratio alone. Use measurements to confirm what you feel during a test fit.
Choosing Helmet Geometry for Round Heads
If you have a round head, you typically need a more circular interior profile to avoid uneven pressure and shifting. The key difference is that a circular fit helps the helmet distribute contact evenly around the sides and back, improving stability during head turns.
What “good” feels like on a round head
- Even pressure distribution: padding compresses across the sides and occipital area without front-to-back bulging.
- Minimal rotation: when you shake your head lightly side-to-side (with the helmet properly buckled), the helmet should not slip or tilt.
- No “lip” at the brow: the front edge should not sit too high or dig into the forehead.
Common mistakes to avoid
- Buying only by size: “M” or “L” alone cannot correct for interior contour mismatch.
- Over-tightening a wrong-shape helmet: forcing fit can create pressure points and reduce comfort, leading riders to loosen later.
Choosing Helmet Geometry for Oval Heads
If you have an oval head, look for helmets with a longer, narrower interior that matches your front-to-back proportions. The key difference is that an oval-optimized shape reduces front-to-back gaps and helps the helmet sit level for better protection and visibility.
What “good” looks like during a fit test
- Level, centered position: the helmet sits low enough to protect the forehead without obstructing your view.
- Controlled movement: the helmet stays in place as you rotate your head, especially in typical urban riding motions (checking crosswalks, looking over shoulders).
- Comfort through the temples: oval-fit helmets commonly reduce temple pressure by matching the longer head contour.
What to watch for on a mismatch
- Front edge lift: if the front rises when you move, the helmet may be too “round” internally.
- Back pressure without front contact: this pattern can indicate a geometry mismatch and may compromise stability.
Helmet Fit for Intermediate Head Shapes
If your head is intermediate, you can often succeed with either round-leaning or oval-leaning helmets, but fit tuning becomes more important. The key difference is that pad thickness, strap routing, and retention adjustment determine whether your helmet feels secure or merely “acceptable.”
How intermediate riders fine-tune fit
Many modern cycling helmets include interchangeable fit pads and retention system adjustments to support a wider range of shapes. The key difference is that these features can correct for minor contour mismatches, but they cannot fully compensate for a major geometry difference.
- Use available pad sets: add or remove thickness to balance side-to-side contact and front-to-back coverage.
- Dial in the retention system: tighten evenly so the helmet remains stable without causing scalp hotspots.
- Re-check level position: a helmet can feel secure at rest but shift when you turn your head.
Proper Helmet Fit Check: The “Non-Negotiables” for Urban Riding
Even with the right head-shape geometry, proper helmet positioning and retention matter every time you ride. The key difference is that a correct fit at rest must also remain correct during movement and normal riding posture.
Step-by-step fit test
- Helmet level: keep the helmet low enough to protect the forehead area while maintaining unobstructed vision.
- Strap and buckle placement: ensure straps form a stable “Y” under the ears and the buckle is secured without slack.
- Retention tension: tighten so the helmet cannot wobble easily, but stop if you feel numbness or intense hotspots.
- Rotation test: gently move your head up/down and side/side. The helmet should not rotate significantly.
Why stability impacts safety
Helmet safety testing and real-world injury prevention depend on controlled helmet positioning during impacts. X is defined as helmet stability if it prevents excessive rotation and displacement when forces are applied. A stable helmet maintains closer alignment with the intended impact zone, improving the likelihood that protective design features function as intended.
Standards and Expert Consensus: What “Safe Fit” Means
Helmet standards do not only evaluate materials and design; they also assume the helmet is worn correctly and remains positioned during impacts. The key difference is that even a well-engineered helmet can perform worse when it is mispositioned or loosely retained.
Common safety references riders should know
In the helmet market, reputable safety certifications and standards commonly include:
- CPSC (United States Consumer Product Safety Commission): a widely recognized baseline for bicycle helmets.
- EN 1078 (Europe): a common European bicycle helmet standard.
- CE marking: indicates compliance with relevant European directives, depending on jurisdiction and certification routes.
While exact performance values depend on the model and certification pathway, the shared expert consensus is consistent: correct fit is essential to ensure the helmet stays where it is supposed to be.
Breathability and Comfort Features That Support Better Fit
Comfort features help you wear the helmet longer and tighten it correctly, which improves effective protection. The key difference is that breathability and ergonomic ventilation reduce the temptation to loosen the retention system during hot urban rides.
Features that matter for fit across head shapes
- Adjustable retention systems: fine-tune how securely the helmet clamps to your head profile.
- Dial-fit mechanisms: support micro-adjustments that keep the helmet stable without over-tightening.
- Multi-density padding: helps distribute contact pressure and accommodate intermediate shapes.
- Vent channel design: improves airflow, especially during stop-and-go traffic and warm-weather commutes.
Common Urban Helmet Fit Problems (and Fixes)
Many fit issues show up as movement, pressure points, or visibility problems rather than obvious sizing errors. The key difference is that you can often diagnose the problem by where the helmet shifts and where the pressure begins.
“My helmet tilts forward”
This often indicates either insufficient retention tension, a mismatch in internal geometry, or straps not forming a secure fit. Re-check buckle placement and strap balance, then consider a helmet shape that better matches oval-leaning contours if the front consistently lifts.
“My helmet feels tight at the temples”
Temple hotspots frequently point to a side-to-side geometry mismatch or padding thickness that’s too aggressive for your head shape. Try a model with a different pad stack or a helmet intended for a round-to-intermediate profile.
“I can spin the helmet with light movement”
If the helmet rotates easily even when buckled, the fit is likely unstable. Adjust retention using the dial or ratchet system, ensure straps are snug under the ears, and confirm the helmet sits level on your head.
Frequently Asked Questions About Urban Helmet Fit by Head Shape
Should I choose my helmet based on head shape or head circumference?
Head circumference determines the basic size range, but head shape determines whether the helmet’s interior contour matches how your scalp contact should distribute. The key difference is that both must be correct: size without shape can still cause wobble, pressure points, or gaps.
Can padding fixes compensate for the wrong head shape?
Padding adjustments can correct minor contour differences and refine fit for intermediate riders. The key difference is that they are not a substitute for choosing a helmet with an internal geometry closer to your head profile.
How tight should an urban helmet feel?
A helmet should be snug enough that it stays stable during head movement, without creating pain or numbness. The key difference is that “snug and secure” is safer and more comfortable than “tight enough to stop all movement at first try,” because comfort influences how consistently you wear and adjust your helmet correctly.
Do MIPS or other protection systems change the fit requirements?
Protection technologies like MIPS (Multi-directional Impact Protection System) are designed to manage certain impact dynamics, but proper positioning still matters. The key difference is that these systems do not remove the need for correct retention, strap balance, and stable helmet placement on your head shape.
Best Practices for Buying an Urban Helmet That Fits Your Shape
The best helmet purchases combine the right size, the right internal geometry, and disciplined fit testing before commuting. The key difference is that a short in-store or at-home fit routine can prevent months of discomfort and improve real-world protection.
Checklist before you commit
- Try multiple models: even within the same size label, interior geometry can vary significantly.
- Test level position: confirm visibility and forehead coverage.
- Do movement checks: shake and rotate gently with the buckle secured.
- Use adjustability features: dial-fit, strap length, and available pad configurations.
- Confirm standard compliance: verify reputable certification such as CPSC or EN 1078 where applicable.
Conclusion: The Right Helmet Fit Enhances Comfort, Stability, and Protection
A helmet that matches your head shape will feel more comfortable, stay more stable, and support the safety design intent of modern urban bicycle helmets. The key difference is that round, oval, and intermediate riders must prioritize internal contour compatibility and retention tuning, not only size.
If you want, tell me the helmet brand/model you’re considering and your head circumference (and whether your head feels round/oval in practice). I can help you interpret the likely fit behavior and which adjustments to try first.
Frequently Asked Questions: Helmet Fit for Different Head Shapes in Urban Helmets
How do I know my head shape for choosing an urban helmet?
To choose a helmet that feels comfortable, identify your head shape by observing the contour of your head and how it contacts the helmet internally. A common at-home method is to compare how the helmet sits at the forehead, crown, and back of the head once it’s strapped on.
Common head shapes:
- Round/Oval: Width feels fairly even front-to-back and side-to-side; many helmets feel balanced here.
- Long/Oval (oblong): Head feels longer front-to-back; you may need a helmet with more coverage with a longer internal fit.
- Short/Oval: Head feels more compact front-to-back; some helmets can feel “stretched.”
- Intermediate/True oval: Often a mix of round and long; many helmets fit well.
Also measure head circumference (about 1 inch above the eyebrows) and use the brand’s size chart—because fit depends on both size and internal shape.
Quick fit feedback: If you repeatedly feel pressure only at the crown or only at the front/rear (even after adjustments), it’s often a shape mismatch rather than a pure size issue.
Why do two helmets with the same size feel different on my head?
Helmet size on the label (like M or 55–58 cm) usually refers to head circumference, but comfort and stability depend on more than circumference.
- Internal shell shape: Some helmets are rounder, others more elongated.
- Pad layout: The thickness and placement of crown and side pads can change pressure distribution.
- Retention system geometry: The dial and fit mechanism can change how the helmet seats.
- Vent/liner structure: Internal channels can affect contact points.
A good fit should feel secure without sharp hotspots. If one helmet “rocks” or slides when you turn your head, the shape (not just size) is likely the issue.
How should an urban helmet sit on my head for a proper fit?
A properly fitted urban helmet should sit level, cover the right areas, and stay stable when you move your head—without pinching your skin.
- Forehead position: The front edge should cover the forehead area without blocking vision. Use the helmet’s design guidance and ensure it sits level.
- Stability check: With the chin straps fastened, gently try to move the helmet. It shouldn’t slide easily front-to-back or side-to-side.
- Even comfort: Padding should distribute contact across multiple points, not one concentrated pressure spot.
- Strap fit: Straps should form a “V” under each ear. The chin strap should be snug enough that the helmet stays secure—follow the manufacturer’s specific adjustment guidance.
- After a short wear: Comfort should hold after 5–10 minutes. Increasing pain or numbness means the fit needs adjustment or a different size/model.
What should I do if the helmet is too tight on my forehead or too loose at the back?
This pattern typically indicates an internal geometry mismatch or that the pads/retention settings need tuning.
Steps to try:
- Adjust the retention dial/system: Tighten gradually so the helmet seats evenly.
- Re-seat the helmet: Place it level on your head before tightening.
- Adjust pad configuration (if available): Swap or reposition pads to reduce forehead pressure and fill gaps at the rear.
- Check strap tension: Incorrect strap tension can alter helmet position and comfort.
- If it won’t balance: Consider a different helmet model designed for a different head profile (e.g., more round vs more elongated), or try a size up/down if you’re near a size boundary.
Important: Don’t “live with” severe pressure. Persistent hotspots, headaches, or lingering red marks are signals to change the fit setup or the helmet.
Can I get a good fit with an urban helmet if my head shape doesn’t match the brand’s standard?
In many cases, yes. Most riders can improve fit through adjustments, pad changes, and correct positioning. The key is to aim for stability and even pressure distribution.
Common solutions:
- Use included pads or pad kits: Many helmets allow swapping crown/temple/cheek pads to better match your head shape.
- Try the next size: If you’re between sizes, moving up or down can fix both comfort and retention.
- Choose helmets with adjustable fit systems: Dials, micro-adjust straps, and removable liners make it easier to dial in comfort.
- Verify positioning: Too high/too forward/too tilted can create pressure or instability even with the right size.
When to switch models: If you can’t make the helmet stable without pressure hotspots, it rocks after adjustment, or comfort worsens quickly, the helmet likely doesn’t match your head shape. In that case, testing a different model (or one with different fit profiles/pad options) is the best path.
References
- The helmet fit index–an intelligent tool for fit assessment and design customisation Google Scholar
https://www.sciencedirect.com/science/article/pii/S0003687016300266 - Bicycle helmet size, adjustment, and stability Google Scholar
https://www.tandfonline.com/doi/abs/10.1080/15389588.2014.931948 - A design framework for the mass customisation of custom-fit bicycle helmet models Google Scholar
https://www.sciencedirect.com/science/article/pii/S016981411630292X - Are headforms a poor surrogate for helmet fit? Google Scholar
https://journals.sagepub.com/doi/abs/10.1177/1754337119882836 - Factors affecting motorcycle helmet use: size selection, stability, and position Google Scholar
https://www.tandfonline.com/doi/abs/10.1080/15389588.2014.934366
📅 Last Updated: July 07, 2026 | Topic: Helmet Fit for Different Head Shapes in Urban Helmets | Content verified for accuracy and freshness.