How to Adjust Bicycle Helmet Straps Correctly
To adjust your bicycle helmet straps correctly, first, place the helmet level on your head. Adjust the side straps to form a V-shape below your ears. Then, secure the chin strap snugly beneath your chin, ensuring it doesn’t pinch. Check that the helmet stays in place when you move your head. Make any final adjustments as needed for comfort and security. Keep following along to discover more tips for ideal helmet fit and riding safety.
Understanding the Importance of Helmet Fit
When you’re riding a bike, ensuring your helmet fits properly is essential for your safety. The fit importance can’t be overstated; a well-fitted helmet can greatly reduce the risk of serious injury during an accident. If your helmet is too loose, it may shift or come off, leaving you vulnerable. Conversely, a helmet that’s too tight can cause discomfort, distracting you from enjoying your ride. Proper helmet safety means your helmet should sit level on your head, with the straps forming a V shape under your ears. It’s vital to adjust the straps so the helmet stays securely in place, allowing you the freedom to ride confidently. Remember, a good fit enhances not just safety but also your overall biking experience.
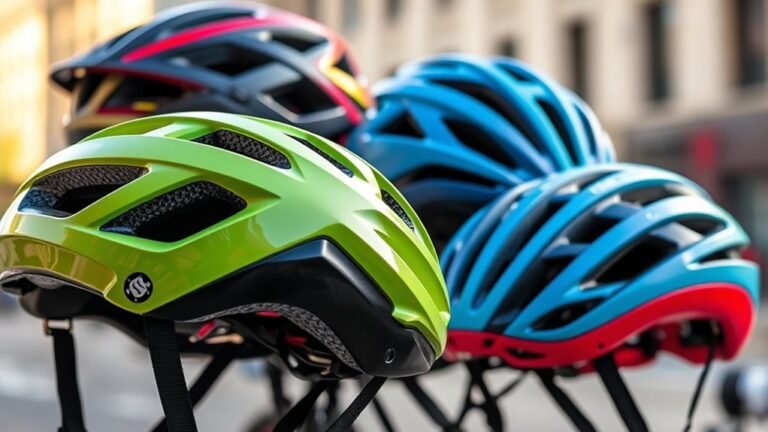
Choosing the Right Helmet Size
Choosing the right helmet size is essential for your safety and comfort. Start by measuring your head circumference with a soft tape measure, ensuring you get an accurate size. Once you’ve got your size, check the helmet fit by putting it on and adjusting it to sit level on your head without any wobbling.
Measure Head Circumference
To guarantee a proper fit, it’s essential to measure your head circumference before purchasing a bicycle helmet. Start by using a flexible measuring tape to wrap around your head, just above your eyebrows and ears. Make sure the tape is snug but not tight, and note the measurement where the ends meet. This will give you your head size. Remember, different brands may have varying sizing charts, so always compare your measurement with the specific helmet’s guidelines. If you don’t have a tape, a piece of string can work; just measure it against a ruler afterward. Accurate measurement techniques are vital for comfort and safety while riding, allowing you the freedom to explore the open road confidently.
Check Helmet Fit
After you’ve measured your head circumference, the next step is checking the fit of the helmet you’re considering. A well-fitted helmet should sit level on your head, snug but not overly tight. You shouldn’t feel any pressure points, and it shouldn’t shift when you shake your head. Verify the front of the helmet rests about an inch above your eyebrows for maximum helmet safety. Next, check the straps; they should form a “V” shape beneath your ears. Adjust them for comfort and security, as strap durability is essential for protection during rides. Finally, perform a quick shake test. If it stays put, you’ve got a solid fit that will keep you safe and free on your biking adventures.
Initial Helmet Placement
Getting the right fit starts with proper helmet placement. Begin by ensuring your helmet is level on your head. It should sit just above your eyebrows, covering your forehead without obstructing your vision. This helmet positioning is essential for both safety and comfort. Next, adjust the helmet’s position by gently shifting it back and forth; it should stay put without sliding. If it moves, you’ll need to make initial adjustments to the fit system inside. The straps should form a “V” shape just below your ears, but we’ll tackle that later. For now, focus on getting the helmet securely positioned. A well-placed helmet not only enhances your riding experience but also protects you on your adventures.
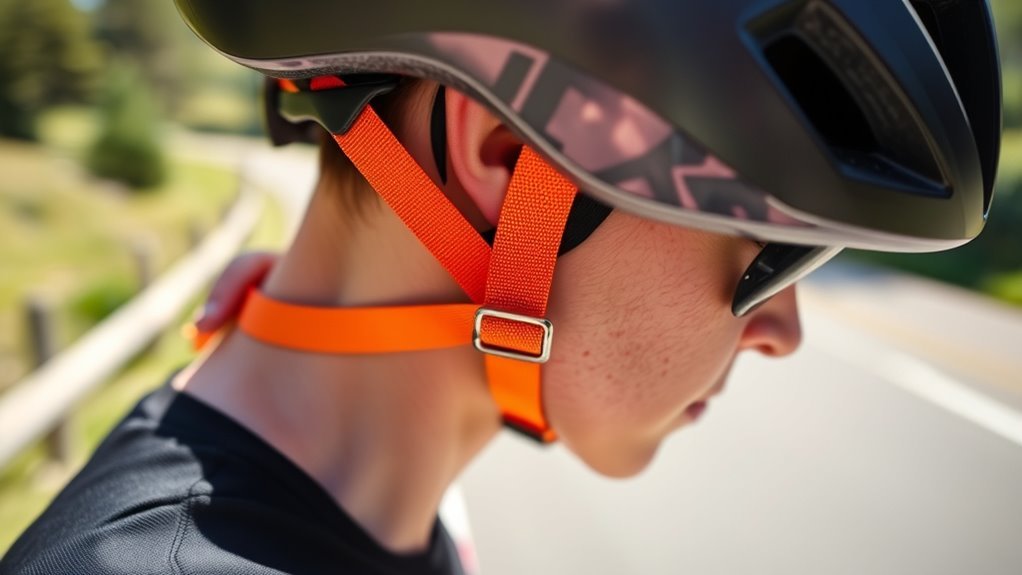
Adjusting the Side Straps
Adjusting the side straps of your helmet is essential for achieving a snug, comfortable fit. Start by locating the sliders on each side of the helmet. Pull the straps to adjust the side strap length until they form a V-shape just below your ears. This guarantees your helmet sits securely without pinching or being too loose.
Here’s a quick reference table for side strap adjustment:
| Step | Action | Result |
|---|---|---|
| 1. Identify sliders | Locate side strap sliders | Access for adjustment |
| 2. Pull straps | Adjust strap length | Achieve ideal fit |
| 3. Check positioning | Confirm V-shape under ears | Comfort and security |
| 4. Test fit | Move helmet side to side | Stability confirmed |
| 5. Finalize adjustment | Verify no slack | Ready for riding |
With this guide, you’ll be set for your next adventure!
Securing the Chin Strap
Securing the chin strap is essential for a safe and comfortable ride. You’ll want to guarantee proper placement and adjust the strap’s tightness for a snug fit without causing discomfort. Checking for comfort is key, as a well-secured chin strap can make all the difference in your cycling experience.
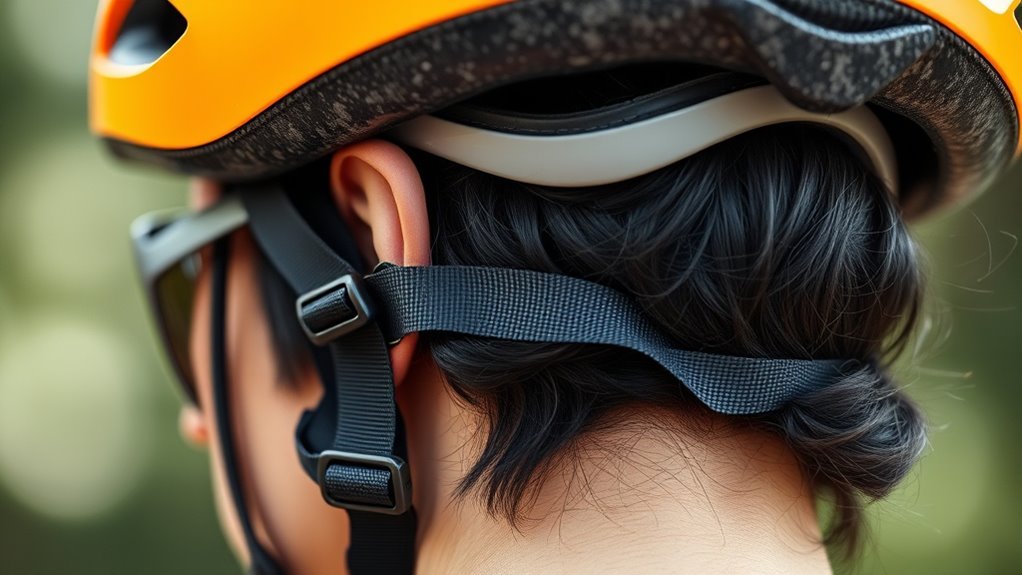
Proper Chin Strap Placement
A well-fitted chin strap is essential for guaranteeing your bicycle helmet stays in place during rides. Proper strap alignment not only enhances comfort but also maximizes safety. Here’s how to achieve that:
- Position the strap: The chin strap should sit snugly beneath your chin, forming a ‘V’ shape just below your ears.
- Adjust the side straps: Make sure they’re symmetrical and aligned with your ears for ideal fit.
- Check for slack: Verify there’s no excess slack; the strap should be tight enough that you can’t pull it away from your chin but not so tight that it’s uncomfortable.
- Buckle securely: Fasten the buckle firmly, ensuring it holds without pinching your skin.
With the right chin strap placement, you’re ready to ride freely and safely!
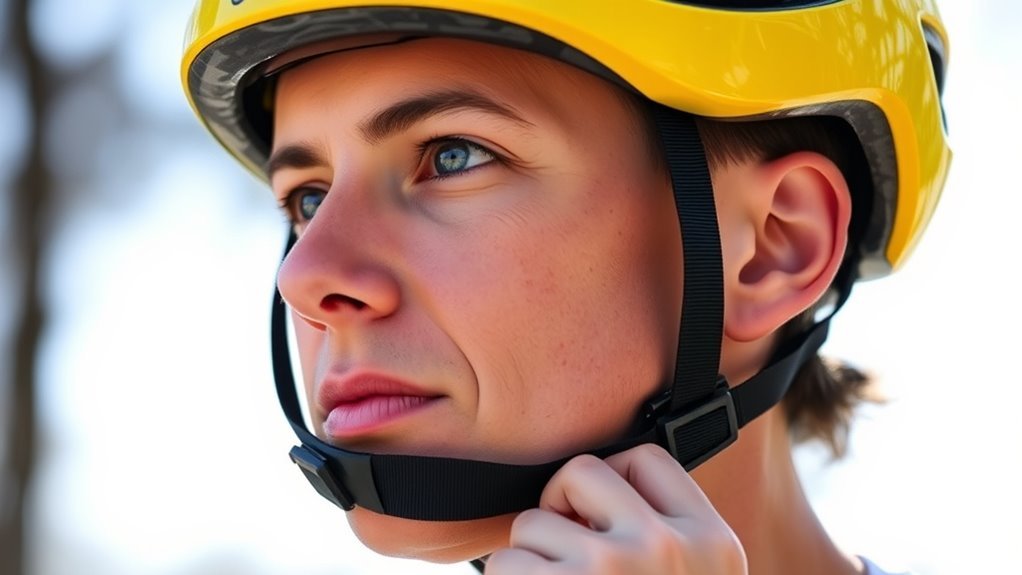
Adjusting Strap Tightness
When it comes to ensuring your safety while cycling, getting the right strap tightness is essential. Start by adjusting the strap length so that it fits snugly under your chin. You should be able to fit one or two fingers between the strap and your chin—this indicates the proper strap tension. If it’s too loose, the helmet may shift during a fall, compromising your protection. Conversely, if it’s too tight, it can cause discomfort and distraction. Make small adjustments to find that perfect balance. Remember, a well-fitted chin strap not only enhances safety but also allows you the freedom to ride confidently. Once you’ve secured the strap, you’ll be ready to hit the road with peace of mind.
Checking for Comfort
Securing comfort while wearing your helmet is just as important as the safety it provides. A well-fitted chin strap enhances your riding experience and keeps you secure. Here’s how to check for comfort:
- Strap Materials: Verify the straps are made from soft, durable materials that won’t irritate your skin.
- Padding: Check the helmet padding; it should cushion your head without causing pressure points.
- Adjustment: Adjust the chin strap so it’s snug but allows you to open your mouth comfortably; you should be able to fit one finger between the strap and your chin.
- Test Movement: Shake your head gently; the helmet should stay in place without discomfort.
Testing the Fit
To make sure your helmet fits properly, you’ll want to conduct a few simple tests. Start by putting on the helmet, ensuring it sits level on your head, about an inch above your eyebrows. Then, perform fit testing by wiggling your head side to side and up and down. The helmet should stay securely in place without shifting. Next, check the chin straps; they should be snug but not too tight, allowing you to open your mouth comfortably. Finally, with the helmet on, give it a gentle push from the front and back. If it moves considerably, it’s a sign that the fit isn’t ideal. Remember, proper helmet safety is essential for your protection while riding.
Making Fine Adjustments
While you may think your helmet is properly fitted after testing it, making fine adjustments can greatly enhance comfort and safety. Start by focusing on the strap length, as this can markedly impact how your helmet sits on your head. Here are some effective adjustment techniques:
Making fine adjustments to your helmet can significantly improve both comfort and safety while cycling.
- Check the Side Straps: Verify they’re positioned just below your ears for ideal fit.
- Buckle Placement: Adjust the chin strap so it’s snug but not uncomfortable when buckled.
- Vertical Adjustments: If your helmet has a height adjustment, tweak it for better alignment with your forehead.
- Final Tightening: After adjustments, give all straps a final tighten to confirm everything stays secure during your ride.
These steps will help you enjoy a safer, more comfortable cycling experience.
Checking for Movement
After you’ve made your adjustments, it’s vital to check for movement to guarantee your helmet fits securely. Start by gently shaking your head from side to side and up and down. If your helmet shifts considerably, you need to tighten the strap tension. A properly adjusted helmet should stay in place without excessive movement. Next, check the stability by ensuring the helmet sits snugly on your head, just above your eyebrows. You shouldn’t feel any pinching, but it should feel secure. Remember, a stable helmet is essential for your safety while enjoying the freedom of riding. If you notice any instability, revisit your adjustments and make the necessary changes to achieve the perfect fit.
Regular Maintenance and Checks
Once you’ve confirmed your helmet fits properly and remains stable, it’s important to incorporate regular maintenance and checks into your riding routine. Keeping your helmet in top shape guarantees your safety and comfort. Here are four key areas to focus on:
- Regular inspections: Check for cracks or damage on the outer shell and foam padding.
- Strap cleanliness: Wipe down straps with a mild soap solution to remove sweat and dirt.
- Adjustment checks: Periodically confirm the straps and buckles are functioning correctly and can be easily tightened or loosened.
- Fit verification: After making adjustments, verify that the helmet sits snugly on your head without shifting during movement.
These simple steps will help you enjoy your rides with peace of mind!
Tips for Comfortable Riding
To guarantee a comfortable ride, it is essential to pay attention to both your bicycle setup and your own personal gear. Ensuring ride stability starts with adjusting your seat height and handlebar position. Don’t overlook the importance of strap comfort; your helmet straps should fit snugly without pinching.
| Gear Element | Adjustment Tips | Benefits |
|---|---|---|
| Seat Height | Align with hip when standing | Improved pedaling efficiency |
| Handlebar Position | Should allow slight bend in arms | Enhanced control and comfort |
| Helmet Straps | Tighten without discomfort | ideal safety and focus |
Frequently Asked Questions
Can I Adjust the Straps After Every Ride?
Yes, you can adjust the straps after every ride. In fact, it’s a good practice for strap maintenance. Adjusting comfort levels helps guarantee your helmet fits snugly and securely, which is essential for safety. Make it a habit to check those straps, especially if you feel any discomfort. A well-fitted helmet allows you to enjoy your ride with confidence, knowing you’re protected while experiencing the freedom of cycling.
What Materials Are Helmet Straps Typically Made From?
Helmet straps are typically made from durable materials like nylon straps and polyester webbing. These materials provide strength and flexibility, guaranteeing your helmet stays securely in place during rides. Nylon offers excellent abrasion resistance, while polyester is known for its UV stability and resistance to stretching. When you choose a helmet, look for these materials to guarantee safety and comfort on your adventures, allowing you the freedom to ride confidently.
How Often Should I Replace My Helmet?
You might think your helmet’s fine as long as it looks good, but it’s essential to replace it every 3 to 5 years, regardless of wear. Over time, materials degrade, and helmets may not meet safety standards after their lifespan. If you’ve been in an accident, replace it immediately, even if there’s no visible damage. Prioritizing your safety on the road is important for that sense of freedom you cherish while riding.
Can I Use My Helmet in Different Weather Conditions?
Yes, you can use your helmet in different weather conditions! Just keep in mind that helmet ventilation plays an essential role in comfort during hot weather, while many helmets also provide some weather protection against rain or wind. However, extreme conditions might require additional gear. Always verify your helmet fits well and is in good condition, as this maximizes its effectiveness, allowing you the freedom to ride confidently, no matter the weather!
Are There Helmets Specifically Designed for Different Sports?
Yes, there are helmets specifically designed for different sports. Each sport has unique safety standards and sport variations, which means you’ll need a helmet that fits those specific needs. For cycling, you want a lightweight design with ventilation. For skateboarding, a sturdier helmet that covers more of your head is essential. Always choose a helmet that meets the safety standards for your sport to guarantee maximum protection and freedom during your activities.