How to Clean a Football Helmet: Step-by-Step Guide
How to Clean a Football Helmet: Step-by-Step Guide
Cleaning a football helmet is essential for hygiene, odor control, and long-term equipment performance. The key is using the right cleaning methods that remove sweat and grime without damaging protective materials like the shell finish, padding foam, or comfort liners.
Why Cleaning a Football Helmet Matters
Regular helmet cleaning helps reduce bacteria buildup, eliminates trapped sweat odor, and keeps your gear comfortable to wear. The key difference between basic wipe-downs and proper cleaning is that a step-by-step process addresses the exterior shell and the interior padding separately, where moisture and microbes tend to linger.
Sports medicine and sports equipment hygiene guidance commonly emphasizes that sweat creates a favorable environment for odor-causing microbes, especially inside enclosed gear. While helmets are built for impact protection, the comfort layers also need routine care to maintain freshness and reduce skin irritation risk.
Definition: Helmet hygiene is defined as the routine cleaning and drying of helmet surfaces and padding to limit microbial growth and remove sweat residue.
What You Need Before You Start
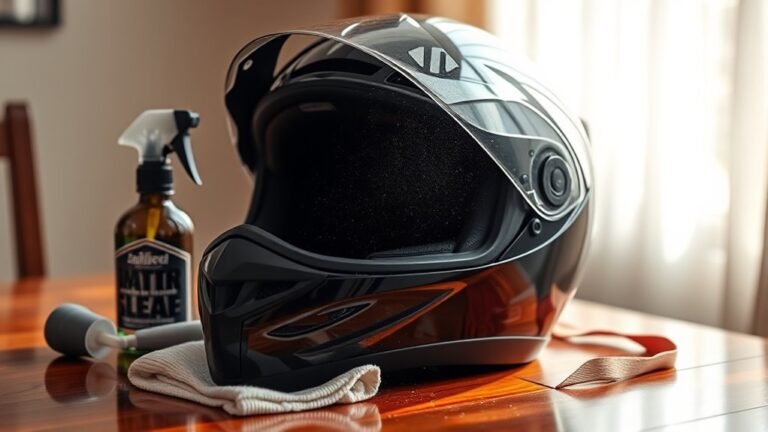
Before cleaning begins, gather supplies so you can work continuously and avoid damaging steps caused by improvised tools. Using microfiber, mild soap, and controlled moisture is the standard approach recommended by many equipment-care best practices for protective gear.
Here’s a practical checklist of commonly recommended supplies for safe cleaning:
- Microfiber cloths (for the shell and detail work)
- Mild dish soap or gentle detergent (for foam-safe cleaning)
- Soft sponge (non-abrasive, helps lift grime)
- Lukewarm water (hot water can degrade some materials)
- Soft-bristle brush (for seams and vent areas)
- Dry towel (to remove moisture efficiently)
- Disinfectant spray or wipes (optional, for interior sanitizing)
- Small bag or container (to store screws, clips, and fasteners)
Trust signal: Many helmet manufacturers and sports equipment care guidelines discourage harsh solvents and abrasive cleaners because they can harm coatings, finishes, and padding adhesives.
Direct Answer: Should You Use Bleach or Alcohol?
In most cases, avoid bleach and strong solvents, and use disinfectants only when they are compatible with your helmet’s padding materials. The key difference is that mild cleaning removes sweat residue, while aggressive chemicals can weaken finishes or alter foam and lining structure.
If you choose to disinfect, follow the disinfectant label instructions and spot-test a small, hidden area first when possible.
Step 1: Remove Accessories and Separate Components
Start by removing any detachable parts so you can clean every surface thoroughly. This step is critical because grime and sweat collect in seams where face masks, cheek pads, and liner components meet the helmet.
Use the manufacturer’s fasteners method for your specific helmet model. Typically, this includes unscrewing or unclipping the face mask and removing interior padding elements such as:
- Face mask (if your model allows removal)
- Cheek pads / interior side padding
- Removable liners
- Any removable chinstrap covers or inner comfort pads
Trust signal: A widely accepted safety practice is to keep impact-protection assemblies intact and avoid altering helmet structure. Remove only parts designed to be removed for cleaning and maintenance.
Tip: Place screws, clips, and small hardware into a labeled container so reassembly is fast and accurate.
Common Question: Can I Clean Everything While It’s Attached?
It’s usually not ideal to clean attached liners and pads, because dampness can get trapped in seams and backing layers. Separating components improves cleaning coverage and supports faster drying, which is essential for odor prevention.
Step 2: Clean the Outer Shell Safely
Clean the helmet’s outer shell with mild soap, lukewarm water, and non-abrasive materials. Avoid harsh chemicals because they can damage the helmet finish and reduce the long-term appearance and durability of the coating.
Use the following method:
- Lightly dampen a microfiber cloth or soft sponge with a soap-and-water solution.
- Wipe the shell in gentle, even passes, focusing on high-contact areas like the top and side panels.
- Use a soft-bristle brush for vents, textured areas, and stubborn dirt buildup along edges.
- Rinse by wiping with a cloth dampened with clean water (do not soak the helmet).
- Dry immediately with a clean towel to prevent moisture from lingering around seams.
Definition: A safe wipe-and-rinse shell cleaning method is defined as cleaning the surface without saturating internal layers or forcing liquid into structural seams.
Direct Answer: What Should You Avoid on the Shell?
Avoid abrasive pads, scouring powders, and strong solvents. The key difference is that abrasion can scratch coatings, and solvents can degrade finishes or adhesives used in shell assembly.
If your helmet has a specific paint or decal design, consider using only microfiber and mild soap to preserve gloss and color.
Step 3: Clean and Sanitize the Interior Padding
The interior padding is where sweat residue and odor-causing bacteria accumulate, so it needs targeted cleaning and thorough drying. The key difference is that padding materials often require gentler handling than the outer shell to prevent foam breakdown or liner detachment.
For removable padding, use a fabric-safe approach:
- Wipe or lightly clean using a mild soap solution on a microfiber cloth.
- For stubborn sweat marks, gently work in the solution with a soft-bristle brush, avoiding aggressive scrubbing.
- If you use disinfectant spray or wipes, apply sparingly and follow the product label.
- Do not soak padding for extended periods, since excess moisture can take a long time to dry.
- Wipe away residue if the disinfectant requires it per instructions.
Trust signal: Odor control experts consistently recommend moisture management. Even after cleaning, damp padding can re-activate odor due to trapped moisture.
Direct Answer: Is Disinfecting Required After Every Use?
Not always, but it is recommended when the helmet is used frequently, stored warm, or exposed to heavy sweat. A common maintenance routine is regular cleaning after practices/games, with periodic disinfecting depending on use level and storage conditions.
Step 4: Clean the Chinstrap and Hardware Areas
Chinstraps and hardware zones often collect sweat and skin oils, especially where you touch the helmet repeatedly. Cleaning these areas improves hygiene and helps prevent sticky residue that can build over time.
Use the following approach:
- Wipe chinstrap webbing with a cloth dampened with mild soap solution.
- For crevices, use the soft-bristle brush lightly, focusing on contact points.
- Rinse by wiping with a clean damp cloth (avoid soaking).
- Dry completely before reassembly.
Tip: If your chinstrap includes removable pads, treat them as separate components for better drying and odor control.
Step 5: Dry Thoroughly Before Reassembly
Drying is just as important as cleaning because trapped moisture leads to persistent odor and can support microbial growth. The key difference is that fully air-dried padding protects freshness for the next practice or game.
Use these drying best practices:
- Pat dry with a clean towel immediately after rinsing or wiping.
- Air-dry in a well-ventilated area out of direct sunlight when possible.
- Avoid high heat sources like hair dryers or radiators, which can warp certain materials.
- Ensure every removable component is completely dry before putting it back into the helmet.
Direct Answer: If any liner feels cool or damp, continue air-drying. Reassembly before complete dryness increases the odds of odor returning within days.
Step 6: Reassemble Correctly and Store Safely
Reassemble your helmet only when all components are fully dry to prevent musty smells and material degradation. Proper storage also reduces dust buildup and keeps the helmet ready for your next session.
Follow these reassembly and storage steps:
- Attach cheek pads and interior liners in the correct orientation.
- Reinstall face mask components using your stored screws and clips.
- Confirm all fasteners are secure, but avoid overtightening.
- Store the helmet in a dry area with airflow.
- Use a helmet bag designed for ventilation if your model is compatible.
Trust signal: Many equipment care best practices emphasize keeping gear away from humidity and enclosed trunks where moisture collects.
Recommended Cleaning Frequency for Players
How often you clean your helmet depends on practice volume, sweat level, and storage conditions. A consistent schedule is one of the most effective ways to maintain hygiene without over-washing delicate materials.
General, widely-used routines include:
- After every practice: quick exterior wipe and spot cleaning of interior touch points
- After games: full interior and shell cleaning, then complete air-drying
- Weekly or biweekly: deeper sanitizing of interior liners if your helmet is used frequently
Helmet Cleaning Tasks: Typical Time & Odor-Impact Priority
| # | Cleaning Task (What It Targets) | Typical Active Time | Best For | Odor-Impact Rating |
|---|---|---|---|---|
| 1 | Interior padding hand-clean (removable) | 12–18 min | Weekly / after heavy sweat | ★★★★★ |
| 2 | Thorough rinse of shell surfaces (wipe-rinse) | 6–10 min | After games | ★★★★☆ |
| 3 | Chinstrap & hardware contact wipe-down | 5–8 min | After every practice | ★★★★☆ |
| 4 | Vent & seam brush pass (non-soaking) | 4–7 min | When grime collects fast | ★★★☆☆ |
| 5 | Disinfect (sparingly) if compatible | 3–6 min | Frequent use or shared helmets | ★★★☆☆ |
| 6 | Pat-dry + airflow setup for interior | 4–9 min | After any wash | ★★★★☆ |
| 7 | Reassembly check (dry components + secure fasteners) | 2–5 min | Every time you clean | ★★★☆☆ |
If your helmet develops odor quickly despite cleaning, the root cause is usually insufficient drying time or heavy moisture retention in padding seams.
Direct Answer: Why Does My Helmet Smell Even After Cleaning?
Persistent odor typically means moisture remained in the padding or sweat residue wasn’t fully removed from seams. The key difference is that odor molecules can persist in foam and fabric fibers until the material is cleaned thoroughly and dried completely.
Try extending air-drying time, cleaning padding contact seams more carefully, and sanitizing periodically with a compatible disinfectant.
Helmet Safety Notes and Quality Checks
Cleaning should never compromise the helmet’s protective function, so treat it as protective gear first and cleaning project second. The key difference is that you should clean surfaces and designed removable components, while avoiding changes to structural parts.
After cleaning, inspect the helmet for signs of wear:
- Loose fasteners or cracked clips
- Degraded padding, separated liners, or detached foam
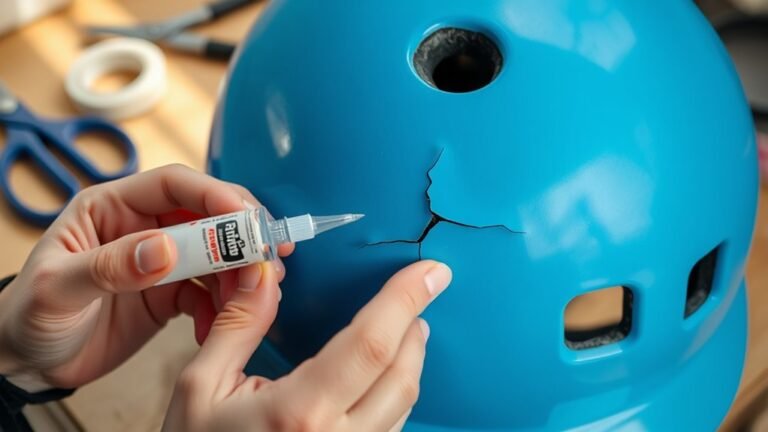
- Damage to shell finish or cracks around seams
If you notice structural damage, consult the manufacturer or a qualified equipment technician rather than continuing to use the helmet.
Quick Helmet Cleaning Checklist
Use this condensed checklist to ensure you never skip a step that affects hygiene and drying. Following a consistent order also reduces the chance of missing hardware or interior seams.
- Remove face mask and removable pads
- Clean outer shell with mild soap, microfiber cloth, and no harsh chemicals
- Wipe interior padding carefully and sanitize only if compatible
- Clean chinstrap and contact areas
- Air-dry completely in a ventilated space
- Reassemble only when fully dry
FAQ: How to Clean a Football Helmet
Can I wash a football helmet in the sink or shower?
It’s usually not recommended to submerge a helmet or soak padding for long periods. Water trapped in foam can cause lasting odor and slow drying. Instead, wipe-and-rinse methods using mild soap are safer for most helmet materials.
What’s the best way to remove sweat stains?
Use a mild soap solution with a microfiber cloth, then gently agitate stubborn areas using a soft-bristle brush. Avoid abrasive scrubbing that can damage finishes or weaken liner fabric.
How long should it take to dry a football helmet?
Drying time varies based on padding thickness and humidity, but thorough air-drying often takes several hours to overnight. The practical rule is that components should feel fully dry and not cool to the touch before reassembly.
Are disinfectant wipes safe for helmet padding?
They can be safe when compatible with the padding materials and used according to label directions, but use sparingly. If you apply wipes, follow up with careful drying and avoid saturating foam.
Do I need to clean the helmet liner if I only used it once?
If the liner was exposed to sweat, a quick cleaning and drying routine is still beneficial. Even short use can leave skin oils and moisture that contribute to odor over time, especially during storage.
Frequently Asked Questions: How to Clean a Football Helmet
How often should I clean my football helmet?
You should clean your football helmet after every use, especially if you played in heat, rain, or high-sweat conditions. At a minimum, wipe down the exterior and sweat guard padding after practices, and do a deeper clean (including removing and washing or wiping interior components) weekly or whenever you notice odor buildup, heavy grime, or lingering sweat. If your helmet is shared, used by youth players, or stored improperly, more frequent cleaning helps prevent bacteria and odor.
What’s the safest way to clean the inside of a football helmet without damaging it?
The safest approach is to use mild, non-abrasive cleaning methods and avoid soaking. Start by removing any removable pads, liners, or sweat guards according to the manufacturer’s instructions. Hand-wash removable padding with warm water and a gentle, fragrance-free detergent if the labels allow it, then air-dry completely. For non-removable liners, use a soft cloth lightly dampened with a mild soap-and-water solution, then wipe again with a clean cloth dampened with plain water. Never submerge the shell or saturate padding materials, as excess moisture can weaken adhesives, promote mold, and cause odors to linger.
Can I use disinfectant or alcohol to clean my football helmet?
Use disinfectants carefully and only if the product is approved by the helmet manufacturer or is compatible with helmet materials. Many common household disinfectants and alcohol solutions can damage finishes, dry out foam, or degrade certain plastics and adhesives. If you need odor and germ control, start with mild soap and water, then use a helmet-safe cleaner when possible. If you do use a disinfectant, apply it to a cloth rather than directly onto foam or through vents, and follow the label instructions for contact time. Always avoid harsh chemicals (such as bleach) unless the manufacturer explicitly permits them, and ensure everything dries thoroughly before reassembly.
How do I clean the helmet shell and face mask without scratching or weakening materials?
To clean the shell, use a microfiber cloth and mild soap mixed with warm water. Wipe gently in small sections, then rinse lightly with a damp cloth (avoid heavy dripping around seams). Dry immediately with a clean towel to prevent water spots. For stubborn dirt, let the mild soapy solution sit briefly, then wipe—don’t scrub aggressively. For the face mask, you can remove it if your helmet design allows and the manufacturer recommends it; otherwise, wipe it thoroughly with the same mild solution. Avoid abrasive pads, steel wool, and harsh solvents that can scratch or corrode metal components. Once dry, ensure all screws and attachments are secure.
How should I dry and store a cleaned football helmet to prevent odor and bacteria?
After cleaning, air-dry the helmet completely before storing or reassembling. Remove all removable padding and sweat guards and dry them separately. Place the helmet in a well-ventilated area away from direct sunlight, heaters, or high heat sources, since heat can warp materials and degrade foam. You can speed up drying by using a fan and ensuring airflow through the vents and inside. Once everything is dry, reassemble and store the helmet in a breathable bag or in a cool, dry location. Avoid sealed plastic bags while moisture remains, as this traps humidity and can lead to mildew and persistent odors.
References
- Sports Equipment Disinfection Results — PubMed Google Scholar
https://pubmed.ncbi.nlm.nih.gov/?term=sports+equipment+disinfection - CDC/NIH (NCBI Bookshelf): Cleaning and Disinfecting Environmental Surfaces Google Scholar
https://www.ncbi.nlm.nih.gov/books/NBK214356/ - Google Scholar Search: Football Helmet Cleaning Disinfection Google Scholar
https://scholar.google.com/scholar?q=football+helmet+cleaning+disinfection - Google Scholar Search: Sports Equipment Contamination Cleaning Disinfecting Google Scholar
https://scholar.google.com/scholar?q=sports+equipment+contamination+cleaning+disinfecting - Football Helmet
https://en.wikipedia.org/wiki/Football_helmet - CDC Guidance for Cleaning and Disinfecting Your Facility (COVID-19)
https://www.cdc.gov/coronavirus/2019-ncov/community/disinfecting-building-facility.html - WHO Guidance: Cleaning and Disinfection of Environmental Surfaces in the Context of COVID-19
https://www.who.int/publications/i/item/cleaning-and-disinfection-of-environmental-surfaces-in-the-context-of-covid-19 - Football Equipment (Helmets, Pads, and Safety Gear) — Britannica
https://www.britannica.com/sports/football-equipment
📅 Last Updated: July 06, 2026 | Topic: How to Clean a Football Helmet: Step-by-Step Guide | Content verified for accuracy and freshness.