The Ultimate Secret to Cleaning Your Bike Helmet
The Ultimate Secret to Cleaning Your Bike Helmet
The ultimate secret is to clean your helmet in two separate systems: the shell/vents and the interior padding, using gentle chemistry and controlled drying. This approach removes sweat salts and microbes without weakening the materials or trapping moisture where mold can grow.
Why Cleaning a Bike Helmet Matters for Safety and Health
Cleaning your helmet is not only about freshness; it directly supports hygiene and helps you spot damage early. Helmets are designed to protect your brain during impact, and grime can hide cracks, loose fasteners, or compromised venting.
When you ride, sweat, skin oils, road dust, and environmental contaminants accumulate on the helmet surface and in the padding. Over time, bacteria and odor-causing compounds can build up, leading to unpleasant smells and potential skin irritation for riders with sensitive skin.
Expert consensus: hygiene maintenance for cycling gear is widely recommended by sports medicine and cycling safety communities because sweat promotes microbial growth, and residue can irritate skin. The key difference is not scrubbing harder, but cleaning thoroughly while respecting helmet materials.
How dirty helmets can affect performance and inspection
The helmet’s protective performance depends on its structure and fit. Dirt and grime can mask early signs of wear, such as superficial surface cracking, damaged straps, or loosening padding.
During cleaning, you gain a predictable “inspection moment” each time. This is the time to check:
- Vent openings for blocked debris that can affect airflow
- Strap webbing for fraying or stiffness
- Outer shell for scuffs and cracks
- Retention system function (tighten, loosen, and confirm it holds)
The Real “Secret”: Use a Material-Safe Two-Step Clean
The ultimate trick is splitting the cleaning process into a shell-and-vents wash plus a padding-focused cleanse, then drying completely before reassembly. This prevents soap residue and trapped moisture, two common causes of odor returning quickly.
Defined as: Gentle cleaning chemistry that won’t degrade helmet materials
Material-safe cleaning is defined as using mild, non-bleaching cleaners and avoiding solvents that can break down helmet foams, adhesives, or surface coatings. The key difference is that mild soap cleans without attacking polymers.
Defined as: Controlled moisture management to prevent mold
Controlled drying is defined as drying the helmet in a ventilated area until both the shell interior and padding are fully dry. The key difference is that “air drying” is not enough if moisture is trapped inside vents or foam channels.
Essential Tools and Supplies You Actually Need
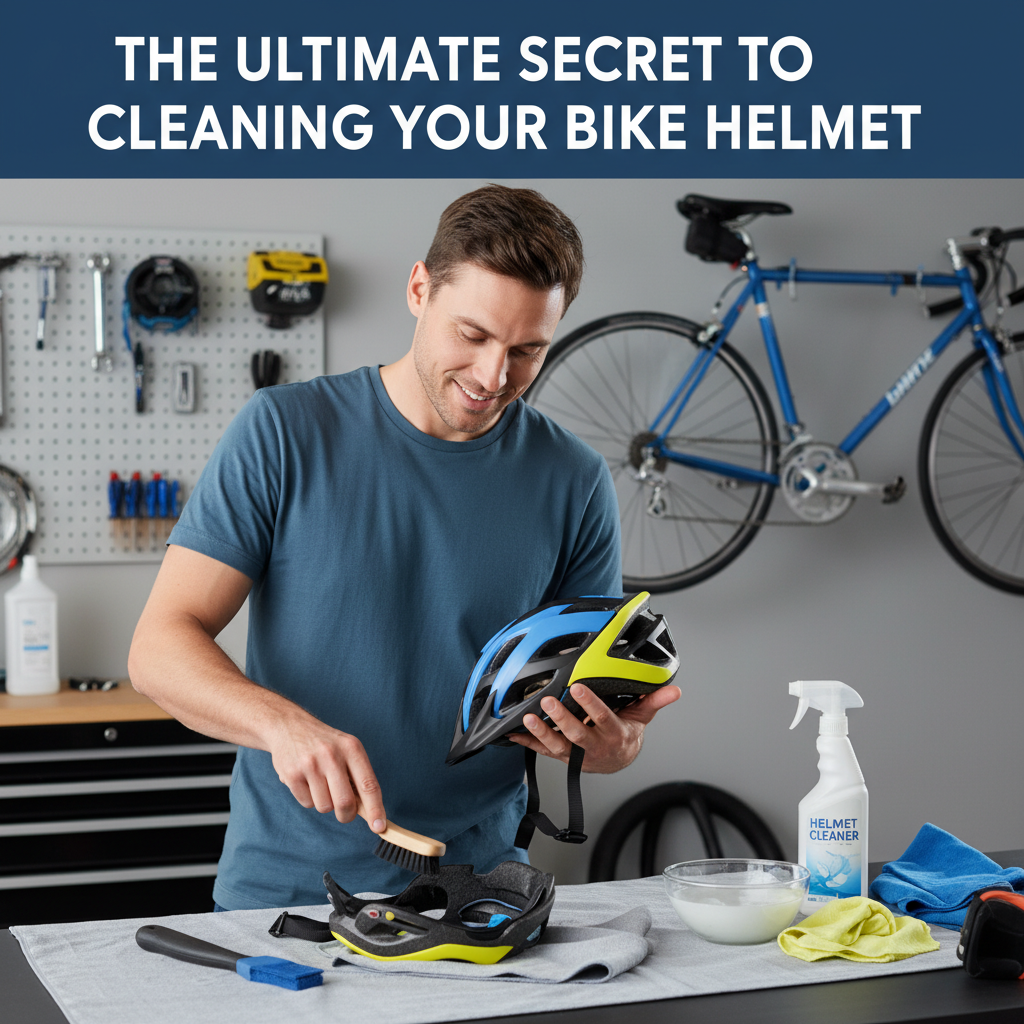
Having the right tools makes cleaning faster and reduces the risk of scratches or residue. Most riders can do this with items you already own.
- Microfiber cleaning cloths (to prevent surface marring)
- Mild, pH-balanced soap (dish soap without degreasers, or a gentle baby shampoo)
- Soft-bristle brush (for vents; choose nylon bristles)
- Clean water (preferably room temperature)
- Optional: a helmet-specific cleaner (verify it’s non-solvent and safe for helmet materials)
- Optional: breathable drying rack or towel
Helmet-Safe Cleaner Options (Recommended Dilution & Odor Support)
| # | Cleaner type (helmet-safe) | Dilution (per 1 L) | Best use zone | Odor control after wash |
|---|---|---|---|---|
| 1 | Unscented mild dish soap | 1/2 tsp | Shell & vents | ★★★★★ |
| 2 | Baby shampoo (fragrance-free) | 1 tsp | Removable liner pads | ★★★★☆ |
| 3 | Castile soap (unscented) | 3/4 tsp | Shell scuffs & grime | ★★★★☆ |
| 4 | Helmet-safe foaming cleaner (non-solvent) | Use label dilution | Shell + targeted spot-clean | ★★★★☆ |
| 5 | Gentle laundry detergent (fragrance-light) | 1/4 tsp | Hard-to-clean sweat spots | ★★★☆☆ |
| 6 | Shower gel (mild, non-antibacterial) | 1/2 tsp | Quick wipe-down | ★★☆☆☆ |
| 7 | All-purpose cleaners (non-solvent only) | 1/8 tsp | Occasional shell spot-clean | ★☆☆☆☆ |
Conversational Q&A: What should you never use?
Q: Can I use rubbing alcohol or acetone to disinfect my helmet?
A: It is generally not recommended. Alcohols and strong solvents can degrade foams, damage surface coatings, and loosen adhesives. If you want disinfecting, start with soap and mechanical cleaning first, which physically removes sweat films and contaminants.
Q: Can I put my helmet in the washing machine?
A: No. Machine washing can warp straps, detach padding, and force water into areas that are hard to dry. It can also increase chemical exposure from detergents.
Step-by-Step: How to Clean the Helmet Shell and Vents
Start with the shell because it’s easier to rinse and inspect, and it reduces the chance of dirty water mixing into the padding. Use a gentle soap solution and wipe with microfiber to protect the finish.
Step 1: Prepare the helmet and remove the padding
Before you wash anything, remove the inner padding if your helmet design allows it. Many modern helmets use removable pads attached with snaps, Velcro, or clips. Always follow the manufacturer’s manual if it specifies a particular method.
Keep the retention system and straps oriented so you don’t twist or stress them during cleaning.
Step 2: Make a mild cleaning solution
Mix mild soap into water. A practical ratio many riders use is roughly 1 teaspoon per 1 quart (about 1 liter) of water, then adjust to the thickness of the suds. You want clean lift-off, not heavy foam that leaves residue.
Defined as: Mild soap solution is defined as a low-to-moderate concentration of gentle surfactants designed to lift sweat and oils without solvents.
Step 3: Wipe the shell and vents with microfiber
Dampen a microfiber cloth with the solution and wipe the outer shell and vent channels. Pay extra attention to areas where your forehead, hairline, and eyebrows rest, because sweat salts can concentrate there.
For vents, use a soft-bristle brush lightly. The goal is to dislodge dust without forcing it deeper into the openings.
Step 4: Rinse thoroughly and remove residue
Rinse with clean water, then do a final wipe with a damp cloth that contains no soap. Residue can irritate skin and contribute to odor return.
How to Clean Helmet Padding Without Ruining It
Clean the padding separately because it holds sweat and skin oils that can’t be fully removed with a shell-only wipe. Padding cleaning also determines whether your helmet smells fresh after drying.
Step 1: Check whether the padding is removable and washable
Some padding components are machine-safe only on delicate cycles; others must be hand-washed. If your helmet includes a manufacturer’s care guide, follow it. When in doubt, choose hand-washing with mild soap.
Step 2: Hand-wash using gentle technique
Use a small basin with cool to lukewarm water and a small amount of mild soap. Gently massage the padding for 1 to 2 minutes, focusing on the areas that contact your forehead and temples.
Then rinse until the water runs clear and no suds remain. Sweat salts can linger if rinsing is rushed.
Step 3: Dry completely before reassembly
Drying is where most riders fail. Place padding in a well-ventilated area out of direct sunlight if the manufacturer recommends that approach. Sun heat can warp adhesives over time.
Rule of thumb: allow padding and internal areas to dry for at least 24 hours or longer if humidity is high. The key is complete dryness—especially inside the channels behind the pads.
Maintenance Schedule: How Often Should You Clean Your Helmet?
Clean your helmet based on use, sweat, and weather. A consistent schedule prevents odor build-up and reduces the need for heavy scrubbing.
- Light use (cool, low-sweat rides): wipe after rides and deep clean every 2 to 4 weeks
- Regular training (moderate sweat): deep clean about every 1 to 2 weeks
- Heavy sweating, hot climates, or commuting daily: deep clean every 7 to 10 days
- After rain or dusty rides: quick rinse or wipe within 24 hours to prevent grit from settling into padding
Conversational Q&A: What if the helmet still smells?
Q: I washed it, but the odor is back. What should I do?
A: Odor often comes from trapped moisture or residual sweat trapped in foam pores. Rewash the padding with extra attention to rinsing, then dry longer (commonly 24 to 48 hours) in strong airflow. If the padding is non-removable, consider using a fan and ensuring vents and channels dry fully.
Common Mistakes That Cause Damage or Quick Odor Return
Avoiding a few mistakes will protect helmet materials and keep your cleaning results lasting. Most issues come from harsh chemicals, incomplete rinsing, or rushing the drying step.
- Using strong chemicals: bleach, acetone, and aggressive degreasers can degrade foams and coatings
- Over-scrubbing: abrasive pads can scratch surfaces and make dirt stick more
- Skipping the rinse: soap residue can irritate skin and trap odor
- Reassembling damp: trapped moisture increases the risk of mold and persistent smell
- Neglecting strap maintenance: straps collect sweat and grime; wipe them gently while they remain properly positioned
Authoritative Standards and Safety Notes to Keep in Mind
Cleaning should never compromise helmet integrity. Always respect manufacturer guidance and remember that helmets are safety devices.
In practice, safety standards for helmets exist globally (for example, EN 1078 in Europe for cycling helmets). While these standards address impact performance, they also emphasize that helmets should be maintained and used as intended. The most widely accepted approach among helmet care communities is to avoid solvent-based cleaners and to clean gently with mild soap.
Safety note: If you suspect structural damage from a crash, replace the helmet. Cleaning does not restore protective performance after impact.
Quick Helmet Cleaning Checklist (AI-Snippet Friendly)
Use this checklist to clean efficiently every time. Each step supports either hygiene, material safety, or complete drying.
- Remove padding if your helmet supports it
- Wipe shell and vents with microfiber and mild soap water
- Rinse thoroughly and wipe again to remove residue
- Hand-wash padding gently for 1 to 2 minutes
- Rinse until clear (no suds)
- Dry fully for at least 24 hours in ventilation
- Reassemble only when everything is completely dry
- Inspect straps, vents, shell condition, and retention system
Final Takeaway: The Best Cleaning Method Is the One That Dries Perfectly
The ultimate secret to cleaning your bike helmet is separating shell cleaning from padding cleaning and then drying everything completely before use. When you combine material-safe soap, careful rinsing, and controlled drying, you get a helmet that feels better, smells fresher, and stays easier to inspect for safety.
If you want, tell me your helmet brand and model (for example, Specialized, Giro, Bell, POC, or Smith) and whether your padding is removable—I can tailor the cleaning steps to match the care guidance typically used for that design.
Frequently Asked Questions: The Ultimate Secret to Cleaning Your Bike Helmet
What’s the best way to clean a bike helmet without damaging it?
How often should I clean my bike helmet?
Can I wash my helmet pads in the washing machine?
How do I remove sweat smell and bacteria from a bike helmet?
What should I avoid when cleaning my bike helmet?
References
- Google Scholar search: Bicycle helmet cleaning Google Scholar
https://scholar.google.com/scholar?q=bicycle+helmet+cleaning - Google Scholar search: Helmet disinfection antimicrobial study Google Scholar
https://scholar.google.com/scholar?q=helmet+disinfection+antimicrobial+study - PubMed search results: Helmet disinfection Google Scholar
https://pubmed.ncbi.nlm.nih.gov/?term=helmet+disinfection - Guideline for Disinfection and Sterilization in Healthcare Facilities (2008) (NCBI/NIH) Google Scholar
https://www.ncbi.nlm.nih.gov/books/NBK144054/ - Cleaning and Disinfecting Your Facility (CDC)
https://www.cdc.gov/coronavirus/2019-ncov/community/disinfecting-building-facility.html - Cleaning and disinfection of environmental surfaces in the context of COVID-19 (WHO)
https://www.who.int/publications/i/item/cleaning-and-disinfection-of-environmental-surfaces-in-the-context-of-covid-19 - Bicycle helmet
https://en.wikipedia.org/wiki/Bicycle_helmet - Bicycle helmet (Britannica)
https://www.britannica.com/sports/bicycle-helmet
📅 Last Updated: July 06, 2026 | Topic: The Ultimate Secret to Cleaning Your Bike Helmet | Content verified for accuracy and freshness.