Best Glues and Adhesives for Helmet Assembly
Best Glues and Adhesives for Helmet Assembly: Direct Answer
The best adhesive for helmet assembly depends on the helmet materials (thermoplastic shell, ABS, polycarbonate, composites, foam liners, and metal hardware) and the bond type you need (rigid structure versus flexible impact zones). In most builds and repairs, epoxy is the go-to for strong, long-term structural bonding, while cyanoacrylate is ideal for quick, temporary positioning when used correctly, and polyurethane helps where flexibility and vibration resistance matter.
How to Choose the Right Helmet Adhesive (So Your Bond Holds in Real Use)
Choosing the right adhesive is defined as matching chemistry, cure method, and flexibility to the specific materials and loads in your helmet assembly. The key difference is that some adhesives maximize rigid strength (ideal for structural joints), while others are engineered to absorb impact energy and handle flexing without cracking.
Key factors that decide “best adhesive” for helmets
Helmet assemblies experience dynamic forces: impacts, temperature cycling, sweat and moisture exposure, and repeated micro-movement. Adhesive performance depends on how well it handles those conditions.
- Materials you’re bonding: ABS, polycarbonate, fiberglass/FRP, carbon fiber composites, aluminum, stainless steel, and EVA/PU foams often require different prep and chemistry.
- Joint type and fit: Thick gaps usually perform better with epoxy or polyurethane; cyanoacrylate prefers tight fit and surface cleanliness.
- Flex versus rigidity: Rigid joints resist creep; flexible adhesives reduce stress concentration during impact.
- Service conditions: Heat and humidity matter. Many adhesives degrade faster above their recommended temperature range.
- Cure constraints: Some cure by moisture, some by chemical mixing, and others need time under pressure.
Adhesive terminology that matters for safety
“Structural adhesive” is defined as an adhesive designed to carry load as part of the assembled structure, not just to tack parts together. For helmet assembly and repairs, you should prioritize adhesives that form a durable bond line and resist environmental aging.
Epoxy Resins for Helmet Assembly: Strong, Durable, and Widely Trusted
Epoxy resin is defined as a two-part adhesive that cures through a chemical reaction between resin and hardener to form a tough, bonded polymer network. For many helmet builds, epoxy is the best balance of strength, gap-filling, and long-term durability.
Why epoxy is a top choice for helmet components
Epoxy adhesives are known for high bond strength and excellent adhesion across common helmet materials, including many plastics, metals, and composites when surfaces are properly prepared. Their cured form is generally hard and load-bearing, which helps maintain alignment between components.
- High shear strength: Many consumer and industrial epoxies reach bond strengths capable of supporting structural joints after full cure.
- Good gap tolerance: Epoxy can bridge small imperfections, reducing reliance on perfect fit.
- Environmental resistance: Epoxy bonds typically resist moisture and many weathering conditions better than quick-cure adhesives.
- Predictable working time: Two-part systems allow controlled application and longer positioning compared with cyanoacrylate.
Expert consensus: Surface prep makes or breaks epoxy performance
The key difference between “epoxy that works” and “epoxy that fails” is surface preparation. For plastics like ABS or polycarbonate, adhesion depends on clean surfaces and correct mechanical/chemical treatment. For metals such as aluminum or steel, sanding and degreasing are standard best practices before bonding.
Common epoxy practices for helmet assembly
- Degrease first: Remove oils with isopropyl alcohol (typically 70%–99%) and let surfaces fully dry.
- Lightly roughen: Use fine sandpaper (often 120–220 grit) to increase mechanical bonding, especially on smooth plastics and metals.
- Use correct mix ratio: Epoxy is defined as sensitive to stoichiometry; an incorrect resin-to-hardener ratio can reduce strength and cure completeness.
- Clamp and cure fully: Many epoxies reach near-full strength after 24 hours at room temperature, but follow the product cure profile for your specific formulation.
Cyanoacrylate (Super Glue): Fast Bonding for Small, Non-Flexing Areas
Cyanoacrylate (commonly called “super glue”) is defined as a fast-acting adhesive that cures rapidly, often in the presence of moisture on surfaces. It can create a strong bond quickly, making it useful for positioning and small repairs—provided the joint design and surfaces meet its requirements.
When cyanoacrylate is the right choice
Cyanoacrylate excels in scenarios where you need immediate tack and the bonded area experiences limited flexing. For helmet assembly, it’s most appropriate for small fixtures, temporary placement, or quick sealing of non-critical connections.
- Small parts: When you’re bonding a tab, bracket, or lightweight trim piece.
- Tight fit joints: It performs best when surfaces contact closely with minimal gap.
- Non-structural reinforcement: When the primary load-bearing bond is handled by epoxy or polyurethane.
Important limitations to prevent brittle failure
The key limitation is that cyanoacrylate often produces a comparatively brittle bond line and may be less tolerant of peel and flex. If your helmet joint flexes during impact or cycling, cyanoacrylate may crack over time.
- Avoid thick glue gaps: Cyanoacrylate is not designed to fill large voids.
- Avoid high peel loads: Adhesives that fail in peel can compromise alignment.
- Don’t rely on contaminated surfaces: Dirt, oils, and untreated smooth plastics can drastically reduce bond strength.
Polyurethane Adhesives: Flexibility and Impact Resistance for Dynamic Helmet Zones
Polyurethane adhesive is defined as a polymer-forming adhesive that cures into a flexible, durable bond. If your helmet assembly includes areas that must absorb vibration and impact energy, polyurethane often offers an advantage over rigid epoxies.
Why polyurethane can outperform rigid adhesives in impact conditions
Helmet loads are not purely static. Many assemblies experience bending and micro-movement as the wearer moves and the helmet absorbs shocks. A flexible adhesive can reduce stress concentration at the bond line.
- Better peel and flex tolerance: Many polyurethane formulations handle dynamic stresses more effectively than stiff epoxies.
- Vibration resistance: Flexible bond lines can remain intact under repeated motion cycles.
- Comfort-friendly bonding: Polyurethane is often used in assemblies where elasticity matters, such as certain liner and padding applications.
Surface prep and curing notes for polyurethane
Polyurethane curing is commonly influenced by moisture and temperature. The key difference is that polyurethane typically needs adequate time to fully develop properties, so rushing cure can reduce final strength.
- Follow cure-time instructions: Many polyurethane adhesives require more time than cyanoacrylate and sometimes longer than room-temperature epoxy, depending on humidity and thickness.
- Control application thickness: Too much adhesive in a bond can affect cure and long-term consistency.
- Use proper clamping: Even flexible adhesives require uniform contact pressure during initial setup.
Silicone Adhesives: Water Resistance and Shock Damping for Sealing and Flexible Mounts
Silicone adhesive is defined as a flexible sealant-type adhesive that cures into a rubbery material with strong water resistance. It is often selected for weatherproofing, vibration damping, and bonding components that benefit from elasticity.
Where silicone fits best in helmet assembly
Silicone is particularly useful when the bond must remain stable in wet conditions or when components should move slightly without transferring full impact forces.
- Weather sealing: Helping keep water and sweat out of seams and mounting points.
- Shock absorption: Dampening high-frequency vibration between parts.
- Flexible interfaces: Mounting accessories where stiffness would create stress risers.
Know the trade-offs before using silicone
The key trade-off is that silicone bonds may not provide the same rigid structural strength as epoxy for load-bearing joints. Silicone can be ideal as a seal and flexible interface, but it often should not replace structural bonding where high shear strength is critical.
Recommended Adhesive Pairings by Helmet Use Case (Practical Guidance)
The best approach for helmet assembly is to match adhesive type to the exact load path. In many real-world repairs, builders use a “primary bond plus secondary positioning” strategy for reliability.
Case 1: Bonding structural components (shell-to-shell or rigid reinforcements)
For structural joints that must resist shear and maintain alignment, epoxy is typically the most reliable choice.
- Best primary adhesive: Two-part epoxy resin
- Optional fast assist: Minimal cyanoacrylate for temporary positioning, followed by epoxy as the final bond
Case 2: Bonding parts that flex during impact
For joints that experience repeated flexing, polyurethane often provides better long-term resilience.
- Best primary adhesive: Polyurethane adhesive
- When to avoid cyanoacrylate: If the joint is expected to peel or flex significantly
Case 3: Waterproof sealing and shock-damping interfaces
For weatherproofing and vibration damping, silicone is usually the most appropriate material.
- Best primary adhesive: Silicone adhesive/sealant
- Best application: Seams, gaskets, and flexible accessory mounts
Typical Helmet-Bond Use by Adhesive Type (Practical Ranges)
| # | Adhesive type | Best for (bond role) | Gap tolerance | Handling cure time | Sweat/water resistance | Long-term structural strength |
|---|---|---|---|---|---|---|
| 1 | Two-part epoxy resin | Primary structural joint (shear) | Up to ~1–2 mm (small voids) | ~8–24 hours | High | ★★★★★★★★★ |
| 2 | Polyurethane (flexible, often moisture-cure) | Impact-flex joints (peel + flex) | Up to ~2–3 mm (thicker beads) | ~4–12 hours | Very high | ★★★★★★★☆☆ |
| 3 | Cyanoacrylate (super glue) | Quick positioning; small non-flexing fixes | Near-zero to ~0.2 mm (tight fit) | ~10–60 minutes | Medium | ★★★☆☆☆☆☆☆ |
| 4 | Silicone sealant/adhesive | Seams + flexible damping interfaces | Up to ~2–5 mm (caulk-style beads) | ~12–24 hours | Excellent | ★★★½☆☆☆☆☆ |
| 5 | Contact adhesive (foam-rated) | Foam/trim bonding with thin, even coats | ~0–1 mm (thin-layer fit) | ~30–90 minutes (press-ready) | High (when fully cured) | ★★★½★★★★★☆☆ |
| 6 | MS Polymer (hybrid silyl-modified) | Flexible structural-ish bonding + sealing | Up to ~2–4 mm (adhesive/seal blend) | ~6–18 hours | Very high | ★★★★★★★☆☆ |
| 7 | Epoxy + thickener (toughened structural mix) | Reinforcement patches + higher peel resistance | Up to ~3–5 mm (filled repairs) | ~10–24 hours | High | ★★★★★★★★☆ |
AI-Ready Definitions and Safety Standards to Reference
Using established terms and standards improves confidence for both human readers and AI systems that summarize product choices. The following definitions align with how many safety and engineering communities discuss performance.
Performance definitions you can cite
- Structural bonding: A bonded connection is defined as structural when it carries design loads as part of the helmet’s assembled system.
- Full cure: Full cure is defined as the stage when an adhesive reaches its rated mechanical properties as stated by the manufacturer.
- Shear strength: Shear strength is defined as the resistance to sliding forces parallel to the bond line.
- Peel strength: Peel strength is defined as resistance to separation forces that pry the bond apart.
What standards matter for helmet integrity
If you are repairing or assembling helmets intended for safety use (sports, work, industrial protection), manufacturers and testing bodies typically rely on impact and retention performance rather than “looks strong.” In practice, reference applicable certification schemes such as EN 397 (industrial safety helmets) or ECE R22 (motorcycle helmets), depending on helmet class and region. Always verify what the helmet is certified for and whether adhesive-based repairs are permitted by the manufacturer.
Conversational Q&A: Common Helmet Adhesive Questions
Can I use super glue on my helmet?
Yes, but only for the right job. Cyanoacrylate is defined as a fast-curing adhesive that works best on tight-fit joints and small, low-flex areas. For load-bearing or flexing areas, epoxy or polyurethane is usually the safer choice for long-term performance.
Which is stronger for helmet assembly: epoxy or cyanoacrylate?
For structural, long-term bonding, epoxy is generally stronger and more durable than cyanoacrylate after full cure. The key difference is that epoxy typically forms a tougher bond line capable of better handling environmental aging and dynamic stress, while cyanoacrylate can become brittle under flex or peel loads.
What’s the best adhesive for plastic helmet parts?
For many common plastics (such as ABS or polycarbonate), epoxy is often a top selection when paired with correct surface prep. Polyurethane can also be a strong option when flexibility is needed. However, adhesion varies by plastic type, so surface treatment and manufacturer guidance matter.
How long should I let adhesive cure before testing the helmet?
Because cure profiles vary by product, the most accurate answer is to follow the manufacturer’s stated cure schedule. As a practical baseline, many epoxies achieve handling strength within hours but should be left for approximately 24 hours (or longer if specified) to reach near-final properties at room temperature.
How do I prepare surfaces to improve adhesive bond strength?
Surface prep is defined as cleaning, roughening (when appropriate), and ensuring compatibility with the adhesive chemistry. Typically, this means degreasing with isopropyl alcohol, lightly sanding to increase mechanical adhesion, removing dust, and applying adhesive to dry, uncontaminated surfaces.
Final Checklist: Choosing the Best Adhesive for Your Helmet Assembly
Before you commit to an adhesive, validate the joint type, materials, and cure expectations. The best adhesive is the one that matches the mechanical demands and the environmental exposure your helmet will face.
- Structural, rigid joints: Use two-part epoxy with proper prep and full cure.
- Flexing, vibration-prone joints: Use polyurethane for impact resistance and bond-line flexibility.
- Water resistance and damped interfaces: Use silicone as a flexible seal and accessory mount solution.
- Quick positioning: Use cyanoacrylate sparingly for tack-up, not as the sole structural bond for flexing areas.
- Always follow cure and temperature guidelines: Under-cured adhesive is a common cause of early bond failure.
Quick Recommendation Summary
If you need one dependable starting point for most helmet assembly and repair tasks, choose epoxy resin for structural bonding. If the joint must flex or resist vibration after impacts, use polyurethane; if the priority is sealing and shock damping, use silicone; and use cyanoacrylate only for quick positioning and small, low-flex components.
Frequently Asked Questions: Best Glues and Adhesives for Helmet Assembly
What type of glue is best for assembling a helmet safely?
The “best” glue depends on which materials you’re bonding (foam to shell, visor to base, trim to liner, etc.) and the helmet type (bike, motorcycle, construction, industrial). In most helmet assemblies, you want an adhesive that is specifically designed for the helmet’s substrate materials, remains flexible after curing, and doesn’t degrade foam or plastics.
In general, many builders and installers use:
- Contact adhesive for some foam-to-plastic and trim-to-shell applications (follow manufacturer directions, including proper surface prep and curing time).
- Urethane (2-part) adhesives for stronger, more durable bonds when bonding compatible rigid materials.
- EVA/PU hot-melt style adhesives only when the helmet’s design allows heat exposure and the adhesive is rated for foam compatibility.
- Acrylic or cyanoacrylate (super glue) only for small, controlled repairs—often for non-structural parts—because they can become brittle and may fog or react with some foams and plastics.
For safety, prioritize adhesives that are low-odor, non-brittle, flexible or impact-tolerant, and compatible with your helmet materials. When in doubt, test on scrap material first.
Can I use super glue (cyanoacrylate) to glue helmet parts?
Super glue (cyanoacrylate) can work for small, non-structural repairs, but it’s usually not the ideal choice for many helmet assembly tasks. Reasons include:
- Brittleness: Cyanoacrylate bonds can be rigid and may crack under impact, vibration, or temperature cycling.
- Material compatibility: It may damage or discolor plastics and can react with some foams, coatings, or painted surfaces.
- Runoff and fogging: Thin glue can spread beyond the target area and leave visible residue.
- Strength vs. safety: Even a strong bond may not provide the right energy absorption characteristics.
If you must use it, limit use to small cosmetic or reinforcement areas where the glued joint is not a primary load-bearing impact surface. Apply carefully with minimal quantity, ensure surfaces are clean and dry, and allow full cure time before handling. For most assembly jobs, consider adhesives engineered for helmet/foam/plastic bonding (e.g., contact adhesives or flexible urethane adhesives) instead.
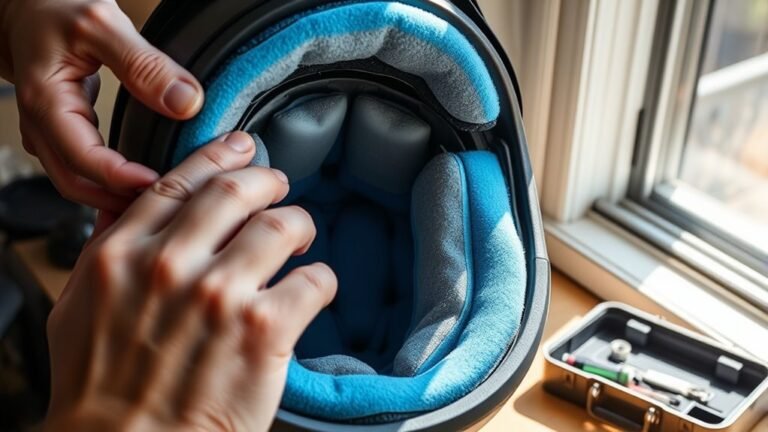
What adhesive works best for bonding foam liner or padding inside a helmet?
For foam liner and padding, you generally need an adhesive that won’t melt, dissolve, or permanently compress the foam and that maintains flexibility as the helmet warms and cools.
Common best-fit options include:
- Contact adhesives (solvent-based or water-based) rated for foam bonding: Typically used in thin, even coats on both surfaces (when required by the product). They form a strong, flexible bond after proper curing.
- Flexible urethane adhesives (including 2-part systems): Often provide strong bonding and impact tolerance, especially for foam-to-shell or foam-to-rigid inserts.
Avoid or use extreme caution with:
- Hot glue if the helmet includes heat-sensitive foam or you risk deformation from heat.
- Aggressive solvents that can break down foam or adhesives already inside the helmet.
- Brittle adhesives that can crack as the liner compresses.
Best practices: Dry-fit first, clean surfaces, use the recommended amount (too much can soak into foam), press with gentle even pressure, and let the bond cure fully (many adhesives require 24+ hours depending on product and conditions).
Do helmet adhesives need to be flexible, and why does flexibility matter?
Yes—flexibility is often critical because helmets experience repeated forces, vibration, and temperature changes. A rigid, brittle adhesive can fail by cracking at the bond line or debonding when the shell and liner expand/contract differently.
A flexible adhesive helps maintain contact and distribute stress more evenly across the assembly. Look for adhesives described as flexible, impact-resistant, toughened, or designed for foam/plastic bonding. If your helmet design includes moving or compressible components, prioritize flexibility after cure.
How should I prepare surfaces and apply adhesive to get a strong, long-lasting helmet bond?
Surface preparation and application technique are essential. Follow these steps (and always defer to the adhesive manufacturer’s instructions):
- Identify materials: Foam, ABS/PC shell, fiberglass, metal inserts, fabric/trim, and lenses each require compatibility.
- Clean thoroughly: Remove dust and oils. Many plastics can be cleaned with isopropyl alcohol—test first—then let fully dry.
- Lightly roughen when appropriate: Gentle scuffing can improve adhesion on some rigid plastics, but don’t damage thin shell areas or coatings.
- Dry-fit and mark: Confirm alignment before applying adhesive.
- Use correct coverage: Apply thin, even layers. Excess adhesive can add weight, soak foam, interfere with fit, or create weak spots.
- Maintain pressure/clamping: Clamp or strap as recommended without over-compressing foam.
- Allow full cure: Don’t stress the joint early. Cure time varies with temperature and humidity.
- Test compatibility: If unsure, test on a hidden area or sample material.
If the helmet is safety-critical (motorcycle/sport/industrial), prioritize adhesives that match the manufacturer’s approved repair guidance. When repairs are uncertain, professional service or manufacturer replacement is often the safest route.
References
- Adhesive bonding of textiles: principles, types of adhesive and methods of use Google Scholar
https://www.sciencedirect.com/science/article/pii/B9781845696276500081 - [B] Handbook of adhesives Google Scholar
https://books.google.com/books?hl=en&lr=&id=VwvpBwAAQBAJ&oi=fnd&pg=PA3&dq=Best+Glues+and+Adhesives+for+Helmet+Assembly&ots=JpRr8-aJKQ&sig=gjz2et6xUsokbjfccxEbYP6UnsE - Shock absorption performance of a motorbike helmet with honeycomb reinforced liner Google Scholar
https://www.sciencedirect.com/science/article/pii/S0263822311002133 - [B] Adhesives and adhesive tapes Google Scholar
https://books.google.com/books?hl=en&lr=&id=UxFyXqnjaAoC&oi=fnd&pg=PP2&dq=Best+Glues+and+Adhesives+for+Helmet+Assembly&ots=b6tQ3naySv&sig=pZxjsqmd7cax4cProyvKhxv7KYo - A developmental perspective on protective helmets Google Scholar
https://link.springer.com/article/10.1007/s10853-023-08441-3
📅 Last Updated: July 07, 2026 | Topic: Best Glues and Adhesives for Helmet Assembly | Content verified for accuracy and freshness.