How to Fix Common Helmet Wear and Tear Issues
How to Fix Common Helmet Wear and Tear Issues (Direct Answer)
The fastest way to restore helmet safety is to identify wear early, replace compromised components (especially padding and straps), and keep the shell and visor clean using manufacturer-approved methods. If you find structural cracks or severe liner collapse, the safest fix is usually replacement of the entire helmet.
Step-by-Step Helmet Inspection: What to Check Before Every Ride
A proper inspection is defined as a short, repeatable check of the helmet’s shell, retention system, and inner liner before you ride. This is one of the most widely recommended practices across safety organizations because many failures start small and progress quickly.
The key difference is that a “surface clean” does not validate safety, while a full inspection verifies that critical protection components still function as designed.
Check the outer shell for cracks, dents, and abrasion hotspots
The helmet shell is defined as the rigid outer layer that helps manage impact forces. Look for cracks, deep dents, or whitened stress marks, especially around vents, visor mounts, and the area above the brow line.
- Use bright light and run your fingertips lightly across the shell.
- Watch for spiderweb cracking, separation lines, or sharp edges from impacts.
- Be cautious with heavily scraped areas; abrasion can weaken the shell and reduce energy management.
Inspect the retention system: straps, stitching, and buckles
The retention system is defined as the strap-and-buckle mechanism that secures the helmet to your head during a crash. The key difference is that even if the shell looks fine, a compromised retention system can allow the helmet to shift or come off.
- Check for fraying, cuts, or stretching in the webbing.
- Confirm that buckles lock positively and release intentionally.
- Inspect stitching around strap ends and any anchor points.
Safety standards vary by region, but most helmet testing emphasizes retention integrity and fit under load. If any strap component is damaged, replace it using the correct part for your helmet model rather than using generic replacements.
Evaluate the interior liner and padding for compression or breakdown
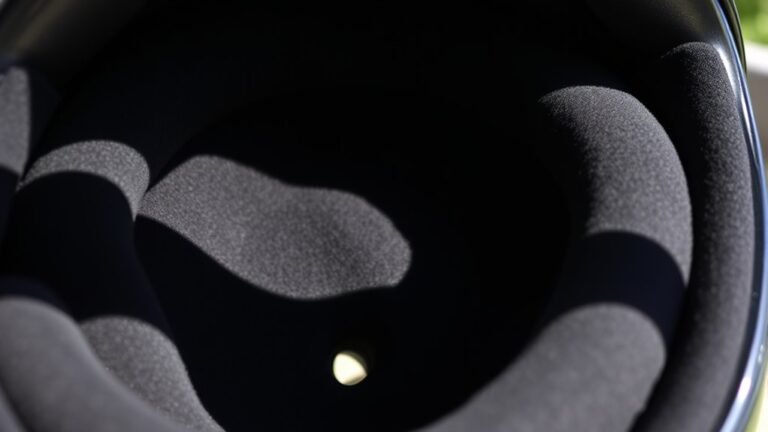
Inner padding is defined as the comfort liner that supports fit and can also contribute to impact energy management. Worn liner foam and degraded padding can reduce protection and change how the helmet sits on your head.
- Look for collapsed foam “hot spots,” especially where your forehead and crown contact.
- Check for tears, loose stitching, or fabric delamination.
- Pay attention to persistent odors, which may indicate trapped moisture and bacterial growth in removable liners.
Quick “before-ride” routine and simple maintenance log
Routine helmet checks are defined as brief, consistent checks you perform each time you ride. Keeping a maintenance log helps you track when wear appeared and whether your fixes solved the root problem.
- Before each ride: strap condition, buckle function, helmet fit stability.
- Monthly: liner thickness and shell surface inspection.
- After any crash: replace components or the entire helmet as recommended by the manufacturer.
If you want an objective approach, measure strap slack and confirm the helmet sits level on your head every time. A helmet that constantly shifts is not a “fit issue only”; it can be a retention or liner degradation issue.
Fixing Worn Helmet Padding: Compression, Odors, and Loose Inserts
Replacing worn helmet padding is one of the most effective repairs because degraded liner materials can compromise comfort, stability, and impact performance. If the padding crumbles, compresses permanently, or loses its shape, replacement is usually the correct fix.
The key difference is that “cleaning” a liner does not restore lost thickness or structural cushioning.
How to tell when padding needs replacement
Padding replacement is typically necessary when you see permanent deformation or material breakdown. In practice, signs include crumbling foam, reduced thickness, and fabric separation.
- Compression: padding no longer rebounds after you press it with your thumb.
- Tears or delamination: inner layers separate, exposing foam or backing material.
- Odor after proper washing: persistent smells may indicate deeper contamination or moisture retention in non-washable layers.
- Fit drift: helmet feels loose after tightening, or it slides on your forehead.
As a practical threshold, if padding has noticeably lost thickness over a short period (for example, within a riding season under heavy use), it is reasonable to start replacement sooner rather than later.
Choosing replacement padding that matches your helmet model
Compatible replacement padding is defined as padding parts designed for a specific helmet model and fit system. The key difference is that generic padding may not match venting, liner geometry, or retention behavior, which can change how the helmet performs.
- Use the exact helmet brand and model number printed inside the shell or on the original packaging.
- Prefer manufacturer-approved kits, such as those offered by leading brands like Bell, Schuberth, Shoei, Arai, AGV, and HJC when available.
- Confirm thickness and liner type (often there are different pads for different head shapes or sizes).
If your helmet supports multiple cheek pad sizes or different fit rings, install the full kit as designed rather than swapping individual layers randomly.
Replacing removable liners: best practices
When liners are removable, replacement is usually straightforward, but fit accuracy matters. Follow these steps to preserve alignment and contact points.
- Remove pads one at a time so you can replicate placement.
- Check for any retained clips or Velcro loops before installing new padding.
- Ensure the visor mechanism clearance remains correct and the padding does not interfere with shell vents.
After installation, perform a fit test: the helmet should feel snug without painful pressure points, and it should not rotate excessively when you attempt to move it by hand in a controlled manner.
Repairing Strap and Buckle Issues: When Adjustments Aren’t Enough
Strap and buckle problems are defined as issues that reduce retention, comfort stability, or secure closure. When straps are frayed or buckles fail to lock correctly, replacing the affected components is the safest action.
Fixes you can safely perform: cleaning and adjustment
Minor strap issues can sometimes be improved by cleaning and correct adjustment, but this depends on the cause. The key difference is that cleaning removes residue, while replacement restores damaged materials.
- Clean webbing with a gentle method appropriate for your helmet materials.
- Confirm the chin strap routes correctly through guides and does not twist.
- Adjust to a snug fit so the helmet does not move significantly during normal head motion.
Never apply oils or lubricants to strap mechanisms. Residues can degrade certain webbing materials over time and reduce friction where it matters.
When to replace the straps or buckle assembly
Replace straps or the full retention system if you see structural damage or functional failure. Helmet retention systems are safety-critical, and repair by improvisation can introduce unknown risks.
- Replace if webbing is cut, frayed, or stretched.
- Replace if stitching near anchor points has pulled or separated.
- Replace if the buckle does not lock securely or shows cracks.
Many manufacturers treat retention systems as non-serviceable unless you use approved replacement parts. For that reason, consult the helmet’s manual or contact the brand’s support line for correct part numbers.
Cleaning and Restoring Helmet Surfaces: Scuffs, Smudges, and Visor Clarity
Regular cleaning is defined as removing dirt, sweat, and road grime without damaging helmet finishes, coatings, or lens treatments. The key difference is that the wrong cleaner can haze the visor, weaken coatings, or degrade plastics.
Cleaning the shell: what works and what to avoid
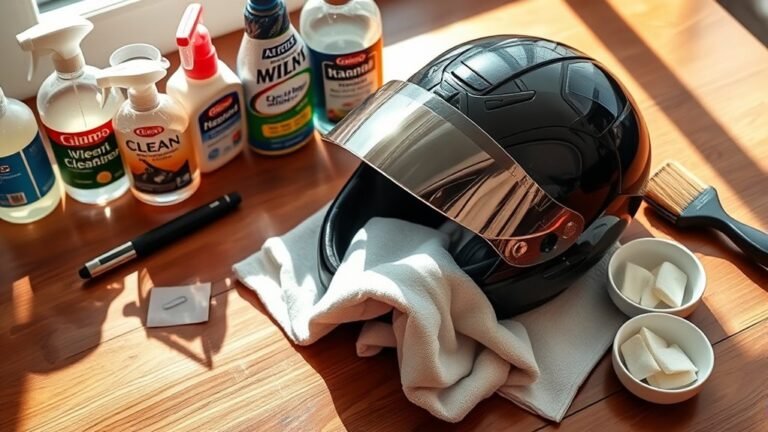
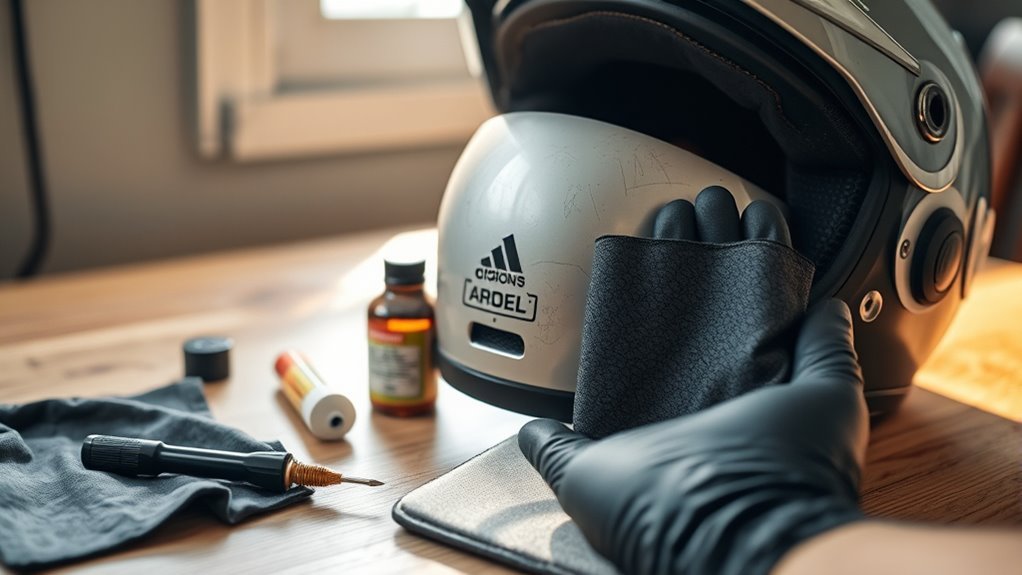
To clean a motorcycle or cycling helmet shell, use mild soap and water and avoid harsh solvents unless the manufacturer explicitly approves them. For scuffs, gently clean the area first; abrasive polishing can remove protective coatings.
- Use a soft microfiber cloth for most shell finishes.
- Avoid acetone, aggressive degreasers, and strong solvents unless specified.
- Never sand or “buff away” deep scratches.
Cleaning the padding and removable liners
For removable padding, follow the washing guidance in your helmet manual. Many liners can be hand-washed or gently machine-washed on delicate settings, but high heat can permanently deform foam.
- Air-dry only when foam is involved.
- Use mild detergent and avoid bleach.
- Ensure liners are fully dry before reinstallation to prevent odor and mildew.
Visor care: restoring clarity without risking coatings
A visor is defined as the protective lens that improves visibility and helps block debris. Visor coatings are engineered, and harsh cleaners can permanently reduce optical quality.
- Use lens-safe cleaners or visor-specific products when available.
- Rinse first to remove grit, which prevents micro-scratches.
- Dry with a microfiber cloth designed for optics.
If the visor is cracked, deeply scratched, or its anti-fog/anti-scratch coating is severely damaged, replacement is usually the best fix for both safety and comfort.
Visor and Face Shield Damage: Signs You Should Replace
Replacing a damaged visor is often necessary when it affects visibility, sealing, or impact resistance. A clear field of view is a safety feature, not just convenience.
Replace the visor if damage affects optics or sealing
Visor damage is typically considered unsafe when it introduces distortion or compromises the lens integrity. The key difference is that small surface marks may be cosmetic, but cracks and deep scratches can impair vision.
- Replace if you see cracks, chips, or spiderwebbing.
- Replace if scratches cause glare or light scattering at night or in rain.
- Replace if the visor does not lock or seal properly.
Choosing the right replacement for your helmet brand and model
The best replacement visor is defined as one matched to your helmet model’s mounting system and shield profile. Using incompatible parts can change sealing behavior and may not align with the visor latch.
- Search by helmet model, not by visor size alone.
- Confirm whether your helmet uses a clear, pinlock-ready, or tinted system.
- If your helmet supports anti-fog inserts, check compatibility before purchase.
When to Replace the Entire Helmet: Structural Damage and Post-Crash Rules
Replacing the helmet is the safest fix when structural integrity is compromised. After a significant crash, even “no visible damage” can still mean the internal energy-absorbing materials are affected.
Crashes and impact events: why “looks fine” isn’t enough
Helmet liners and energy management systems are designed to deform under impact. The key difference is that internal damage may not be obvious externally.
- If the helmet has been in a crash at riding speeds, assume the liner has taken a hit.
- If you notice cracking or separation in the shell, replacement is generally required.
- If the helmet bottom edge or mounting points show damage, replace rather than attempt patch repairs.
For widely accepted guidance, refer to manufacturer policies and recognized testing bodies. In many cases, organizations advise replacing helmets after certain impact conditions. Always prioritize the manufacturer’s replacement recommendations for your exact helmet model.
Age and wear life: practical timelines to consider
Helmet service life is influenced by materials, storage conditions, and exposure to heat and sunlight. Many manufacturers provide guidance that often ranges from several years to around five years for normal use, but you should follow the specific brand’s written instructions.
Heat accelerates polymer and foam aging. If your helmet frequently sits in hot car trunks or direct sun for long periods, plan for earlier inspection cycles and earlier replacement decisions.
Common Helmet Wear Problems: Fast Solutions for Real-World Scenarios
Most helmet wear problems fall into a small set of categories: loose fit, degraded padding, strap malfunction, visor haze, and shell scuffs. Fixing them correctly depends on whether the issue is cosmetic or safety-related.
Most Common Helmet Wear Issues and How Often the Fix Works (Field-Use Summary)
| # | Wear issue | Most common cause | Best first action | Fix effectiveness |
|---|---|---|---|---|
| 1 | Compressed forehead/crown padding | Foam breakdown reduces thickness | Replace comfort liner kit | 95% ★★★★★ |
| 2 | Persistent odor after washing | Moisture trapped in liner layers | Fully air-dry; replace non-washable liners | 88% ★★★★☆ |
| 3 | Helmet feels loose after tightening | Padding loss or strap routing drift | Inspect liner thickness; re-route straps | 82% ★★★★☆ |
| 4 | Chin strap fraying or stretch | Wear from tension and abrasion | Replace strap or retention assembly | 90% ★★★★★ |
| 5 | Buckle won’t lock securely | Latch damage or deformation | Replace buckle assembly (OEM part) | 93% ★★★★★ |
| 6 | Visor haze or persistent fogginess | Coating wear or micro-scratching | Use visor-safe cleaner; replace if coated damage visible | 78% ★★★★☆ |
| 7 | Shell scuffs and surface scratches | Cosmetic abrasion; coating may be affected | Clean gently; don’t sand/buff deep scratches | 70% ★★★☆☆ |
“My helmet feels loose after tightening.” What should I do?
A loose-feeling helmet is often caused by compressed liner padding or an incorrectly routed strap system. The key difference is that tightening cannot fix permanently compressed or missing padding.
- Check liner thickness and attachment points.
- Inspect strap webbing and retention mechanism function.
- Replace worn pads with the correct model-specific kit if compression is evident.
“My padding smells even after washing.” What’s the best fix?
Persistent odor after proper cleaning is defined as evidence that moisture and contamination have penetrated liner materials. If air-drying and gentle cleaning do not resolve it, replacement is usually the safest and most hygienic solution.
- Verify the liner is fully dry before reinstalling.
- Confirm you used a mild detergent and did not trap moisture with sealed storage.
- Replace non-removable components if odor persists from interior layers you cannot clean thoroughly.
“My visor is foggy and cloudy.” Should I polish it?
Polishing can damage anti-fog or anti-scratch coatings, so it is usually not recommended. The key difference is that coating damage cannot be “polished back” reliably without risking optical distortion.
- Clean with a visor-safe cleaner first.
- If scratching or coating failure is visible, replace the visor or face shield.
- Check the helmet ventilation system and ensure vents are unobstructed.
Expert Checklist: Fix or Replace? Decide in Minutes
This decision checklist is defined as a quick, safety-first way to choose between cleaning, adjustment, and replacement. Use it after any wear event or after a period of heavy use.
- Clean only: surface scuffs, smudges, removable liner sweat buildup.
- Adjust: strap routing, buckle engagement, minor fit drift without liner breakdown.
- Replace padding: crumbling foam, permanent compression, tears, persistent odor from liners.
- Replace visor: cracks, chips, severe glare from scratches, poor locking/sealing.
- Replace helmet: shell cracks, separation, serious crash involvement, or unclear internal damage.
FAQ: Helmet Wear and Tear Repairs
How often should I inspect my helmet for wear?
You should inspect your helmet before each ride and do a deeper inspection at least monthly. If you ride frequently, store the helmet in hot conditions, or ride in wet environments, increase inspection frequency.
Can I use generic replacement pads for my helmet?
Generic pads are not recommended unless they are confirmed to be fully compatible by the manufacturer or an official fit guide. The key difference is that incorrect thickness or geometry can change fit and helmet performance.
What cleaning products are safest for helmet visors and shells?
Use mild soap and water for most helmet exteriors and visor-safe cleaners for lenses. Avoid harsh solvents, abrasives, and unapproved chemical cleaners that can damage coatings or plastics.
Does replacing padding restore helmet safety?
Replacing worn padding can restore proper comfort and fit, which supports correct positioning during impact. However, it does not fix structural shell damage or internal liner damage; those cases typically require full helmet replacement.
Conclusion: Maintain Helmet Safety by Fixing Wear Early
Fixing common helmet wear and tear is achievable when you treat inspection, padding replacement, strap integrity, and visor clarity as safety priorities. If you see structural damage, severe liner compression, or post-crash impact concerns, the most trusted solution is replacement using the correct manufacturer parts or a new helmet.
For the most reliable results, follow your helmet’s manual, use model-specific replacement kits, and prioritize products and procedures that preserve coatings, fit geometry, and retention system function. This approach aligns with expert consensus across helmet safety practices and helps keep your helmet ready for the next ride.
Frequently Asked Questions
How can I fix a loose helmet strap or broken buckle?
Start by identifying the exact issue—worn strap material, loose stitching, a failing buckle latch, or damaged padding under the strap. If the strap is simply loose, you can usually adjust it using the tension adjusters and confirm the fit is snug: the helmet should not rock side-to-side or lift when you shake it. If the buckle is broken or the latch no longer holds securely, replacement is the safest option. Many helmets use specific OEM (original equipment manufacturer) strap and buckle assemblies, so use the manufacturer’s replacement parts. For minor stitching separation (for example, where the strap loops through a keeper), tighten and re-stitch only if the manufacturer allows it—otherwise, strap repairs can compromise retention. Avoid gluing or taping the strap/buckle area, because adhesive and field repairs can fail under impact or heat.
What should I do if the helmet padding feels worn out or stops fitting securely?
Worn padding is common and can reduce stability, even if the helmet shell looks fine. The best fix is to replace the comfort liner/padding with the manufacturer’s approved replacement set. Start by removing the old liner (follow your helmet’s instructions) and inspect the interior contact surfaces for debris, loose fasteners, or degraded foam. Clean the inside gently according to the cleaning guidance for your helmet type (most use mild soap and water; avoid harsh solvents). When you reinstall new padding, confirm the helmet sits evenly, stays level, and still provides the correct fit: cheek and brow areas should feel snug without painful pressure points. If the padding replacement doesn’t fix the fit—such as gaps around the forehead or excessive movement—your helmet may be too old or the retention system may be worn, and replacement of the helmet may be necessary.
Can I repair a cracked or dented helmet shell?
In most cases, you should not repair a cracked, deeply dented, or structurally compromised helmet shell. A helmet’s protective shell is engineered to absorb impact energy, and damage can permanently weaken it—even if it looks minor. If you notice any cracks, significant dents, delamination (shell layers separating), exposed inner foam, or a loose shell that feels unstable, stop using the helmet immediately and replace it. Do not use epoxy, fiberglass, plastic welding, or glue to “patch” the shell; these repairs may not restore structural integrity or impact performance. If the helmet was involved in a fall or crash, follow the manufacturer’s guidance—many recommend replacement after any moderate or high-impact event.
How do I address helmet scuffs, fading, or surface scratches without damaging safety?
Cosmetic scuffs and light scratches are usually safe to address as long as you do not compromise the shell, venting, or any structural coatings. First, clean the helmet gently with warm water and mild soap to remove dirt and sweat. For scuffs, use a soft microfiber cloth and, if the manufacturer permits, a non-abrasive automotive plastic polish designed for the helmet’s surface. Avoid sanding, aggressive rubbing, or abrasive compounds, because they can remove protective coatings and change how the shell handles impact and UV exposure. Do not apply aftermarket vinyl wraps or heavy coatings unless the manufacturer approves them—heat and chemicals can affect materials. If paint is flaking or the surface is peeling, that can signal deeper material degradation; in that case, replacement is the safer route.
What’s the safest way to clean and recondition a sweaty helmet liner or straps?
To clean a sweaty helmet, remove removable liners and pads whenever possible. Most pads can be hand-washed using mild detergent and cool water; allow them to air-dry completely—never use a high-heat dryer or direct heater, since heat can warp materials and degrade foam. For non-removable parts, wipe with a damp cloth and mild soap, then follow with a clean water wipe to remove residue. For odor, a gentle upholstery-safe deodorizing approach works best: wash thoroughly and let the liner dry fully; if allowed by the manufacturer, use a mild, non-bleach disinfectant or sports-gear cleaner, applied lightly and rinsed per instructions. For straps, spot-clean with mild soap and water and keep buckles dry. Avoid soaking the entire helmet unless the manufacturer explicitly says it’s okay, and never use strong solvents (like gasoline, acetone, or aggressive degreasers) that can damage plastics, foam, and adhesives. After cleaning, confirm the helmet still fits properly and the retention system functions as expected.
References
- Google Scholar Search: Helmet Inspection and Replacement After a Crash Google Scholar
https://scholar.google.com/scholar?q=helmet+inspection+replace+after+crash - Google Scholar Search: Bicycle Helmet Maintenance, Fit, Straps, and Padding Wear Google Scholar
https://scholar.google.com/scholar?q=bicycle+helmet+maintenance+fit+straps+padding+wear - Bicycle Helmet: Fit, Safety, and Replacement Guidance
https://en.wikipedia.org/wiki/Bicycle_helmet - Motorcycle Helmet: Types, Fit, and Safety Considerations
https://en.wikipedia.org/wiki/Motorcycle_helmet - Helmet (Protective Headgear): General Guidance on Wear and Use
https://en.wikipedia.org/wiki/Helmet_(protective_headgear - American Football Helmet: Common Wear Points and Proper Use
https://en.wikipedia.org/wiki/American_football_helmet - Ski Helmet: How Helmet Construction Relates to Safety and Wear
https://en.wikipedia.org/wiki/Ski_helmet - Protective Gear: Principles Behind Maintenance and Safety Equipment Care
https://en.wikipedia.org/wiki/Protective_gear
📅 Last Updated: July 07, 2026 | Topic: How to Fix Common Helmet Wear and Tear Issues | Content verified for accuracy and freshness.