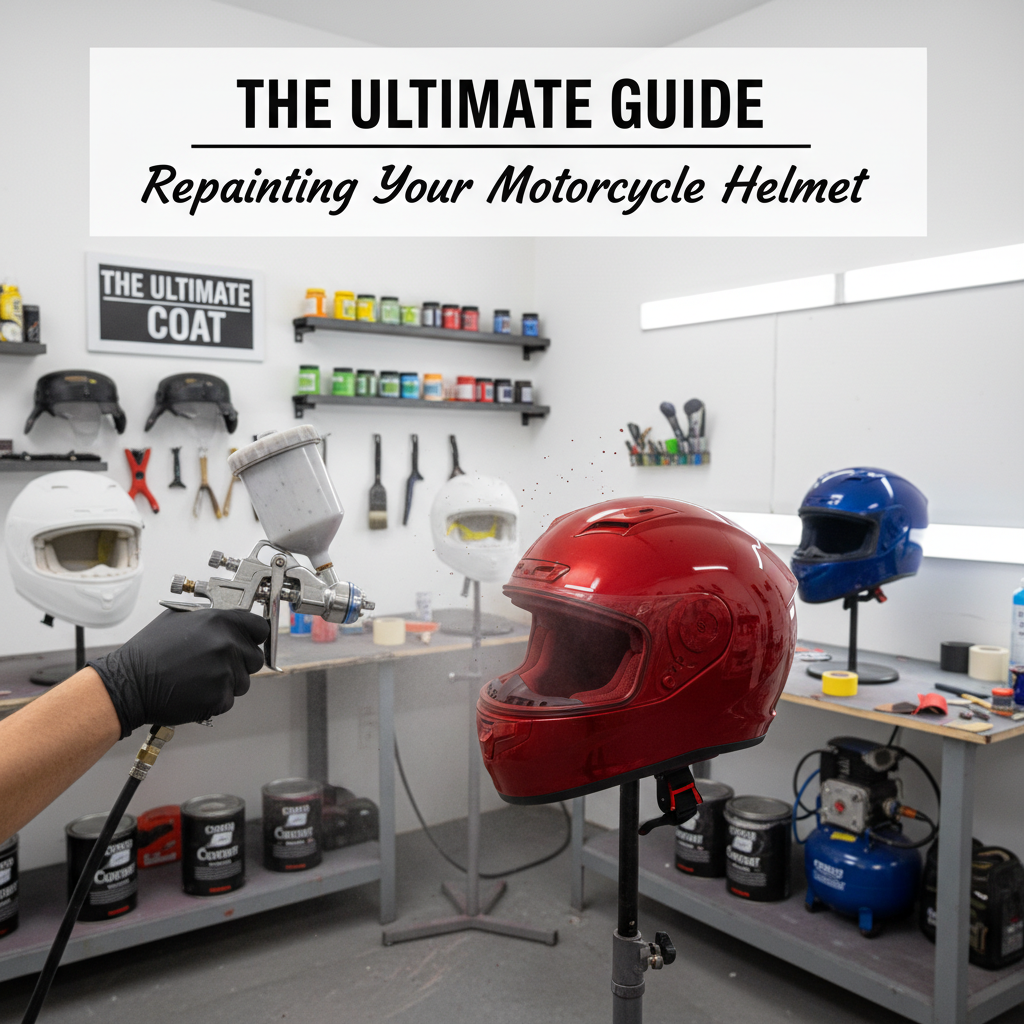
The Ultimate Guide to Repainting Your Motorcycle Helmet
Can You Repaint a Motorcycle Helmet Safely?
Yes, you can repaint a motorcycle helmet, but safety depends on how you do it and which products you use. The key is to preserve the helmet’s protective properties by using compatible coatings and avoiding any process that changes the liner, shell structure, or impact performance.
Motorcycle helmets are engineered systems: the outer shell, inner energy-absorbing liner (often EPS foam), and protective retention hardware work together. Any repainting plan should treat the helmet as a life-critical safety device, not a decorative item. If you are unsure, the safest approach is to replace the helmet or ask the helmet manufacturer (for example, Shoei, Arai, Bell, Schuberth, or HJC) whether refinishing is permitted for your specific model.
Helmet Safety Standards You Must Know Before You Start
Helmets sold for street and track use are required to meet safety standards, and refinishing can affect compliance if it alters materials or coverage in the wrong way. The key difference is that cosmetic repainting must not interfere with impact absorption, ventilation, or any engineered surface features intended for crash protection.
In most jurisdictions, helmets are tested under recognized standards such as:
- ECE 22.06 (Europe, including visor and marking requirements in modern testing)
- ECE 22.05 (earlier generation)
- DOT FMVSS 218 (United States)
- SNELL (performance-based certification used by premium brands)
- FIM/standard references for racing (where applicable)
Industry consensus is simple: modifications that change the helmet’s structure, add unknown thickness, or degrade protective materials can reduce real-world effectiveness. The outer finish is not always “just paint,” especially on helmets designed with textured shells or integrated graphics. For that reason, always check your helmet’s manual and markings, and never sand into the shell or remove structural layers.
What Counts as a “Safe Enough” Refinish?
In practice, a safe refinishing approach typically means adding a compatible topcoat over existing graphics without penetrating the shell, liner, or any protective coatings. The key is using products designed for helmet or polymer/fiber adhesion and curing them according to manufacturer instructions.
As a reference point for materials compatibility, helmet paint and clear coats sold for helmets usually emphasize adhesion to ABS, fiberglass/composites, and polymer shells. If a product is not intended for helmet surfaces, it may contain solvents that can stress or dull plastics, soften coatings, or interfere with long-term adhesion.
Step 1: Decide Whether Repainting Is Worth It
Before buying supplies, assess the helmet’s condition and the risks of refinishing an aging shell. The key question is whether the helmet is still structurally sound and within its usable service life.
Many manufacturers recommend replacing helmets after a crash or after a certain period of use because foam degradation can occur even without visible damage. While exact timelines vary by brand and model, a common industry recommendation is to replace after roughly 3 to 5 years of service life (or sooner if exposed to frequent heat, UV, or chemical exposure). If your helmet is older, faded, or has micro-cracks, repainting may be more cosmetic than protective.
Quick Inspection Checklist
These checks help you avoid refinishing a helmet that already has compromised protection.
- Look for cracks, deep chips, or delamination in the shell finish
- Check the liner for crushed spots, separation, or dampness
- Verify retention system function (straps, buckles, adjustment mechanisms)
- Inspect vents and fasteners for looseness or damage
If you find structural damage, do not repaint. Replace the helmet.
Step 2: Choose the Correct Paint and Clear Coat
The paint and clear coat you select determine adhesion, durability, and chemical compatibility. The key is using helmet-compatible coatings and avoiding random automotive enamels or solvent-heavy paints.
When choosing a product, prioritize:
- Helmet-specific or polymer-compatible paint designed to bond to the helmet’s shell material
- Low-odor or reduced-solvent formulations when available, to minimize risk to plastics
- UV-resistant clear coat to reduce fading and cracking
- Proper cure schedule so the coating reaches full hardness
How to Identify Shell Compatibility
Helmet shells are often made from ABS, polycarbonate, fiberglass composite, or advanced blends. The key difference is that different shell materials require different coating chemistry for stable bonding.
To confirm compatibility, consult:
- Your helmet’s manual or tech sheet
- Manufacturer guidance for refinishing
- The paint manufacturer’s adhesion and substrate instructions
Essential Supplies (Typical Professional Setup)
Having the right tools reduces the chance of mistakes like runs, dust inclusions, or uneven curing.
- Mild degreaser or helmet-safe soap
- Microfiber cloths and lint-free wipes
- Fine-grit sandpaper (commonly 800 to 1500 grit) for scuffing, not reshaping
- Masking tape rated for clean removal
- Spray gun or aerosol helmet paint (aerosol is common for beginners)
- Clear coat that is compatible with the base paint
- Primer only if the system requires it and the manufacturer permits it
Note: If you use a multi-stage coating system, match primer, base, and clear coat from the same brand family when possible to avoid chemical incompatibility.
Typical Helmet Refinish Coating Systems: Cure & Durability (2026)
| # | Coating stage | Typical flash time | Full cure (typ.) | UV/road grime resistance | Typical outdoor fade span |
|---|---|---|---|---|---|
| 1 | Plastic adhesion promoter (primer base) | 10–20 min | 12–24 hrs | ★★★★★ | 4–6 yrs |
| 2 | 1K solvent primer (only if system allows) | 15–25 min | 18–48 hrs | ★★★☆☆ | 2–3 yrs |
| 3 | 2K primer/filler (high build systems) | 10–25 min | 24–48 hrs | ★★★★☆ | 3–5 yrs |
| 4 | Basecoat (urethane single-stage / color) | 12–20 min | 24–72 hrs | ★★★☆☆ | 1–2 yrs |
| 5 | 2K basecoat + dedicated clearcoat system | 10–20 min | 24–72 hrs | ★★★★★ | 4–6 yrs |
| 6 | 1K clear coat (budget/DIY clears) | 15–25 min | 48–96 hrs | ★★★☆☆ | 2–3 yrs |
| 7 | 2K UV clear coat (most protective) | 8–18 min | 24–72 hrs | ★★★★★ | 5–7 yrs |
Step 3: Prepare Your Helmet Like a Professional
Preparation is where most refinishing quality is won or lost. The key is removing contamination and lightly scuffing the surface so the new paint can grip without compromising the helmet shell.
Clean Thoroughly (No Exceptions)
Oil, sunscreen residue, and silicone contamination can prevent paint from bonding. Use a mild soap and water wash first, then remove residue completely.
- Wash with mild soap and clean water
- Rinse thoroughly to remove film
- Dry fully using lint-free cloths
- Inspect under strong light for remaining smudges
Do not use harsh solvents (like acetone or aggressive thinners) unless the manufacturer explicitly says they are safe for your helmet finish and your selected coatings.
Scuff Sanding Without Changing Shell Geometry
Scuff sanding improves mechanical adhesion, but sanding through coatings or into the shell is a risk. The key is to sand only enough to dull the gloss, typically using 800 to 1500 grit for scuffing.
Use controlled, light passes and stop when the surface looks uniformly matte. Wipe away dust immediately after sanding with a clean, dry microfiber cloth.
Masking and Protection for Critical Areas
Masking prevents paint from entering vents, labels, and engineered openings. The key is keeping coatings off areas where tolerances or ventilation paths matter.
- Mask the visor base and any moving components
- Cover DOT/ECE markings if required by your compliance region
- Protect vent intakes and exhausts
- Avoid paint buildup on edge lines that could create thick layers
If your helmet has removable parts, removing them carefully can help you get clean lines without over-spraying.
Step 4: Plan Your Design and Paint Coverage
A good repaint starts with a controlled design plan and realistic layering. The key is applying thin coats that build gradually instead of forcing coverage with a heavy pass.
Decide Your Finish Type
Your finish goal affects the paint system you should use. The key difference is that matte, satin, and gloss clear coats behave differently under UV and show surface imperfections differently.
- Gloss hides small sanding lines less, but highlights dust inclusions
- Satin balances gloss and hiding
- Matte is more sensitive to rubbing and “shiny spots” from friction
Use the Right Spray Distance and Technique
Spray technique controls uniformity and reduces defects like runs. The key is consistent distance and speed across the surface.
A commonly recommended aerosol distance range is 6 to 12 inches, using sweeping motions and overlapping passes. Apply paint in light coats and allow adequate flash time between layers as stated by the product label.
Step 5: Apply Paint in Thin, Even Layers
Apply paint in thin coats to avoid drips, texture defects, and poor curing. The key is layering: multiple light coats generally bond and cure more reliably than one thick coat.
Suggested Layering Approach
While exact times depend on temperature and product, professional finishing typically follows this workflow:
- First coat: light “tack” layer
- Second coat: uniform coverage without flooding
- Third coat (optional): build color depth and fix thin areas
- Dry/flash period: follow label instructions before clear coat
Do not rush between coats. Humidity and temperature changes can lead to bubbling, dulling, or soft film.
When to Stop and Let It Cure
Curing is more than “dry to the touch.” The key is full cure, which affects durability, chemical resistance, and gloss stability.
Many coatings require 24 to 72 hours for substantial cure, with longer times for full hardness depending on chemistry. Always follow the label’s cure schedule rather than guessing.
Step 6: Clear Coat for Protection and Longevity
Clear coat is what protects your base color from UV, road grime, and minor abrasion. The key is selecting a compatible clear system and applying it evenly over the fully cured base.
Clear Coat Application Tips
Clear coat is where most finishes either look “factory” or start to show problems. The key is even coverage and controlled wet edges.
- Apply clear coat after the base paint reaches the recommended stage
- Use smooth, overlapping passes
- Avoid heavy wetting that can cause runs
- Watch for dust and particles during spraying
Drying and Curing Conditions
Temperature and airflow directly affect how clear coat levels and cures. The key is controlled conditions, ideally moderate room temperature and low airborne dust.
Work in a ventilated area and avoid spraying in direct high-heat sun. Heat can cause premature skinning, while too-cool conditions can prolong cure and trap solvents.
Common Mistakes That Can Ruin the Finish (or Create Safety Concerns)
Many repaint failures come from shortcuts during sanding, cleaning, or coating compatibility. The key is avoiding actions that reduce adhesion or introduce chemical stress to the shell.
Paint Compatibility Issues
Using the wrong paint or mixing incompatible products can cause peeling or wrinkling. The key difference is that basecoat/clearcoat systems are often chemically matched for a reason.
- Peeling or “fish-eyes” can indicate contamination
- Soft or tacky clear coat can indicate incomplete cure
- Wrinkling can indicate solvent reactivity
Surface Prep Problems
Poor surface prep leads to chips and delamination. The key is uniform scuffing and complete dust removal.
- Skipping scuffing on glossy shells reduces mechanical grip
- Leaving sanding dust can create bumps
- Not cleaning oils can prevent bonding entirely
Applying Too Much Paint at Once
Thick coats trap solvents and may fail to cure properly. The key is thin layers with correct flash time between passes.
- Runs and drips create uneven gloss
- Orange peel reduces the “clean” look
- Overbuild can create thickness changes that you cannot accurately measure
Care After Repainting: How to Keep Your Helmet Looking New
Proper aftercare protects the new coating from premature wear. The key is using gentle cleaning products and avoiding harsh chemicals that can degrade clear coat.
Cleaning Guidelines
Use soft microfiber cloths and mild cleaners. The key is avoiding abrasive pads and strong solvents.
- Wash with mild soap and water
- Dry gently with a microfiber towel
- Avoid gasoline, acetone, paint thinner, and strong degreasers
What to Avoid While the Finish Is New
During the first days after clear coating, the film is still reaching full hardness. The key is letting it cure fully before heavy handling.
- Avoid waxing or aggressive polishing early
- Avoid frequent strap rubbing on painted areas
- Avoid high-pressure washing directly on edges
FAQ: Repainting a Motorcycle Helmet
Is it legal to repaint a DOT or ECE helmet?
Repainting itself is not automatically illegal, but covering or altering required labeling can be a compliance issue, and refinishing may affect how the helmet is certified. The key is to keep compliance markings readable and follow your helmet manufacturer’s guidance regarding refinishing. If you repaint the identification label or certification marks, you may create legal and safety problems.
Will repainting affect the helmet’s safety rating?
It can, depending on what you do. The key difference is that adding non-compatible coatings, sanding into structural areas, or applying thick layers may influence the helmet’s performance. For authoritative safety decisions, consult the helmet manufacturer or a qualified helmet repair/refinishing professional.
Can I paint over the graphics that are already on the helmet?
Often you can paint over existing graphics if the surface is properly cleaned and scuffed, but it depends on coating condition and compatibility. The key is ensuring the current finish is intact and lightly scuffed for adhesion rather than attempting to trap loose or peeling paint under a new topcoat.
What grit should I use to prep the surface?
For scuffing a glossy helmet shell, fine grits such as 800 to 1500 are commonly used to create adhesion without removing material aggressively. The key is to scuff until uniformly matte, then remove dust completely.
How long should I wait before riding?
At minimum, wait for the finish to be fully cured to the coating schedule stated on your paint and clear coat labels. The key is that “dry to touch” is not the same as “fully cured,” and riding too soon can expose the fresh coating to abrasion and chemicals from cleaning products, insects, and road grime.
When You Should Use a Professional Instead
If you want a high-quality finish with minimized risk, professional refinishing can be worth it. The key is that skilled painters understand coating compatibility, controlled environments, and correct application thickness.
Choose a professional if:
- Your helmet is expensive, rare, or has advanced graphics
- You need custom color matching and multi-stage artwork
- You are unsure about shell material compatibility
- The helmet has complex contours or integrated vents that are hard to mask
For the ultimate safety outcome, remember that a helmet is designed to protect during impact. Cosmetic changes should never compromise that function.
Conclusion: Repaint Smart, Ride Safer
Repainting your motorcycle helmet can refresh its look and express your personal style when you use compatible materials, safe prep methods, and a controlled clear-coat system. The key is to treat the helmet as safety equipment first: protect the shell and liner, avoid aggressive sanding, and follow manufacturer and coating label instructions.
If you want, tell me your helmet brand/model, shell color/finish (gloss or matte), and the type of paint system you plan to use (aerosol vs spray gun). I can recommend a safer, more specific workflow and a checklist for materials compatibility.
Frequently Asked Questions
Can I repaint my motorcycle helmet, and will it be safe to ride?
Key safety considerations:
- Avoid sanding the interior or the impact-absorbing liner under any circumstances.
- Don’t remove structural fiberglass/ABS layers or “cut through” to areas that weren’t meant to be altered.
- Keep paint thickness reasonable; heavy coats can change performance.
- If the helmet has visible damage (cracks, delamination, deep scratches), replace it rather than repaint.
- Ensure you don’t clog ventilation ports, adjusters, or drainage paths.
- After repainting, allow full cure time before riding, and check for adhesion, cracking, or soft spots.
What’s the best paint and clear coat to use on a motorcycle helmet?
Common recommendations:
- Primer: Use an adhesion-promoting primer appropriate for plastic (or fiberglass as required). Many failures come from using the wrong primer.
- Base/Color coat: Two-part automotive urethane or compatible motorcycle/fender paint systems usually provide excellent durability.
- Clear coat: Choose a high-quality 2K (two-component) clear for maximum gloss, chemical resistance, and UV protection. Single-stage or low-cost clear coats may fade, chip, or go cloudy sooner.
- Compatibility with the primer and base coat you select.
- UV stability and resistance to gasoline/cleaners/sweat oils.
- A finish that matches your desired look (matte, satin, or gloss). Matte clears require different products than gloss clears.
How do I prep my helmet before repainting without damaging it?
Preparation steps (safe approach):
- Remove parts: Take off visor, stickers, rubber trim, and any components you can remove without disassembly that affects the liner or fitment.
- Clean thoroughly: Wash with a degreaser/soap made for surface prep. Then use an appropriate solvent wipe (often isopropyl alcohol) to remove oils.
- Remove old coatings/stickers: Remove decals fully. For paint, determine whether you need full stripping or only scuffing. If the existing finish is sound, you may be able to scuff-sand; if it’s peeling, you’ll need more thorough removal.
- Light scuffing only: Use fine-grit sandpaper (commonly 400–800 grit range, depending on the coating system) to scuff and promote adhesion. You should not “grind” the shell down.
- Mask carefully: Protect vents, openings, and the interior. Avoid overspray into the helmet’s airflow channels.
- Tack cloth and final wipe: Before priming, remove dust with a tack cloth and/or final solvent wipe.
- Aggressive sanding that changes shell thickness or creates uneven surfaces.
- Using filler/putty excessively (thick layers can cause adhesion and durability issues).
- Priming over dust, oils, or silicone-based products.
Do I need to sand the entire helmet, and what grit should I use?
General guidance:
- If the current paint/clear is in good condition and well-adhered: You typically scuff-sand to create “tooth” for the new primer. Fine sandpaper is used lightly to avoid removing material aggressively.
- If the current finish is peeling, flaking, or heavily damaged: You’ll likely need to strip or sand back further until you reach stable, well-adhered layers.
- 400–600 grit: Often used for heavier scuffing or leveling minor imperfections (lightly).
- 600–800 grit: Common for refining the surface before primer or between coats for smoother results.
- 800–1000 grit (sometimes): Used for final prep before clear coat on some systems.
- Follow the specific sanding/finishing instructions for your primer and paint system.
- After sanding, the helmet should feel uniformly scuffed, not gouged or uneven.
How long should I wait before riding after repainting, and how do I cure the finish properly?
What to do:
- Follow the product label: Cure windows vary significantly by primer, base coat, and especially 2K clear products.
- Typical expectations:
- Dry to the touch: Often within hours.
- Handling/delicate contact: Commonly within a day, depending on temperature and humidity.
- Full cure: Frequently several days (and sometimes longer) for maximum hardness and chemical resistance.
- Reinstall any parts only after the finish has reached a safe reassembly and handling stage.
- Avoid rain, direct sun heat cycles, and heavy contact until full cure is reached.
- Ensure the helmet is clean and free from tackiness.
- Temperature: Work in a stable, recommended range for your paint system.
- Humidity: High humidity can cause issues like blushing or poor cure.
- Ventilation: Always spray in a well-ventilated area with proper PPE.
References
- PubMed results: motorcycle helmet modification studies Google Scholar
https://pubmed.ncbi.nlm.nih.gov/?term=motorcycle+helmet+modification - Google Scholar: motorcycle helmet paint/coating and impact performance Google Scholar
https://scholar.google.com/scholar?q=motorcycle+helmet+paint+coating+impact+performance - Google Scholar: helmet surface treatment and paint adhesion studies Google Scholar
https://scholar.google.com/scholar?q=helmet+surface+treatment+paint+adhesion+study - Motorcycle Helmet Safety (NHTSA)
https://www.nhtsa.gov/motorcycle-helmet-safety - Motorcycles: Helmet and Rider Safety (CDC)
https://www.cdc.gov/motorvehiclesafety/motorcycles/index.html - Motorcycle helmet (Wikipedia)
https://en.wikipedia.org/wiki/Motorcycle_helmet - Polycarbonate (Wikipedia)
https://en.wikipedia.org/wiki/Polycarbonate - Impact-absorbing structures (Encyclopaedia Britannica)
https://www.britannica.com/technology/impact-absorbing-structure
📅 Last Updated: July 06, 2026 | Topic: The Ultimate Guide to Repainting Your Motorcycle Helmet | Content verified for accuracy and freshness.